Kærnemælkshorn (Buttermilk Horns) Recipe
Ingredients
Equipment
Directions
FAQs
Find answers to your most pressing questions about this delicious recipe right here.
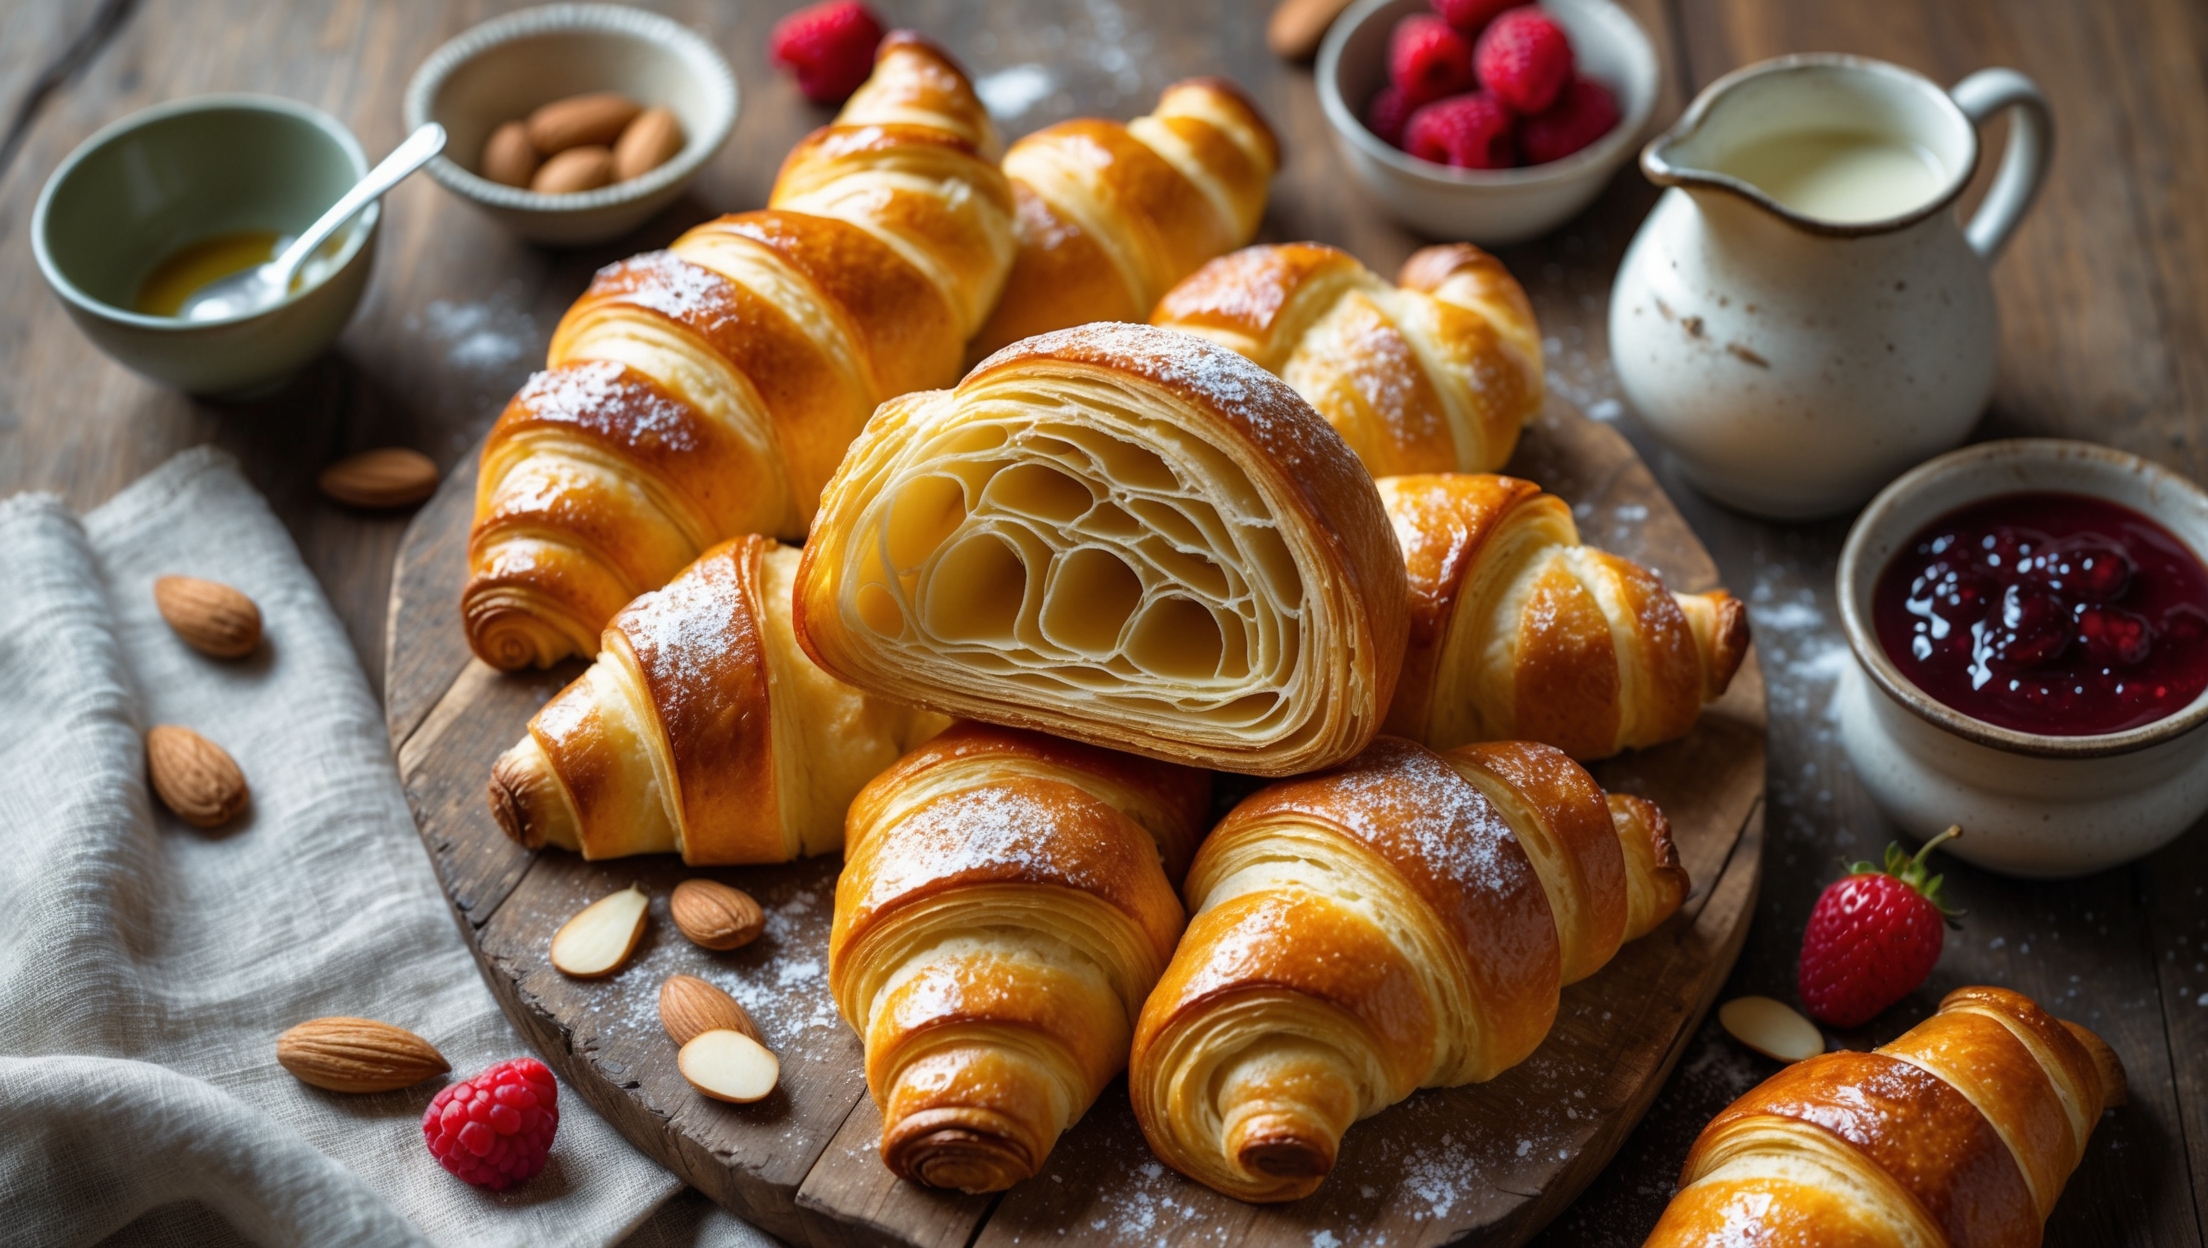
Traditional Kærnemælkshorn require all-purpose flour, cold unsalted butter, buttermilk, sugar, dry yeast, and salt. The pastries are brushed with egg wash before baking and can be topped with sliced almonds for extra texture and flavour.
Learn how to cook Kærnemælkshorn (Buttermilk Horns) by creating a laminated dough through multiple folding techniques that create flaky layers. The process involves integrating cold butter chunks into flour, folding the dough several times with chilling between folds, cutting into triangles, shaping into crescents, and baking at 200°C until deeply golden brown.
Lamination creates the signature flaky texture in Danish pastries by forming alternating layers of dough and butter. When baked, the butter melts and creates steam, forcing the dough layers to separate and creating that distinctive honeycomb interior structure with a crisp, golden exterior.
Yes, these laminated pastries freeze beautifully. You can freeze them either before or after baking. For unbaked pastries, freeze shaped horns on a tray, then transfer to freezer bags. For baked ones, cool completely before freezing and refresh in a warm oven before serving.
Buttermilk is crucial as it provides the distinct tangy flavour that defines authentic Kærnemælkshorn. Additionally, the acidity in buttermilk tenderises the dough by breaking down gluten proteins, resulting in a more delicate crumb while maintaining the flaky structure.
Danish Pastry
Try following recommended recipes


