Custard Danish Recipe
Ingredients
Equipment
Directions
FAQs
Find answers to your most pressing questions about this delicious recipe right here.
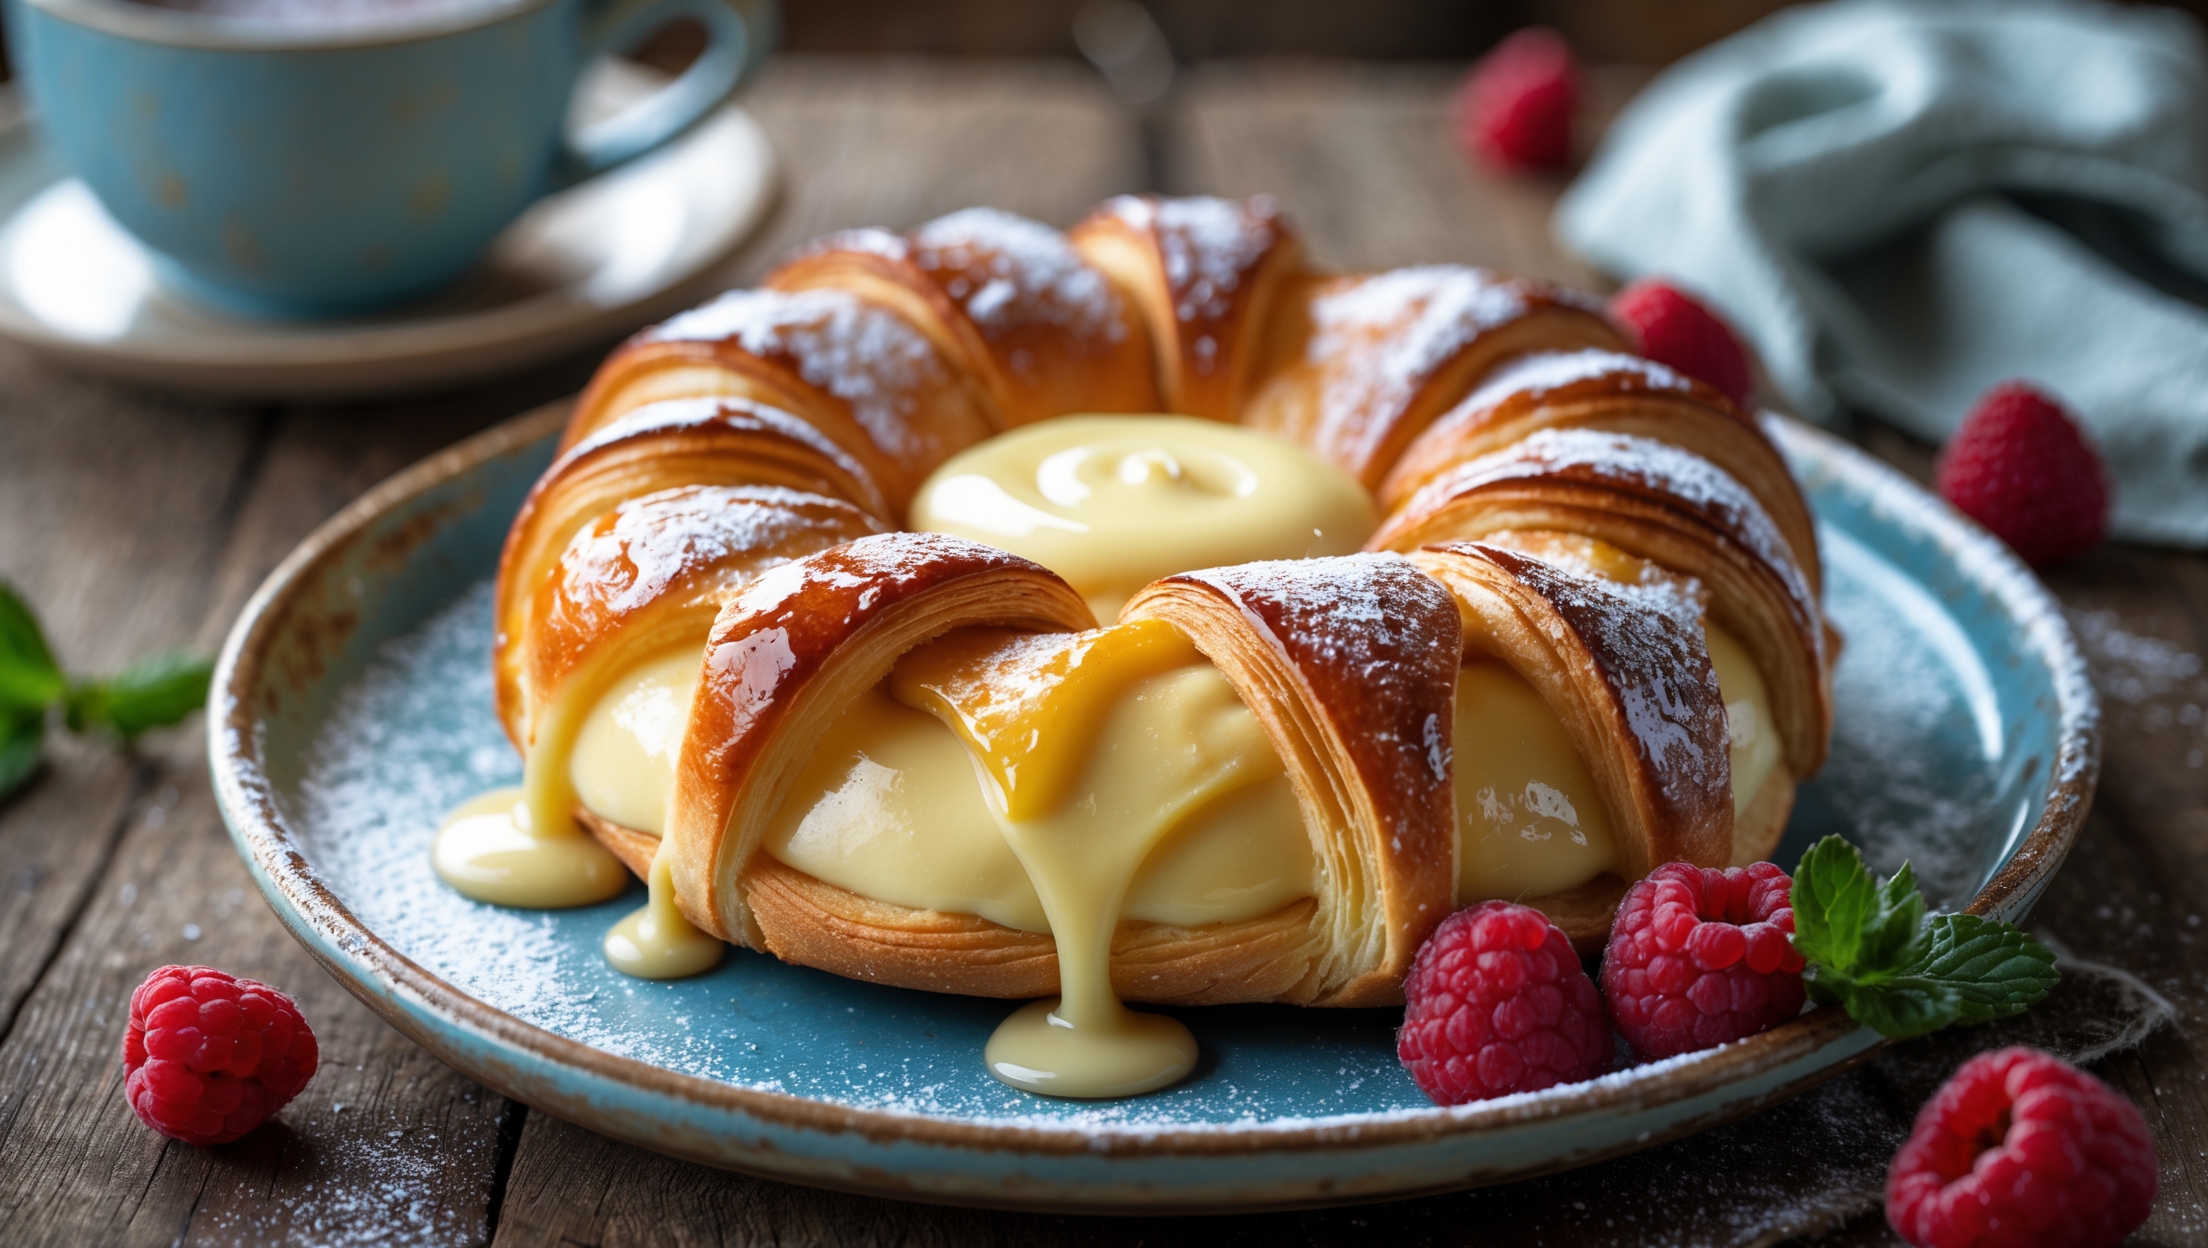
The key ingredients include bread flour, yeast, eggs, milk, sugar, butter for laminating, vanilla, whole milk, egg yolks, cornflour, and icing sugar for the glaze. These combine to create the characteristic flaky layers and rich custard filling.
Learn how to cook Custard Danish Recipe by first preparing a rich vanilla custard, then creating laminated dough through a series of folds to develop flaky layers. Shape the pastries, fill with custard, allow to rise, then bake at 200°C until golden. The process takes about 4 hours total but yields professional-quality Danish pastries.
The key is proper lamination—folding cold butter between layers of dough and performing multiple turns with adequate chilling between each. Maintaining the dough at the right temperature prevents butter from melting into the dough, which ensures distinct layers form during baking.
Ensure your custard reaches a full boil when cooking to activate the cornflour properly. Chill thoroughly before using, and don't overfill pastries. Bake until the pastry is golden and the custard is just set with a slight wobble—overcooking will cause weeping.
Yes! The laminated dough can be frozen after the final turn for up to 1 month. Alternatively, shape and fill the pastries, freeze unbaked, then bake from frozen adding 5-7 minutes to the baking time. Baked Danish can be frozen for up to 3 weeks—reheat at 160°C for best results.
Danish Pastry
Try following recommended recipes


