Cream Cheese Danish Recipe
Ingredients
Equipment
Directions
FAQs
Find answers to your most pressing questions about this delicious recipe right here.
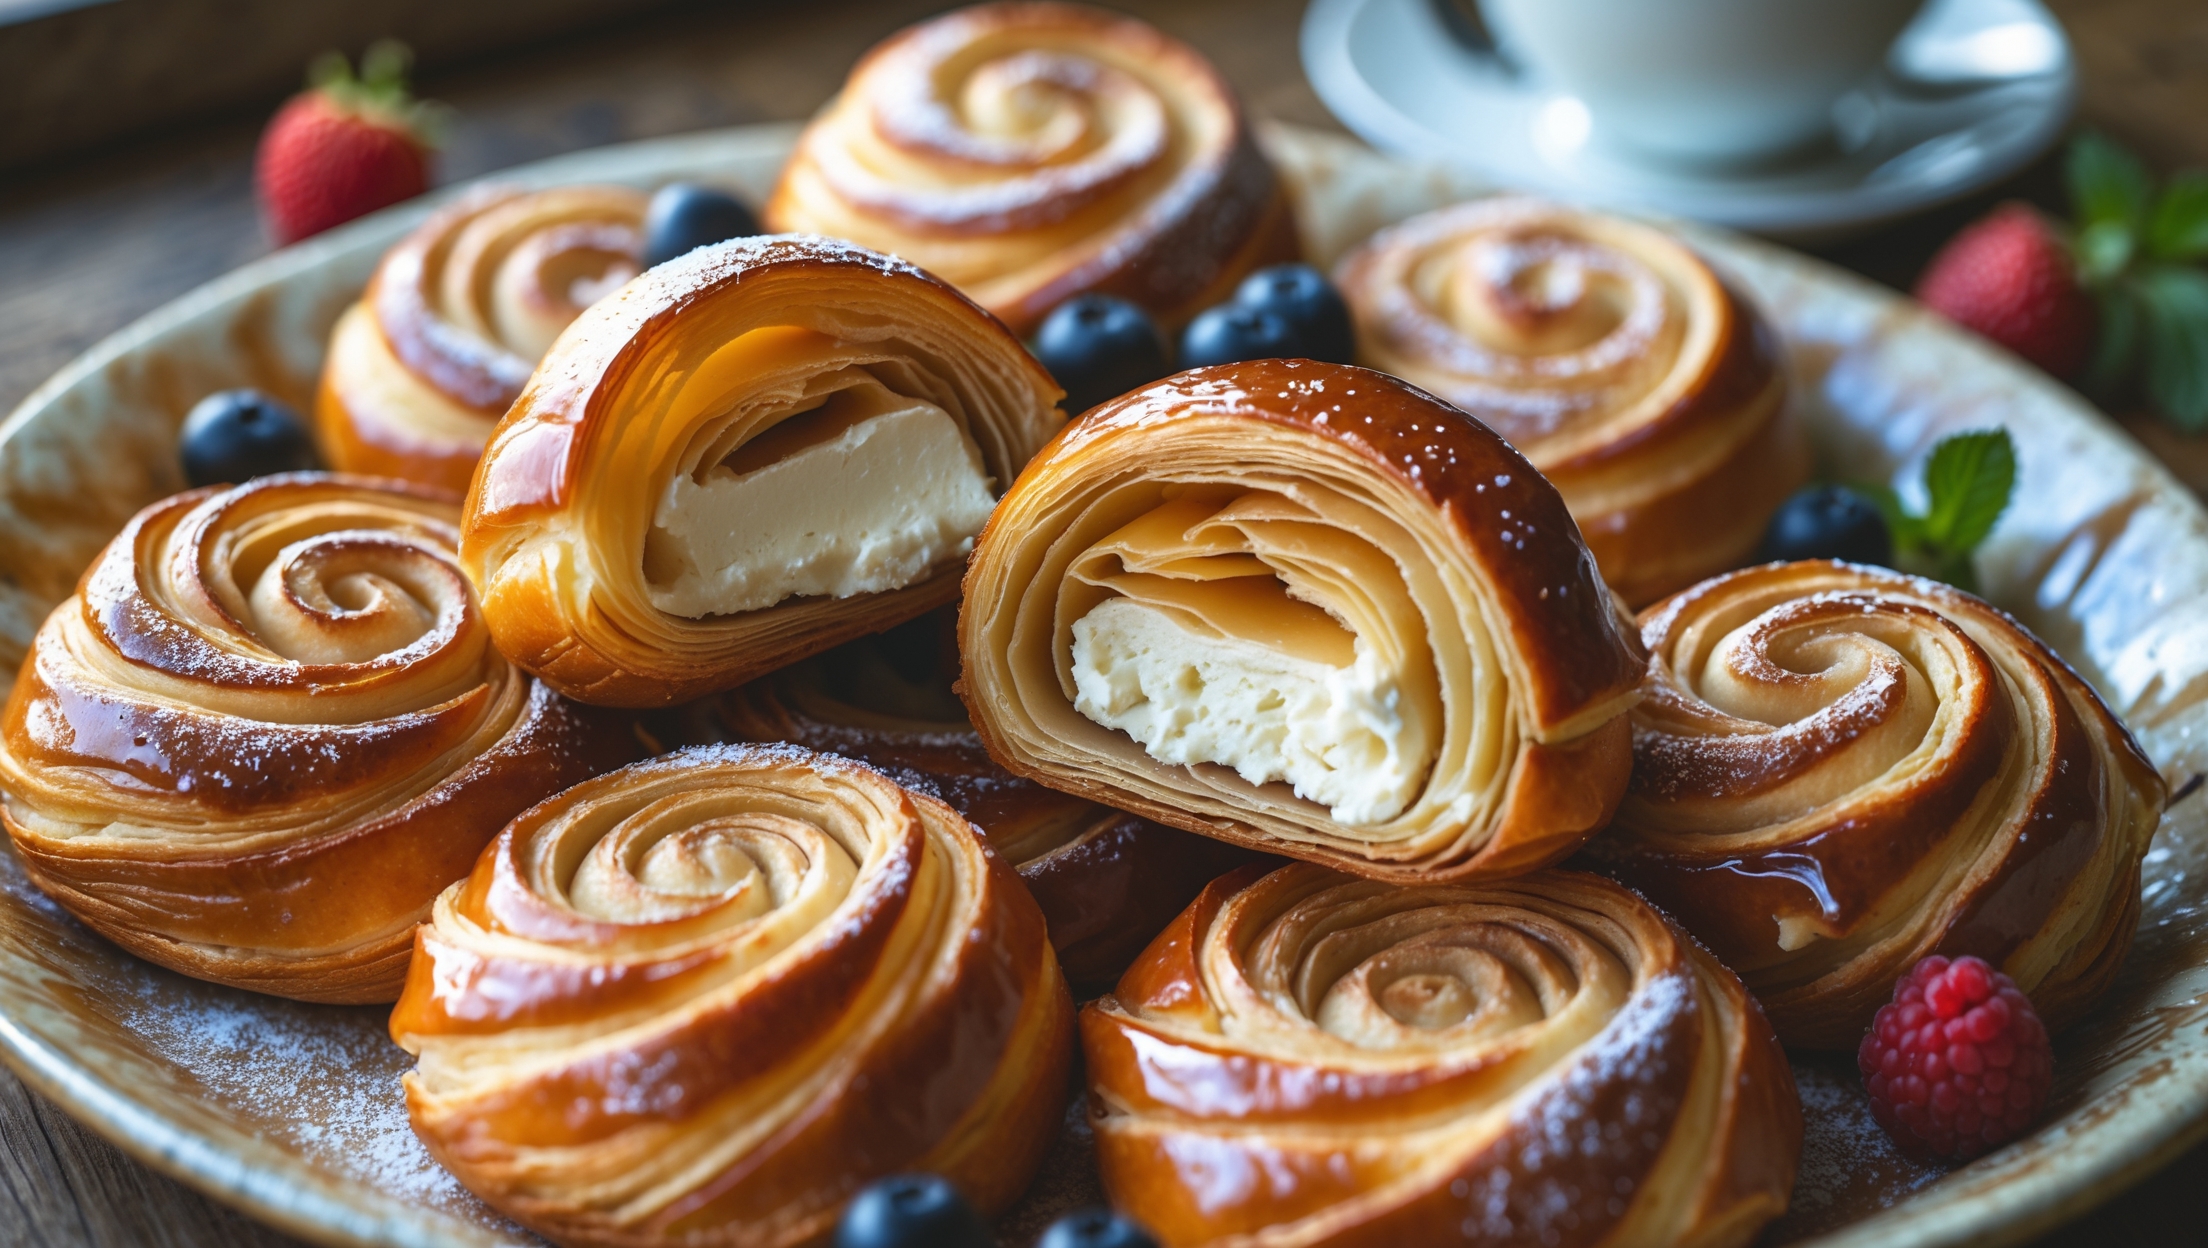
The key ingredients include all-purpose flour, sugar, yeast, butter (both for dough and laminating), full-fat cream cheese, eggs, vanilla extract, and lemon juice. The pastry is finished with a simple powdered sugar glaze for that perfect bakery-style finish.
Learn how to cook Cream Cheese Danish Recipe by creating a laminated dough through several folding and chilling cycles, then filling with a tangy cream cheese mixture. After shaping into traditional Danish forms, they're baked until golden at 190°C for 18-20 minutes and finished with a sweet vanilla glaze.
Flakiness issues usually stem from butter melting too quickly during lamination. Keep your dough and butter cold throughout the process, work quickly, and ensure proper chilling between folds. Overlapping the dough too much during folding or underbaking can also reduce flakiness.
Absolutely! The laminated dough can be prepared up to 3 days in advance and stored wrapped tightly in the refrigerator. For longer storage, freeze it for up to 1 month. Thaw overnight in the refrigerator before shaping and filling for best results.
While both are laminated doughs with butter layers, Danish dough contains yeast, eggs, and sugar, making it enriched and slightly sweet with a tender, bread-like quality. Puff pastry has no yeast, resulting in a crisper, more neutral-flavoured pastry with distinct layers.
Danish Pastry
Try following recommended recipes


