Coconut Danish Recipe
Ingredients
Equipment
Directions
FAQs
Find answers to your most pressing questions about this delicious recipe right here.
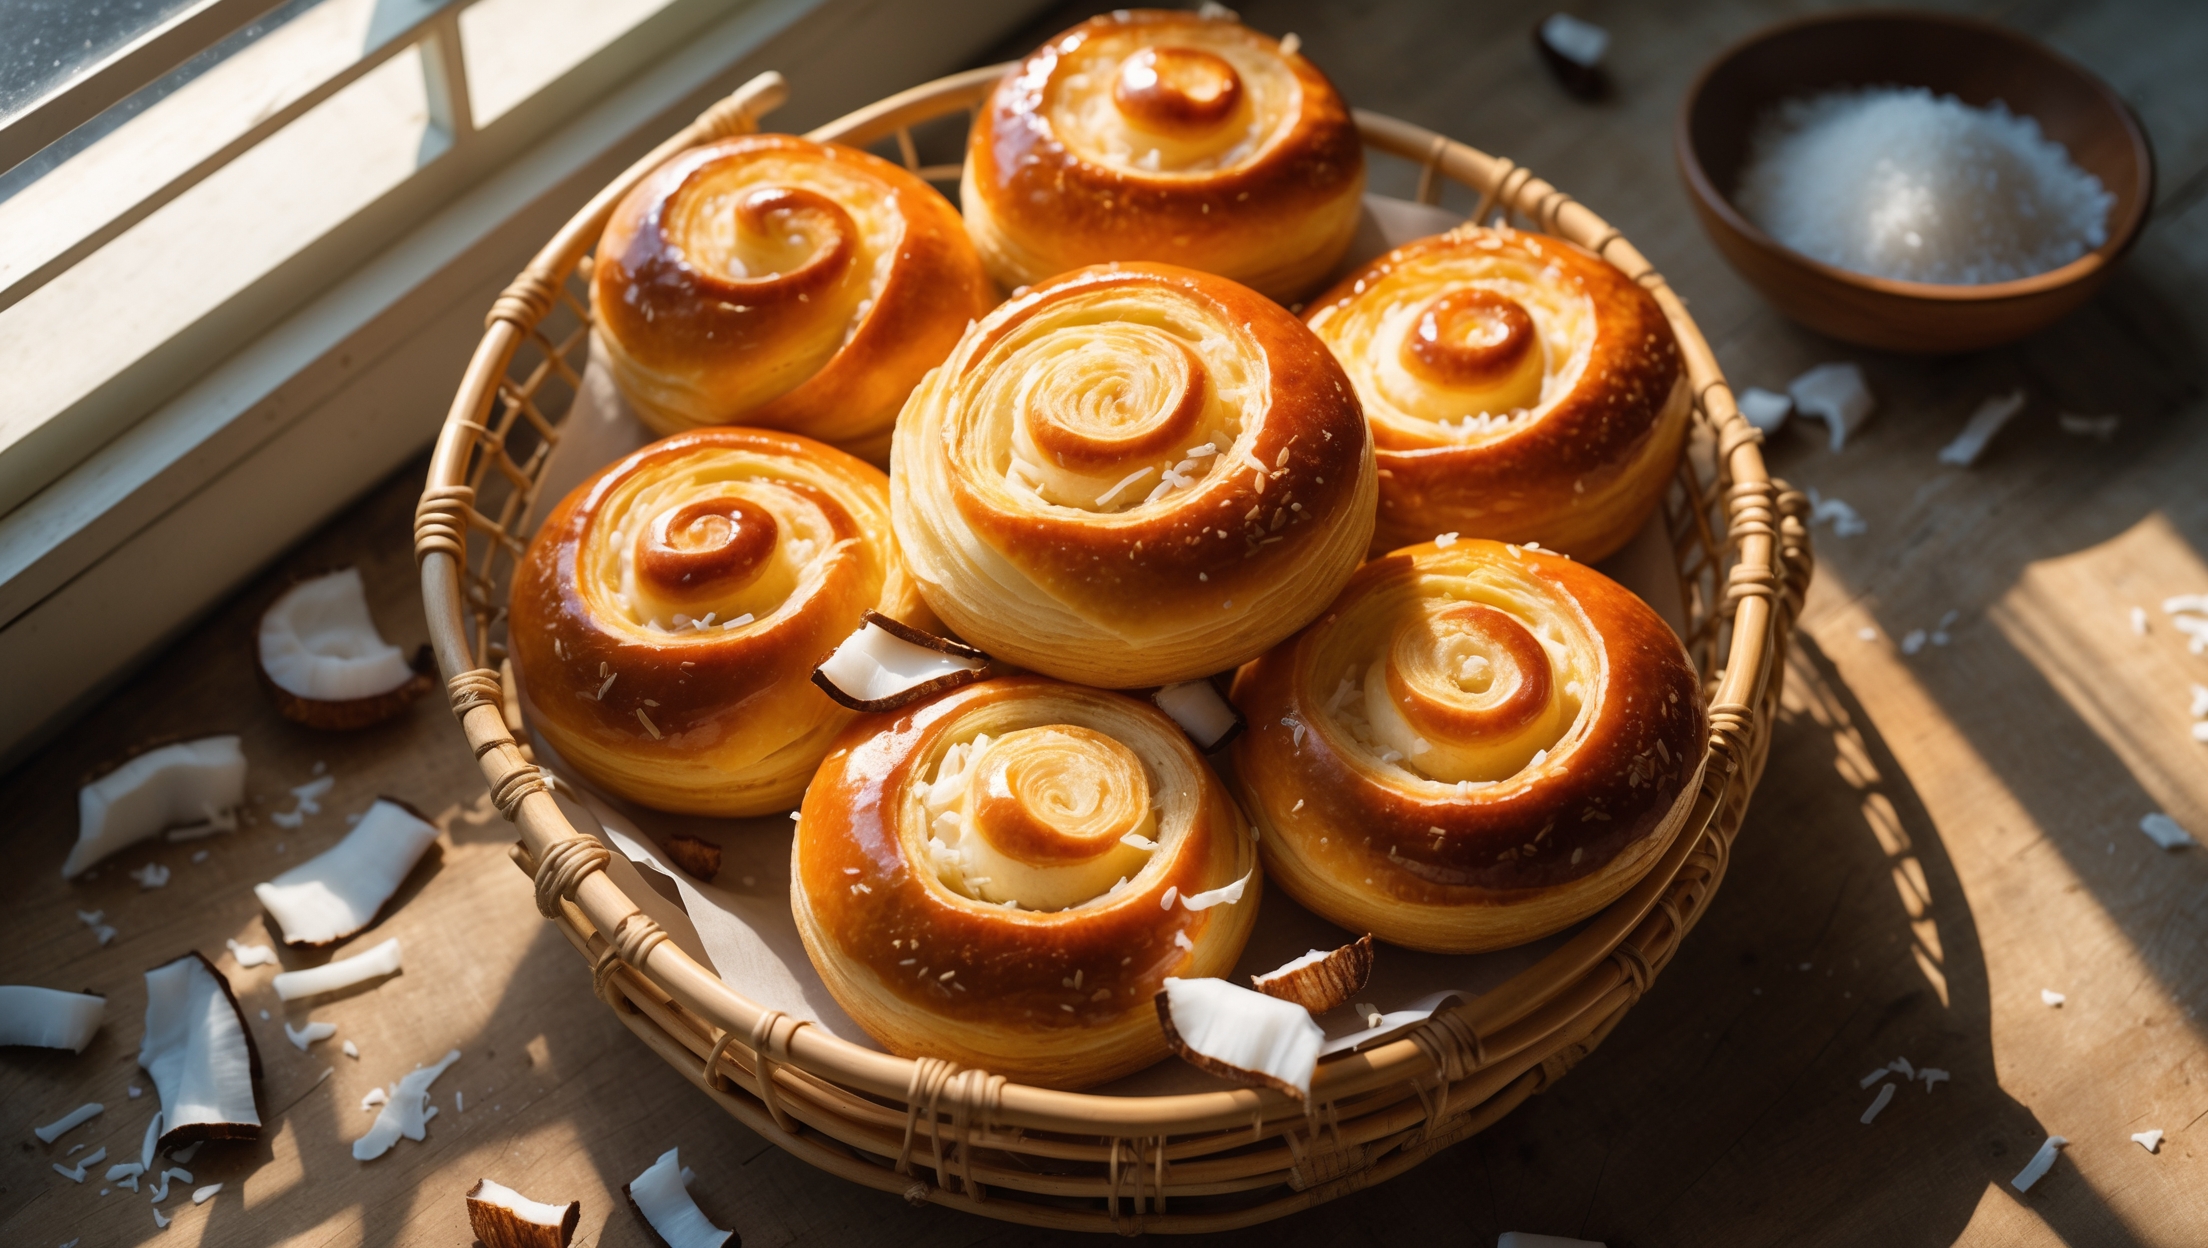
The main ingredients include all-purpose flour, sugar, yeast, butter, eggs, milk, cream cheese, shredded coconut, coconut cream, and coconut extract. For the topping, you'll need egg wash, toasted coconut flakes, and optional pearl sugar.
Learn how to cook Coconut Danish Recipe by preparing a laminated dough with multiple folds to create flaky layers, making a rich coconut cream filling, shaping the pastries, proofing them until puffy, and baking at 190°C for 18-20 minutes until golden brown. The key is properly laminating the dough and allowing adequate proofing time.
Yes, laminated dough can be made up to 2 days in advance and stored in the refrigerator, or frozen for up to 1 month. This actually improves the flavour and makes the pastry process more manageable. Just thaw frozen dough overnight in the refrigerator before using.
The flaky texture comes from the lamination process, where butter is folded between layers of dough. When baked, the butter creates steam that pushes the dough layers apart, while simultaneously creating a crisp texture as the fat melts into the dough.
Properly proofed Danish pastries should look visibly puffy but not doubled in size. When gently pressed with a finger, the dough should spring back slowly, leaving a slight indentation. Under-proofed pastries will be dense, while over-proofed ones may collapse during baking.
Danish Pastry
Try following recommended recipes


