Classic Danish Pastry Recipe
Ingredients
Equipment
Directions
FAQs
Find answers to your most pressing questions about this delicious recipe right here.
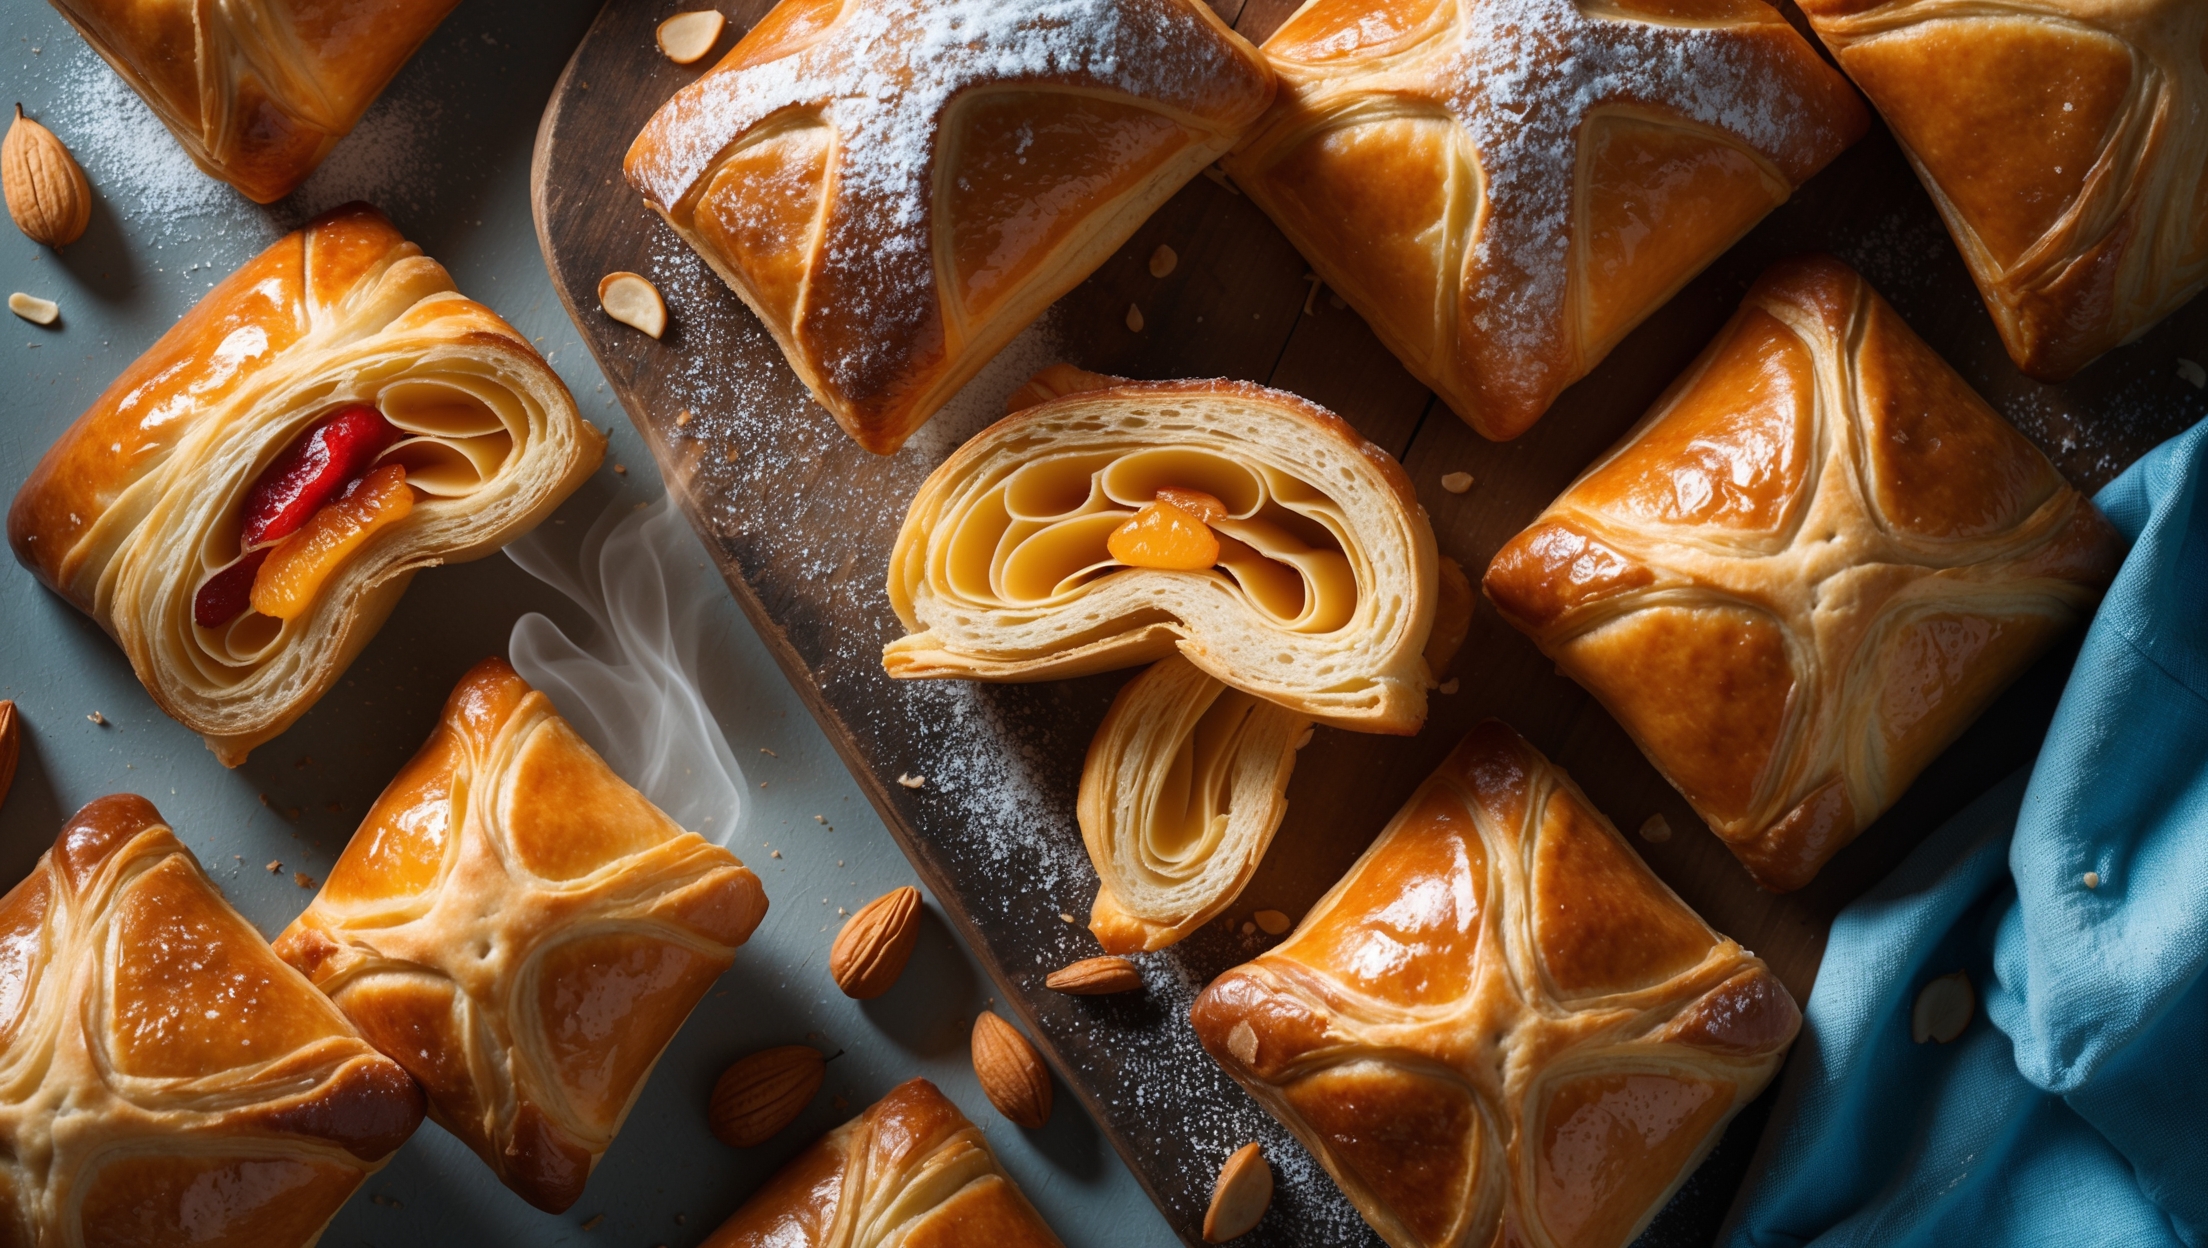
Classic Danish Pastry requires strong bread flour, salt, caster sugar, instant dried yeast, eggs, milk, and unsalted butter (both for the dough and lamination). This creates the signature buttery, flaky layers that Danish pastries are famous for.
Learn how to cook Classic Danish Pastry by mastering the lamination technique - folding butter between layers of yeasted dough through a series of turns. After shaping, let the pastries rise before baking at a high temperature (200°C) for 18-20 minutes until golden brown, allowing the layered butter to create steam and form the characteristic flaky texture.
Poor rise usually results from insufficient proofing, improper lamination, or butter leakage. Ensure your dough is properly proofed (puffy but not doubled), maintain cold temperatures during lamination, and don't let the egg wash drip down the sides as this can seal layers together.
Though both are laminated doughs, Danish pastry contains eggs and more sugar, creating a richer, sweeter dough than croissants. Danish dough is also more versatile for fillings, while traditional croissants remain plain. The folding technique differs slightly too, affecting texture.
Laminated dough can be prepared up to 3 days before baking if kept refrigerated, or frozen for up to 1 month. This makes it perfect for advance preparation. The cold fermentation actually improves flavor, though you'll need to thaw frozen dough overnight in the refrigerator before using.
Danish Pastry
Try following recommended recipes


