Cinnamon Raisin Danish Recipe
Ingredients
Equipment
Directions
FAQs
Find answers to your most pressing questions about this delicious recipe right here.
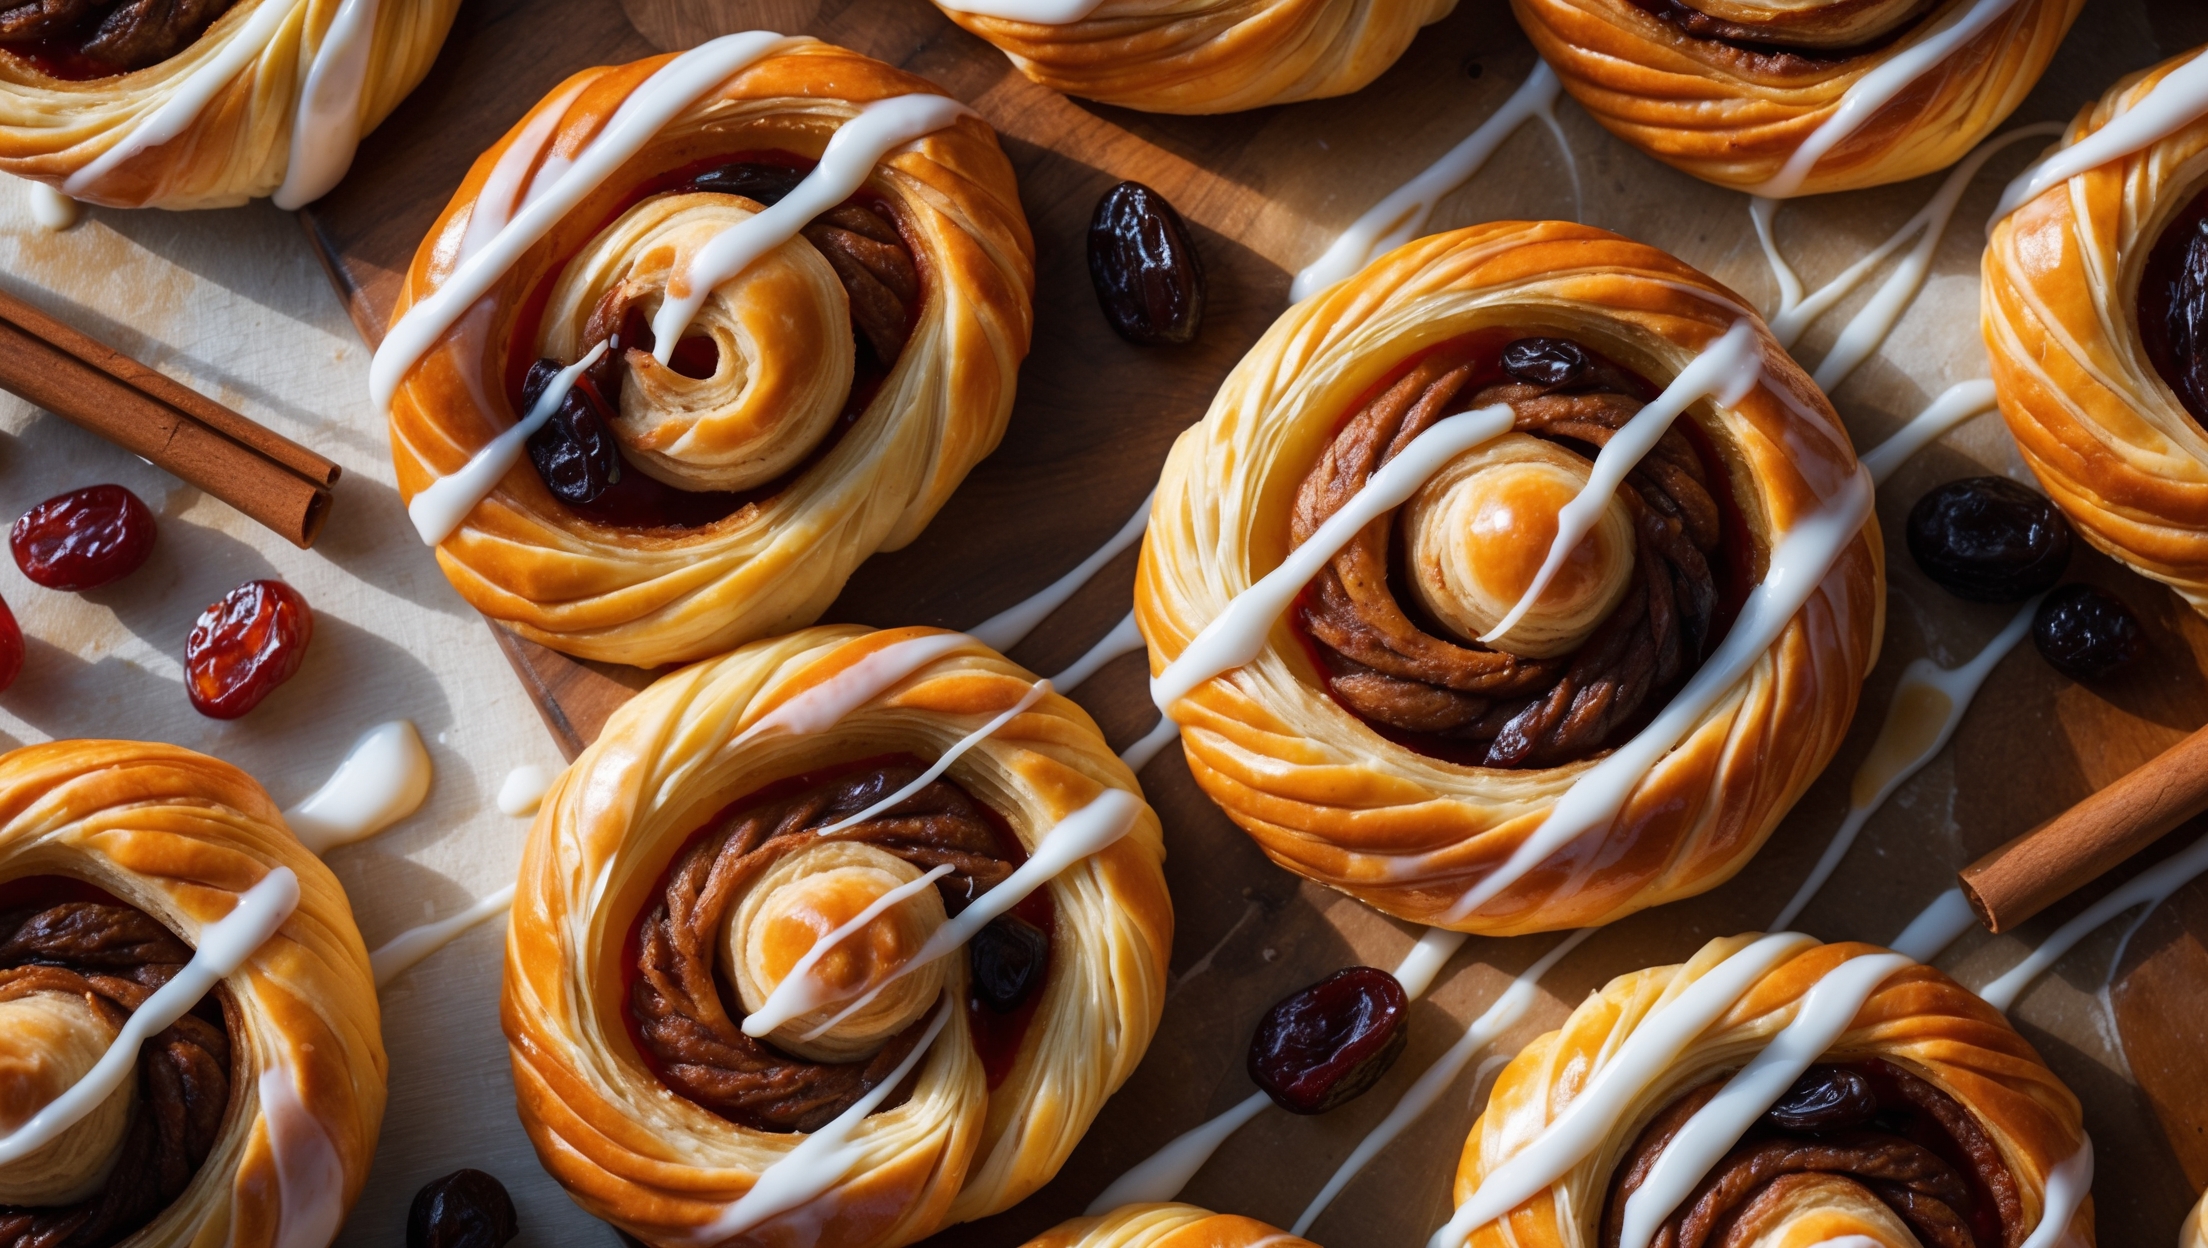
This Danish pastry requires strong bread flour, yeast, sugar, salt, eggs, milk, water, vanilla, butter for lamination, brown sugar, cinnamon, plump raisins, and optional orange zest for the filling. The finishing touches include egg wash and a simple vanilla glaze made with icing sugar.
Learn how to cook Cinnamon Raisin Danish by preparing a yeasted dough, creating a butter block for lamination, and folding the dough multiple times with chilling between folds. After spreading the cinnamon-raisin filling, shape into swirls, proof until puffy, and bake at 190°C for 20-25 minutes until golden brown. Finish with a drizzle of vanilla glaze while still warm for perfect bakery-style results.
The key to flaky Danish pastry is proper lamination – folding cold butter into dough multiple times creates distinct layers. Maintain butter and dough at similar consistencies, follow proper chilling times between folds, and roll with even pressure. This creates hundreds of butter-separated dough layers that puff during baking.
Yes! Laminated Danish dough can be prepared up to 3 days in advance and kept refrigerated, or frozen for up to 1 month. This actually improves results as the extended resting time enhances flavour development and relaxes the gluten, making the dough easier to shape and resulting in superior texture.
Insufficient rising usually stems from inactive yeast (check expiry date), too-cold environment (ideal proofing temperature is 24-27°C), or overhandling during shaping which deflates air bubbles. Ensure your yeast is fresh, provide a warm draft-free environment, and handle the dough gently for best results.
Danish Pastry
Try following recommended recipes


