Cinnamon Danish Recipe
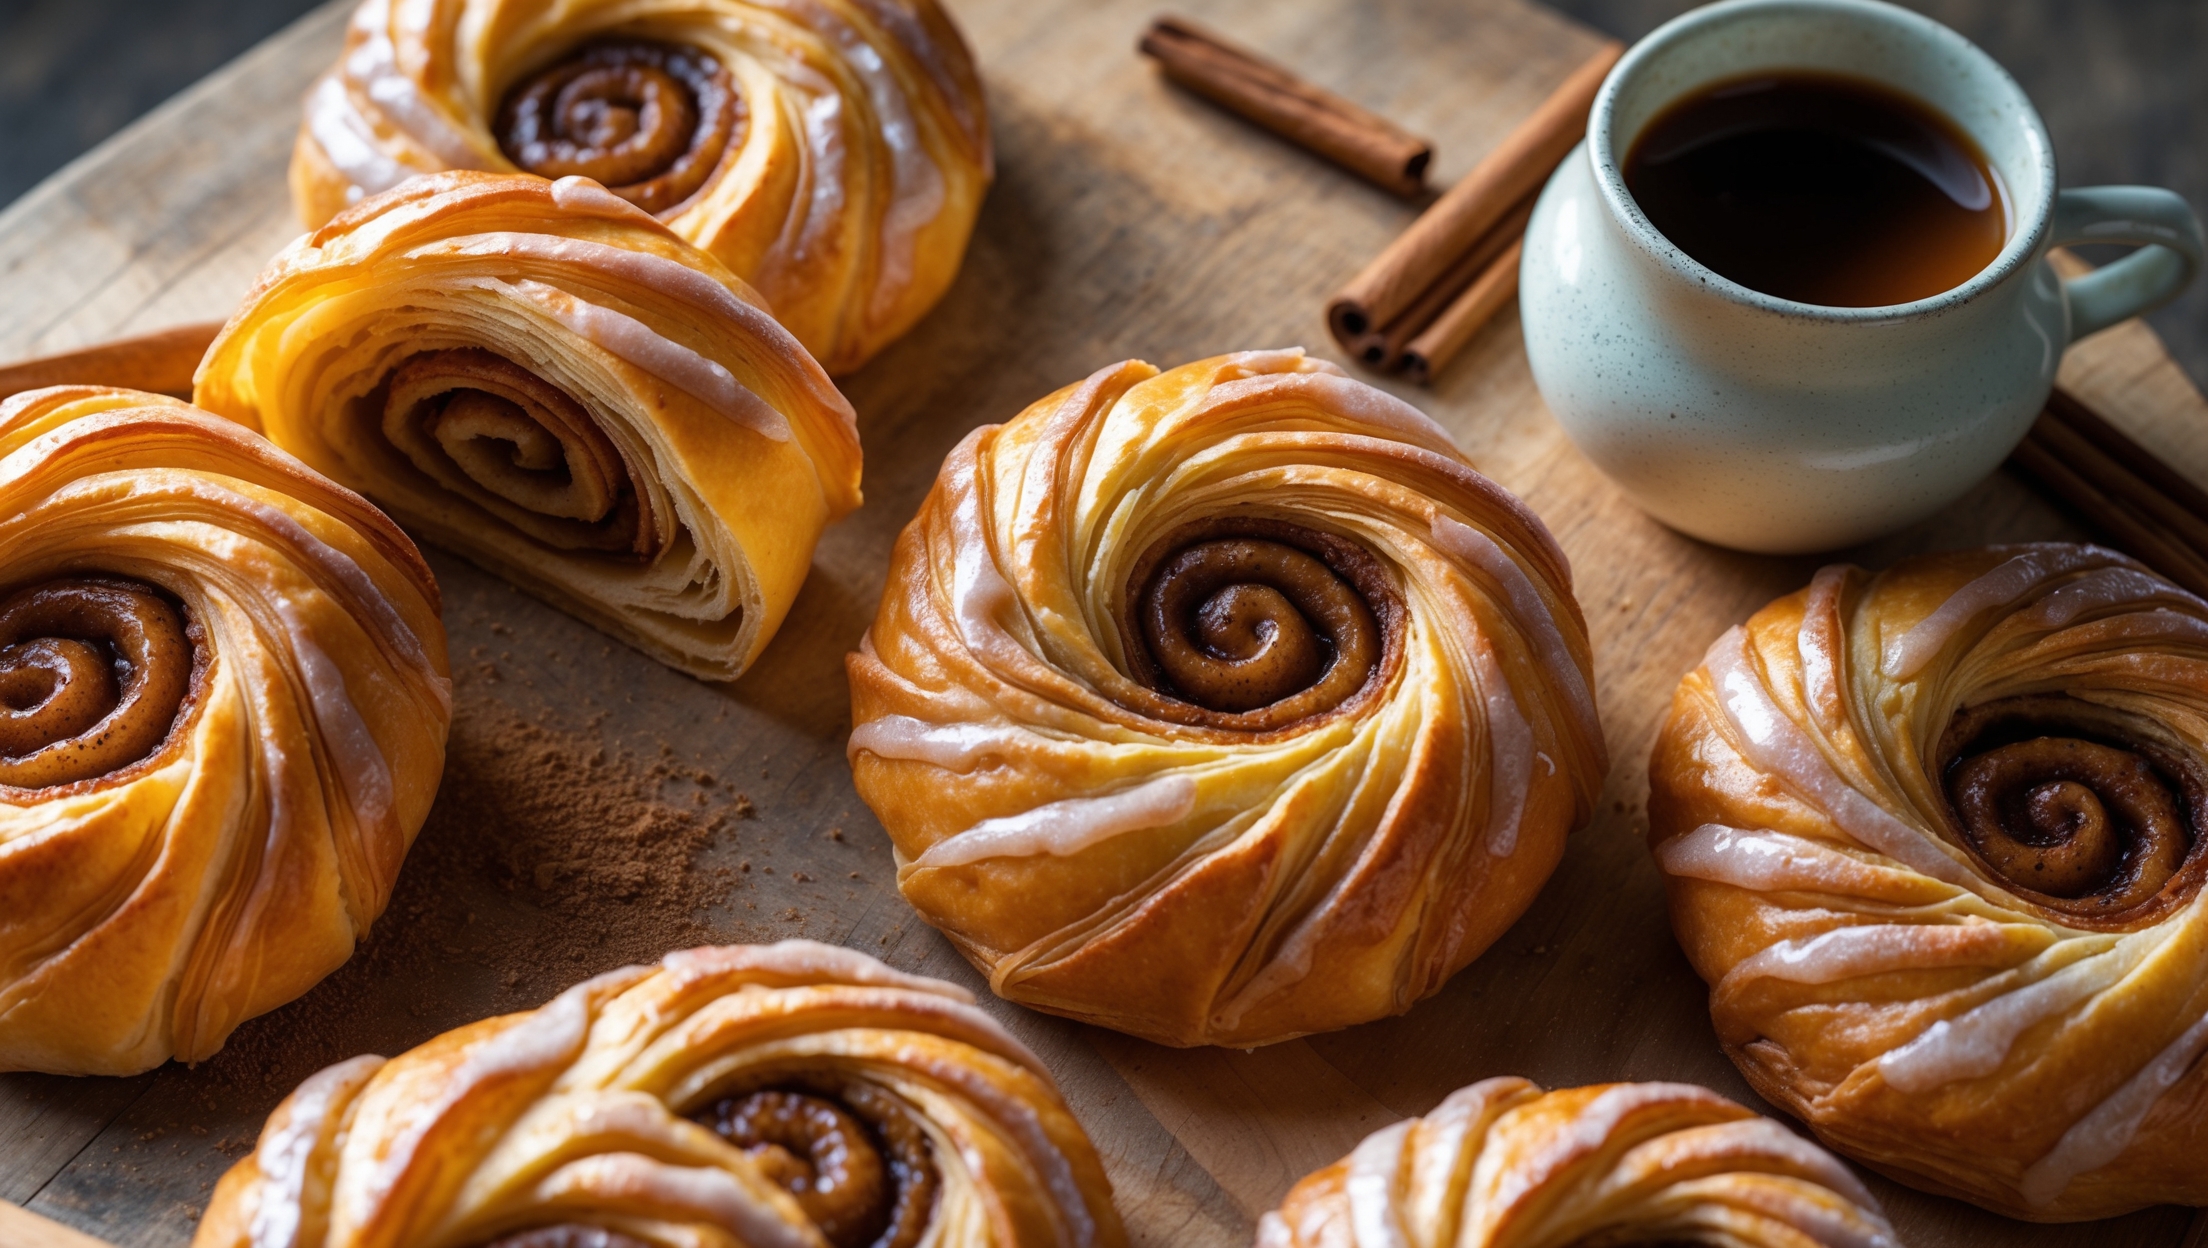
Learn how to make the best homemade cinnamon Danish with this foolproof recipe. The secret to these bakery-quality pastries lies in the buttery laminated dough and rich cinnamon filling. Perfect for weekend baking projects when you crave something special that's still achievable for home bakers.
Difficulty:
Intermediate
Prep Time:
3 hours 30 mins
Cook Time:
25 mins
Serves:
12 pastries
An overhead shot showcases a rustic wooden board with golden-brown Danish pastries arranged in a casual pattern, their swirled centers revealing glossy cinnamon filling. A cross-section view highlights the dozens of delicate, flaky layers created through lamination, while a close-up captures the shimmering vanilla glaze drizzled artfully across the tops. Soft morning light streams across the scene, illuminating the caramelized edges and dusting of cinnamon. A small ceramic pot of coffee and a scattered handful of cinnamon sticks complete the composition, emphasizing the warm, inviting nature of these freshly baked Danish pastries.

Ingredients

<ul class="ingredients-main-list"><li class="ingredients-single-item">475g all-purpose flour</li><li class="ingredients-single-item">60g granulated sugar</li><li class="ingredients-single-item">7g active dry yeast (1 standard packet)</li><li class="ingredients-single-item">1 tsp salt</li><li class="ingredients-single-item">240ml cold milk</li><li class="ingredients-single-item">1 large egg</li><li class="ingredients-single-item">1 tsp vanilla extract</li><li class="ingredients-single-item">250g cold unsalted butter (for lamination)</li><li class="ingredients-single-item">150g brown sugar</li><li class="ingredients-single-item">30g ground cinnamon</li><li class="ingredients-single-item">30g unsalted butter, softened (for filling)</li><li class="ingredients-single-item">150g powdered sugar</li><li class="ingredients-single-item">2-3 tbsp milk</li><li class="ingredients-single-item">1/2 tsp vanilla extract</li></ul>

Equipment

<ul class="equipment-main-list"><li class="equipment-single-item">Rolling pin</li><li class="equipment-single-item">Pastry brush</li><li class="equipment-single-item">Stand mixer with dough hook (optional)</li><li class="equipment-single-item">Ruler or measuring tape</li><li class="equipment-single-item">Pastry cutter or sharp knife</li><li class="equipment-single-item">Baking trays</li></ul>

Directions

<ol class="no-list-style"><li class="MethodStepper"><h4 class="step-title">Step 1</h4>In a large bowl, mix the flour, sugar, yeast, and salt. In a separate bowl, whisk together the cold milk, egg, and vanilla extract. Pour the wet ingredients into the dry and mix until it forms a rough dough. This cold milk method slows yeast activity, giving you more control during lamination.</li><li class="MethodStepper"><h4 class="step-title">Step 2</h4>Knead the dough on a lightly floured surface for about 5 minutes until smooth and elastic. Shape into a rectangle, wrap in plastic, and refrigerate for 30 minutes. Proper chilling at this stage is crucial as it relaxes the gluten and prepares the dough for better butter incorporation.</li><li class="MethodStepper"><h4 class="step-title">Step 3</h4>While the dough chills, prepare your butter block. Place the 250g cold butter between two sheets of parchment paper and beat with a rolling pin until malleable but still cold. Shape into a 20x15cm rectangle, then refrigerate until firm but pliable (about 15 minutes).</li><li class="MethodStepper"><h4 class="step-title">Step 4</h4>Roll the chilled dough into a 30x20cm rectangle. Place the butter block on one half of the dough, leaving a 1cm border. Fold the other half over the butter and seal the edges thoroughly - any butter escape will compromise your layers.</li><li class="MethodStepper"><h4 class="step-title">Step 5</h4>Execute your first turn: Roll the dough into a 45x20cm rectangle, keeping edges straight and corners square. Fold it in thirds like a business letter. Wrap and refrigerate for 30 minutes. This precise folding technique creates the signature flaky layers in your Danish.</li><li class="MethodStepper"><h4 class="step-title">Step 6</h4>Repeat the rolling and folding process (called a "turn") two more times, chilling the dough for 30 minutes between each turn. On your final turn, after folding, chill the dough for at least 1 hour or overnight for best flavor development and easier handling.</li><li class="MethodStepper"><h4 class="step-title">Step 7</h4>Meanwhile, make the cinnamon filling by mixing the brown sugar, cinnamon, and 30g softened butter until it forms a spreadable paste. The butter helps the filling adhere to the dough and prevents it from leaking out during baking.</li><li class="MethodStepper"><h4 class="step-title">Step 8</h4>On a lightly floured surface, roll the chilled dough into a large rectangle about 40x30cm and 3-4mm thick. Spread the cinnamon filling evenly across the surface, leaving a 1cm border along one long edge.</li><li class="MethodStepper"><h4 class="step-title">Step 9</h4>Starting from the long edge with filling, tightly roll the dough into a log, sealing the edge without filling. For evenly sized pastries, use a ruler to mark every 3-4cm before cutting with a sharp knife or unflavored dental floss.</li><li class="MethodStepper"><h4 class="step-title">Step 10</h4>Place the cut pastries on parchment-lined baking trays, spacing them about 5cm apart. Gently press down the center of each roll with your thumb to create the classic Danish shape. Cover loosely with plastic wrap and let rise in a warm spot until puffy, about 45-60 minutes.</li><li class="MethodStepper"><h4 class="step-title">Step 11</h4>Preheat your oven to 190°C. Bake the Danish for 18-25 minutes, rotating the trays halfway through, until deeply golden brown. The dark color isn't burning - it's caramelization that creates flavor depth and ensures the pastry is fully baked without a doughy center.</li><li class="MethodStepper"><h4 class="step-title">Step 12</h4>While the Danish bake, prepare the glaze by whisking together the powdered sugar, milk, and vanilla until smooth. Start with 2 tbsp of milk and add more if needed to achieve a thick but pourable consistency.</li><li class="MethodStepper"><h4 class="step-title">Step 13</h4>Allow the Danish to cool on the trays for 10 minutes, then drizzle generously with the glaze while still warm. This allows some of the glaze to melt into the pastry while the rest forms a sweet, decorative topping. Serve warm or at room temperature for the best texture and flavor experience.</li></ol>

FAQs

Find answers to your most pressing questions about this delicious recipe right here.

What ingredients are used in Cinnamon Danish Recipe?

The key ingredients include all-purpose flour, yeast, milk, egg, unsalted butter (for lamination), brown sugar, cinnamon, and powdered sugar for the glaze. The butter is particularly important for creating those signature flaky layers.

How to cook Cinnamon Danish Recipe at home?

Learn how to cook Cinnamon Danish Recipe by mastering the lamination technique - folding butter into dough repeatedly to create flaky layers. The process involves making a yeasted dough, creating a butter block, performing three "turns" with chilling between each, filling with cinnamon sugar, shaping, and baking until golden brown.

How can I tell when my Danish pastries are properly laminated?

Properly laminated Danish pastry dough will have a smooth surface with visible butter streaks when rolled. When baked, it should puff up significantly and show distinct, separate layers when broken apart. If the layers merge together, the butter likely melted during the folding process.

Why should I keep the dough cold during the lamination process?

Keeping the dough cold prevents butter from melting into the dough, which is essential for creating separate flaky layers. If butter melts, it gets absorbed rather than forming distinct sheets between dough layers, resulting in a bread-like texture instead of crisp, airy pastry.

Can I prepare Danish pastry dough in advance?

Yes, Danish pastry dough can be prepared up to 3 days in advance and stored tightly wrapped in the refrigerator. You can also freeze the prepared dough for up to a month. This actually improves flavour development and makes the final proofing and baking steps quicker.

Want to try something else in ...

Danish Pastry

Try following recommended recipes

{ "@context": "http://schema.org/", "@type": "Recipe", "name": "Cinnamon Danish Recipe", "author": { "@type": "Person", "name": "Gurbir Aujla", "brand": "What's Baking?", "jobTitle": "Baker" }, "datePublished": "2024-05-05", "description": "Learn how to make the best homemade cinnamon Danish with this foolproof recipe. The secret to these bakery-quality pastries lies in the buttery laminated dough and rich cinnamon filling. Perfect for weekend baking projects when you crave something special that's still achievable for home bakers.", "prepTime": "PT3H30M", "cookTime": "PT25M", "totalTime": "PT3H55M", "keywords": "cinnamon danish, laminated dough, breakfast pastry, homemade danish, cinnamon swirl", "recipeYield": "12", "recipeCategory": "Breakfast", "recipeCuisine": "Danish", "nutrition": { "@type": "NutritionInformation", "calories": "385 calories", "carbohydrateContent": "38 g", "proteinContent": "5 g", "fatContent": "23 g", "saturatedFatContent": "14 g", "cholesterolContent": "92 mg", "sodiumContent": "230 mg", "sugarContent": "18 g", "servingSize": "1 pastry" }, "recipeIngredient": [ "475g all-purpose flour", "60g granulated sugar", "7g active dry yeast (1 standard packet)", "1 tsp salt", "240ml cold milk", "1 large egg", "1 tsp vanilla extract", "250g cold unsalted butter (for lamination)", "150g brown sugar", "30g ground cinnamon", "30g unsalted butter, softened (for filling)", "150g powdered sugar", "2-3 tbsp milk", "1/2 tsp vanilla extract" ], "recipeInstructions": [ { "@type": "HowToStep", "name": "Make Dough Base", "text": "In a large bowl, mix the flour, sugar, yeast, and salt. In a separate bowl, whisk together the cold milk, egg, and vanilla extract. Pour the wet ingredients into the dry and mix until it forms a rough dough. This cold milk method slows yeast activity, giving you more control during lamination." }, { "@type": "HowToStep", "name": "Knead and Chill Dough", "text": "Knead the dough on a lightly floured surface for about 5 minutes until smooth and elastic. Shape into a rectangle, wrap in plastic, and refrigerate for 30 minutes. Proper chilling at this stage is crucial as it relaxes the gluten and prepares the dough for better butter incorporation." }, { "@type": "HowToStep", "name": "Prepare Butter Block", "text": "While the dough chills, prepare your butter block. Place the 250g cold butter between two sheets of parchment paper and beat with a rolling pin until malleable but still cold. Shape into a 20x15cm rectangle, then refrigerate until firm but pliable (about 15 minutes)." }, { "@type": "HowToStep", "name": "Enclose Butter in Dough", "text": "Roll the chilled dough into a 30x20cm rectangle. Place the butter block on one half of the dough, leaving a 1cm border. Fold the other half over the butter and seal the edges thoroughly - any butter escape will compromise your layers." }, { "@type": "HowToStep", "name": "First Lamination Turn", "text": "Execute your first turn: Roll the dough into a 45x20cm rectangle, keeping edges straight and corners square. Fold it in thirds like a business letter. Wrap and refrigerate for 30 minutes. This precise folding technique creates the signature flaky layers in your Danish." }, { "@type": "HowToStep", "name": "Complete Lamination", "text": "Repeat the rolling and folding process (called a 'turn') two more times, chilling the dough for 30 minutes between each turn. On your final turn, after folding, chill the dough for at least 1 hour or overnight for best flavor development and easier handling." }, { "@type": "HowToStep", "name": "Make Cinnamon Filling", "text": "Meanwhile, make the cinnamon filling by mixing the brown sugar, cinnamon, and 30g softened butter until it forms a spreadable paste. The butter helps the filling adhere to the dough and prevents it from leaking out during baking." }, { "@type": "HowToStep", "name": "Roll Out Dough and Apply Filling", "text": "On a lightly floured surface, roll the chilled dough into a large rectangle about 40x30cm and 3-4mm thick. Spread the cinnamon filling evenly across the surface, leaving a 1cm border along one long edge." }, { "@type": "HowToStep", "name": "Form and Cut Pastries", "text": "Starting from the long edge with filling, tightly roll the dough into a log, sealing the edge without filling. For evenly sized pastries, use a ruler to mark every 3-4cm before cutting with a sharp knife or unflavored dental floss." }, { "@type": "HowToStep", "name": "Shape and Proof", "text": "Place the cut pastries on parchment-lined baking trays, spacing them about 5cm apart. Gently press down the center of each roll with your thumb to create the classic Danish shape. Cover loosely with plastic wrap and let rise in a warm spot until puffy, about 45-60 minutes." }, { "@type": "HowToStep", "name": "Bake", "text": "Preheat your oven to 190°C. Bake the Danish for 18-25 minutes, rotating the trays halfway through, until deeply golden brown. The dark color isn't burning - it's caramelization that creates flavor depth and ensures the pastry is fully baked without a doughy center." }, { "@type": "HowToStep", "name": "Prepare Glaze", "text": "While the Danish bake, prepare the glaze by whisking together the powdered sugar, milk, and vanilla until smooth. Start with 2 tbsp of milk and add more if needed to achieve a thick but pourable consistency." }, { "@type": "HowToStep", "name": "Glaze and Serve", "text": "Allow the Danish to cool on the trays for 10 minutes, then drizzle generously with the glaze while still warm. This allows some of the glaze to melt into the pastry while the rest forms a sweet, decorative topping. Serve warm or at room temperature for the best texture and flavor experience." } ], "aggregateRating": { "@type": "AggregateRating", "ratingValue": "5", "ratingCount": "156" }, "review": [ { "@type": "Review", "author": "Sofia Petersen", "datePublished": "2024-05-01", "reviewBody": "The flakiest Danish I've ever made! The lamination process seemed intimidating at first, but the detailed instructions made it manageable. My family couldn't believe these were homemade.", "name": "Bakery-Quality Results", "reviewRating": { "@type": "Rating", "ratingValue": "5" } }, { "@type": "Review", "author": "Raj Chaudhry", "datePublished": "2024-04-28", "reviewBody": "Worth every minute of folding! The butter layering technique really does work wonders - I counted over 27 distinct flaky layers in each pastry. Will definitely make these again for special brunches.", "name": "Impressive Layers", "reviewRating": { "@type": "Rating", "ratingValue": "5" } }, { "@type": "Review", "author": "Martina Rossi", "datePublished": "2024-04-30", "reviewBody": "Better than bakery versions by far! The cinnamon-sugar ratio is spot on, and I love how the vanilla glaze adds just the right amount of sweetness. Perfect weekend project that impressed my in-laws.", "name": "Superior to Store-Bought", "reviewRating": { "@type": "Rating", "ratingValue": "5" } }, { "@type": "Review", "author": "Akira Tanaka", "datePublished": "2024-05-02", "reviewBody": "My first attempt at Danish pastry and I'm amazed by the results! The overnight chill really developed the flavors. The detailed instructions about handling temperature were key to my success.", "name": "First-Time Success", "reviewRating": { "@type": "Rating", "ratingValue": "5" } }, { "@type": "Review", "author": "Elena Popescu", "datePublished": "2024-04-25", "reviewBody": "My family devoured these immediately! The aroma while baking was incredible. I appreciated the tip about letting the glaze melt partially into the warm pastry - it created a beautiful finish and perfect sweetness.", "name": "Family Favorite", "reviewRating": { "@type": "Rating", "ratingValue": "5" } } ], "url": "https://www.whatsbaking.co/recipes/cinnamon-danish-recipe" }
{ "@context": "https://schema.org", "@type": "FAQPage", "mainEntity": [ { "@type": "Question", "name": "What ingredients are used in Cinnamon Danish Recipe?", "acceptedAnswer": { "@type": "Answer", "text": "The key ingredients include all-purpose flour, yeast, milk, egg, unsalted butter (for lamination), brown sugar, cinnamon, and powdered sugar for the glaze. The butter is particularly important for creating those signature flaky layers." } }, { "@type": "Question", "name": "How to cook Cinnamon Danish Recipe at home?", "acceptedAnswer": { "@type": "Answer", "text": "Learn how to cook Cinnamon Danish Recipe by mastering the lamination technique - folding butter into dough repeatedly to create flaky layers. The process involves making a yeasted dough, creating a butter block, performing three \"turns\" with chilling between each, filling with cinnamon sugar, shaping, and baking until golden brown." } }, { "@type": "Question", "name": "How can I tell when my Danish pastries are properly laminated?", "acceptedAnswer": { "@type": "Answer", "text": "Properly laminated Danish pastry dough will have a smooth surface with visible butter streaks when rolled. When baked, it should puff up significantly and show distinct, separate layers when broken apart. If the layers merge together, the butter likely melted during the folding process." } }, { "@type": "Question", "name": "Why should I keep the dough cold during the lamination process?", "acceptedAnswer": { "@type": "Answer", "text": "Keeping the dough cold prevents butter from melting into the dough, which is essential for creating separate flaky layers. If butter melts, it gets absorbed rather than forming distinct sheets between dough layers, resulting in a bread-like texture instead of crisp, airy pastry." } }, { "@type": "Question", "name": "Can I prepare Danish pastry dough in advance?", "acceptedAnswer": { "@type": "Answer", "text": "Yes, Danish pastry dough can be prepared up to 3 days in advance and stored tightly wrapped in the refrigerator. You can also freeze the prepared dough for up to a month. This actually improves flavour development and makes the final proofing and baking steps quicker." } } ] }