Chocolate Hazelnut Danish Recipe
Ingredients
Equipment
Directions
FAQs
Find answers to your most pressing questions about this delicious recipe right here.
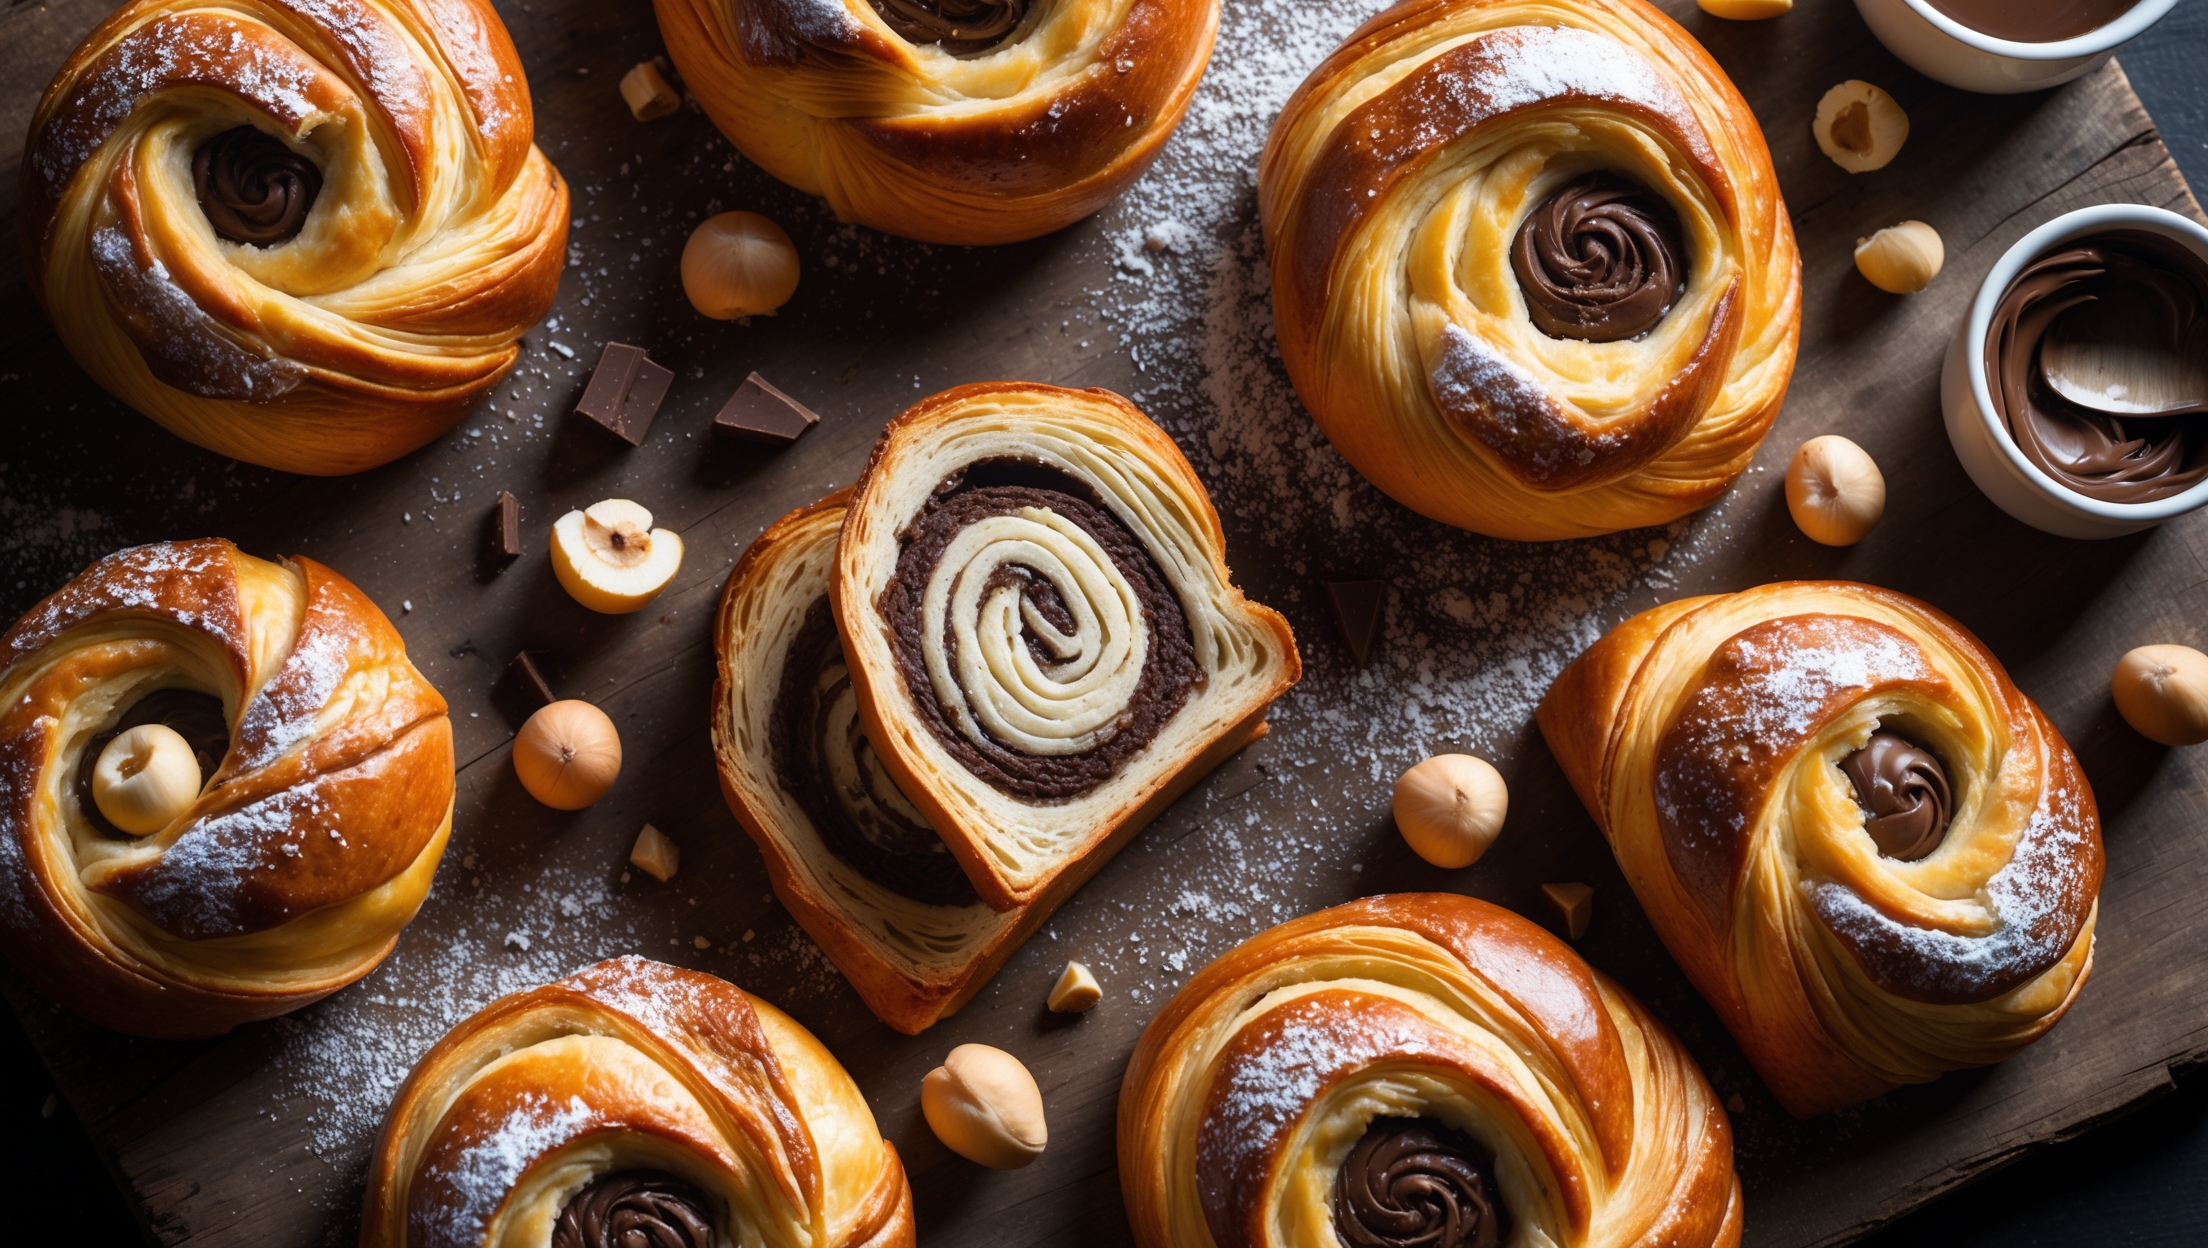
This pastry requires strong bread flour, sugar, yeast, salt, milk, eggs, vanilla, unsalted butter for lamination, chocolate-hazelnut spread (like Nutella), hazelnuts, and powdered sugar for dusting. The combination creates perfectly flaky layers filled with rich chocolate-hazelnut goodness.
Learn how to cook Chocolate Hazelnut Danish Recipe by preparing a laminated dough with multiple folds, filling it with chocolate-hazelnut spread, and baking until golden brown. The process includes making the dough, creating buttery layers through lamination, shaping the pastries, proofing them until puffy, and finally baking at 190°C for about 20 minutes for that perfect flaky texture.
The secret lies in proper lamination - keeping ingredients cold, performing multiple letter folds with adequate resting periods between each fold, and maintaining the butter as thin, even layers within the dough. Cold fermentation of the dough and proper proofing before baking also contribute to those beautiful flaky layers.
Absolutely! Laminated dough benefits from resting overnight in the refrigerator, which improves flavour and texture. You can also freeze the fully prepared dough for up to 3 months - just thaw overnight in the refrigerator before shaping. Shaped unbaked danishes can be refrigerated overnight and baked fresh in the morning.
Wonderful alternatives include homemade chocolate ganache, almond frangipane, fruit preserves, lemon curd, or cream cheese mixed with vanilla and sugar. For a less sweet option, try a savoury filling like herbed cheese, ham and gruyère, or spinach and feta for delicious breakfast or brunch varieties.
Danish Pastry
Try following recommended recipes


