Chocolate Danish Recipe
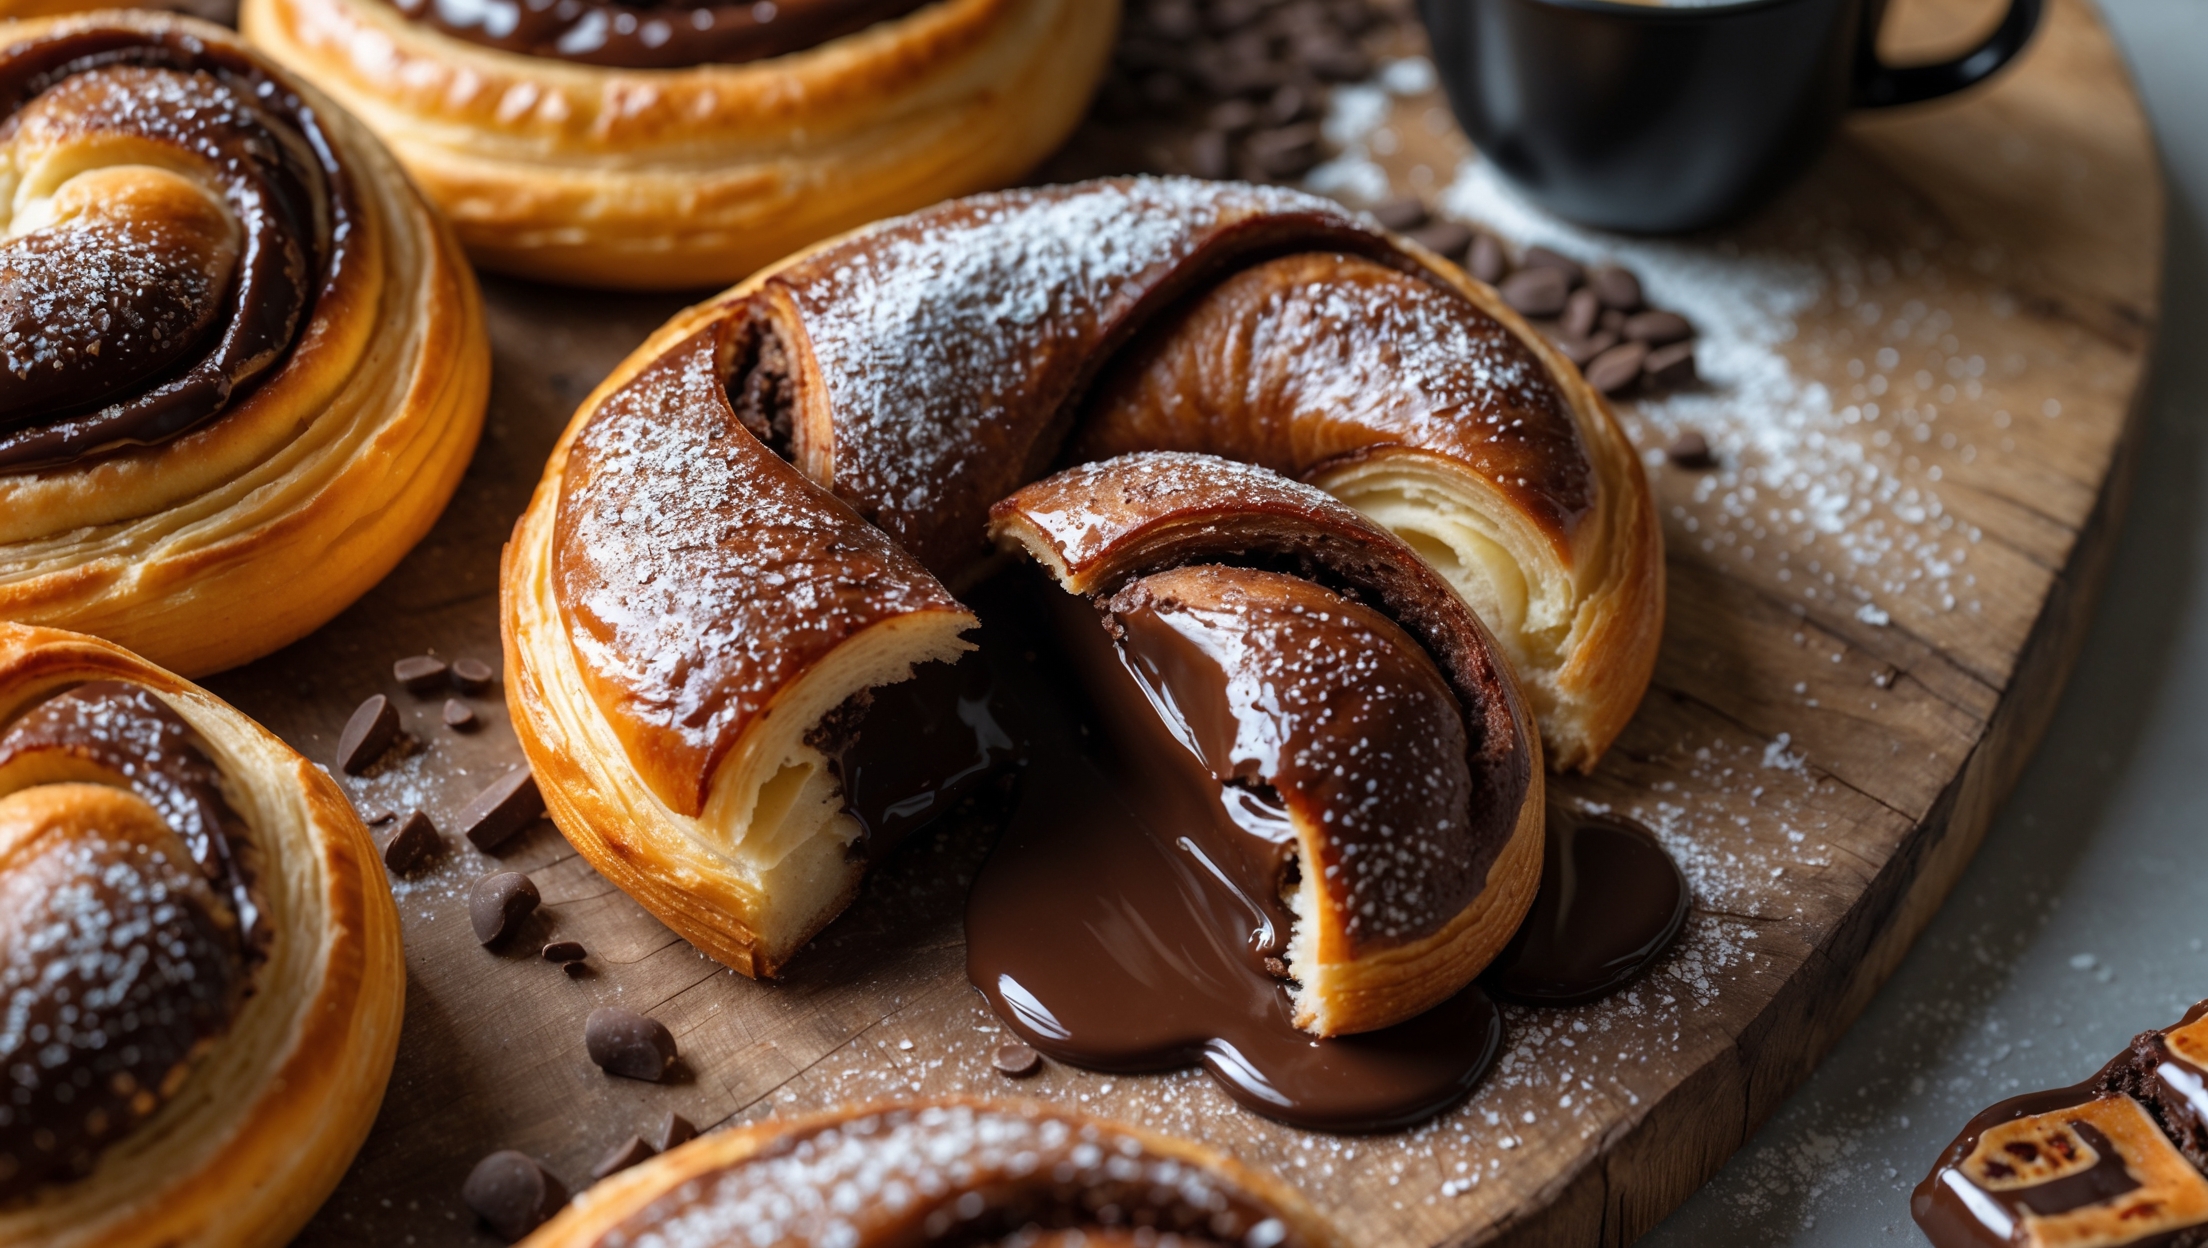
Learn how to make the best homemade chocolate Danish with this foolproof recipe. Featuring buttery laminated dough and rich chocolate filling, this easy baking recipe creates bakery-quality results. Perfect for breakfast treats or impressive brunch offerings that showcase classic Danish pastry techniques.
Difficulty:
Intermediate
Prep Time:
3 hours 30 mins
Cook Time:
20 mins
Serves:
12 pastries
An overhead shot of golden-brown chocolate Danish pastries arranged on a rustic wooden board, with one Danish in the foreground cut open to reveal the glossy chocolate filling oozing slightly. Soft natural morning light highlights the flaky, laminated layers of the pastry and the sheen of the chocolate. A light dusting of powdered sugar creates contrast against the dark chocolate, while scattered cocoa nibs and a small pot of espresso sit nearby. The pastries show distinct, perfectly caramelized edges and an appetizing butter-rich sheen on their surfaces, capturing the irresistible texture contrast between crisp exterior and soft, chocolatey center.

Ingredients

<ul class="ingredients-main-list"><li class="ingredients-single-item">For the Danish dough:</li><li class="ingredients-single-item">500g all-purpose flour</li><li class="ingredients-single-item">60g granulated sugar</li><li class="ingredients-single-item">7g active dry yeast</li><li class="ingredients-single-item">1 tsp salt</li><li class="ingredients-single-item">240ml cold milk</li><li class="ingredients-single-item">2 large eggs, room temperature</li><li class="ingredients-single-item">1 tsp vanilla extract</li><li class="ingredients-single-item">250g cold unsalted butter, for laminating</li><li class="ingredients-single-item">For the chocolate filling:</li><li class="ingredients-single-item">200g dark chocolate (60-70% cocoa), chopped</li><li class="ingredients-single-item">50g unsalted butter</li><li class="ingredients-single-item">75g granulated sugar</li><li class="ingredients-single-item">25g cocoa powder</li><li class="ingredients-single-item">1 tsp vanilla extract</li><li class="ingredients-single-item">For the egg wash:</li><li class="ingredients-single-item">1 egg beaten with 1 tbsp water</li><li class="ingredients-single-item">For the glaze (optional):</li><li class="ingredients-single-item">100g powdered sugar</li><li class="ingredients-single-item">2-3 tbsp milk</li><li class="ingredients-single-item">1/2 tsp vanilla extract</li></ul>

Equipment

<ul class="equipment-main-list"><li class="equipment-single-item">Stand mixer with dough hook attachment</li><li class="equipment-single-item">Rolling pin</li><li class="equipment-single-item">Ruler or measuring tape</li><li class="equipment-single-item">Pastry brush</li><li class="equipment-single-item">Baking sheets</li><li class="equipment-single-item">Parchment paper</li><li class="equipment-single-item">Serrated knife</li></ul>

Directions

<ol class="no-list-style"><li class="MethodStepper"><h4 class="step-title">Step 1</h4>Start by making the dough. In the bowl of your stand mixer, combine the flour, sugar, yeast, and salt. In a separate bowl, whisk together the cold milk, eggs, and vanilla extract. With the mixer on low speed using the dough hook, gradually add the wet ingredients to the dry ingredients. Mix until a soft dough forms, about 5 minutes. The dough should be slightly tacky but not sticky – add a tablespoon of flour if needed.</li><li class="MethodStepper"><h4 class="step-title">Step 2</h4>Turn the dough onto a lightly floured surface and knead for 1-2 minutes until smooth. Shape into a rectangle, wrap tightly in plastic wrap, and refrigerate for at least 1 hour. Cold dough is essential for lamination as it prevents the butter from melting into the layers.</li><li class="MethodStepper"><h4 class="step-title">Step 3</h4>While the dough chills, prepare your butter block for lamination. Place the cold butter between two sheets of parchment paper and beat with a rolling pin to soften slightly. Shape into a 20cm x 15cm rectangle, keeping the edges straight. Return to the refrigerator until ready to use.</li><li class="MethodStepper"><h4 class="step-title">Step 4</h4>On a lightly floured surface, roll the chilled dough into a 30cm x 20cm rectangle. Place the butter block on one half of the dough, leaving a 1cm border. Fold the other half of the dough over the butter and press the edges to seal completely, trapping the butter inside. This butter package is the foundation of your flaky layers.</li><li class="MethodStepper"><h4 class="step-title">Step 5</h4>Roll the dough into a 45cm x 20cm rectangle, keeping the edges straight and even. Perform your first fold by folding the bottom third of the dough up, then the top third down (like folding a letter). Wrap in plastic wrap and refrigerate for 30 minutes. This "letter fold" creates the initial layers in your Danish dough.</li><li class="MethodStepper"><h4 class="step-title">Step 6</h4>Repeat the rolling and folding process two more times, always chilling the dough for 30 minutes between folds. After the final fold, wrap the dough tightly and refrigerate for at least 2 hours or overnight. This resting period allows the gluten to relax and the butter to firm up, making the dough easier to shape.</li><li class="MethodStepper"><h4 class="step-title">Step 7</h4>Meanwhile, prepare the chocolate filling. In a heatproof bowl set over simmering water (don't let the bowl touch the water), melt the chocolate and butter together. Remove from heat and stir in sugar, cocoa powder, and vanilla until smooth. Let cool until spreadable but not runny.</li><li class="MethodStepper"><h4 class="step-title">Step 8</h4>When ready to shape, line two baking sheets with parchment paper. Remove the dough from the refrigerator and divide in half. Return one half to the refrigerator while working with the other.</li><li class="MethodStepper"><h4 class="step-title">Step 9</h4>Roll the dough into a 30cm x 40cm rectangle about 3-4mm thick. Trim the edges with a sharp knife to create clean lines. Cut the dough into 12 equal squares (approximately 10cm each).</li><li class="MethodStepper"><h4 class="step-title">Step 10</h4>Place a tablespoon of chocolate filling in the center of each square. To form the traditional Danish shape, cut from each corner toward the center (leaving about 2cm uncut in the middle). Fold every other point to the center, pressing gently to seal. Alternatively, fold two opposite corners to the center for a simpler shape.</li><li class="MethodStepper"><h4 class="step-title">Step 11</h4>Transfer the shaped pastries to the prepared baking sheets, leaving 5cm between each. Cover loosely with plastic wrap and let rise in a warm place for 45-60 minutes until puffy (but not doubled). The pastries should look slightly swollen and feel soft when gently pressed.</li><li class="MethodStepper"><h4 class="step-title">Step 12</h4>Preheat your oven to 190°C. Just before baking, brush the pastries with egg wash for a golden shine. Bake for 18-20 minutes, rotating the pans halfway through, until deeply golden brown. The high heat helps create the characteristic flaky texture as the butter between layers creates steam.</li><li class="MethodStepper"><h4 class="step-title">Step 13</h4>Allow the Danish pastries to cool on the baking sheets for 5 minutes, then transfer to a wire rack. If desired, while still warm, prepare the glaze by whisking together powdered sugar, milk, and vanilla until smooth. Drizzle over the pastries.</li><li class="MethodStepper"><h4 class="step-title">Step 14</h4>Serve the Danish pastries slightly warm or at room temperature. They're best enjoyed the day they're made, but can be stored in an airtight container for up to 2 days. To refresh, warm in a 150°C oven for 5 minutes. Your homemade chocolate Danish will have beautiful flaky layers with a rich, decadent chocolate center – a true testament to your baking skills!</li></ol>

FAQs

Find answers to your most pressing questions about this delicious recipe right here.

What ingredients are used in Chocolate Danish Recipe?

The key ingredients include all-purpose flour, granulated sugar, active dry yeast, cold milk, eggs, vanilla extract, and cold unsalted butter for the dough. The chocolate filling requires dark chocolate, butter, sugar, cocoa powder, and vanilla. Optional glaze uses powdered sugar and milk.

How to cook Chocolate Danish Recipe at home?

Learn how to cook Chocolate Danish by preparing a laminated dough with cold butter folded in three times, creating delicate layers. After shaping squares with chocolate filling, let them rise before baking at 190°C for 18-20 minutes until golden brown. The careful folding technique creates a professional-quality pastry with a flaky texture.

What makes Danish pastry dough different from regular bread dough?

Danish pastry dough is a laminated dough, similar to croissants, where butter is folded between layers of yeasted dough. This creates the characteristic flaky, buttery texture with distinct layers, unlike regular bread dough which is simply kneaded. The process of folding creates hundreds of thin layers.

Can I freeze unbaked Danish pastries for later use?

Yes, after shaping but before the final rise, place pastries on a tray in the freezer until solid, then transfer to freezer bags for up to 1 month. When ready to bake, thaw overnight in the refrigerator, let rise at room temperature for 1-2 hours, then bake as directed.

What's the secret to achieving perfectly flaky layers in laminated pastry?

The key to perfect flaky layers is keeping everything cold throughout the process. Use cold butter, chill the dough between folds, and work quickly. Maintaining straight edges when rolling ensures even layers, and allowing proper resting time between folds helps the gluten relax.

Want to try something else in ...

Danish Pastry

Try following recommended recipes

{ "@context": "http://schema.org/", "@type": "Recipe", "name": "Chocolate Danish Recipe", "author": { "@type": "Person", "name": "Gurbir Aujla", "brand": "What's Baking?", "jobTitle": "Baker" }, "datePublished": "2024-06-11", "description": "Learn how to make the best homemade chocolate Danish with this foolproof recipe. Featuring buttery laminated dough and rich chocolate filling, this easy baking recipe creates bakery-quality results. Perfect for breakfast treats or impressive brunch offerings that showcase classic Danish pastry techniques.", "prepTime": "PT3H30M", "cookTime": "PT20M", "totalTime": "PT3H50M", "keywords": "chocolate danish, laminated dough, breakfast pastry, chocolate filling, danish pastry", "recipeYield": "12", "recipeCategory": "Breakfast", "recipeCuisine": "Danish", "nutrition": { "@type": "NutritionInformation", "calories": "320 calories", "carbohydrateContent": "35 g", "proteinContent": "5 g", "fatContent": "18 g", "saturatedFatContent": "10 g", "cholesterolContent": "75 mg", "sodiumContent": "180 mg", "sugarContent": "15 g", "servingSize": "1 serving" }, "recipeIngredient": [ "500g all-purpose flour", "60g granulated sugar", "7g active dry yeast", "1 tsp salt", "240ml cold milk", "2 large eggs, room temperature", "1 tsp vanilla extract", "250g cold unsalted butter, for laminating", "200g dark chocolate (60-70% cocoa), chopped", "50g unsalted butter", "75g granulated sugar", "25g cocoa powder", "1 tsp vanilla extract", "1 egg beaten with 1 tbsp water", "100g powdered sugar", "2-3 tbsp milk", "1/2 tsp vanilla extract" ], "recipeInstructions": [ { "@type": "HowToStep", "name": "Make Dough", "text": "In the bowl of your stand mixer, combine the flour, sugar, yeast, and salt. In a separate bowl, whisk together the cold milk, eggs, and vanilla extract. With the mixer on low speed using the dough hook, gradually add the wet ingredients to the dry ingredients. Mix until a soft dough forms, about 5 minutes. The dough should be slightly tacky but not sticky – add a tablespoon of flour if needed." }, { "@type": "HowToStep", "name": "Initial Chill", "text": "Turn the dough onto a lightly floured surface and knead for 1-2 minutes until smooth. Shape into a rectangle, wrap tightly in plastic wrap, and refrigerate for at least 1 hour. Cold dough is essential for lamination as it prevents the butter from melting into the layers." }, { "@type": "HowToStep", "name": "Prepare Butter Block", "text": "While the dough chills, prepare your butter block for lamination. Place the cold butter between two sheets of parchment paper and beat with a rolling pin to soften slightly. Shape into a 20cm x 15cm rectangle, keeping the edges straight. Return to the refrigerator until ready to use." }, { "@type": "HowToStep", "name": "Encase Butter", "text": "On a lightly floured surface, roll the chilled dough into a 30cm x 20cm rectangle. Place the butter block on one half of the dough, leaving a 1cm border. Fold the other half of the dough over the butter and press the edges to seal completely, trapping the butter inside. This butter package is the foundation of your flaky layers." }, { "@type": "HowToStep", "name": "First Fold", "text": "Roll the dough into a 45cm x 20cm rectangle, keeping the edges straight and even. Perform your first fold by folding the bottom third of the dough up, then the top third down (like folding a letter). Wrap in plastic wrap and refrigerate for 30 minutes. This 'letter fold' creates the initial layers in your Danish dough." }, { "@type": "HowToStep", "name": "Complete Lamination", "text": "Repeat the rolling and folding process two more times, always chilling the dough for 30 minutes between folds. After the final fold, wrap the dough tightly and refrigerate for at least 2 hours or overnight. This resting period allows the gluten to relax and the butter to firm up, making the dough easier to shape." }, { "@type": "HowToStep", "name": "Prepare Filling", "text": "In a heatproof bowl set over simmering water (don't let the bowl touch the water), melt the chocolate and butter together. Remove from heat and stir in sugar, cocoa powder, and vanilla until smooth. Let cool until spreadable but not runny." }, { "@type": "HowToStep", "name": "Shape Pastries", "text": "Roll the dough into a 30cm x 40cm rectangle about 3-4mm thick. Trim the edges with a sharp knife to create clean lines. Cut the dough into 12 equal squares. Place a tablespoon of chocolate filling in the center of each square. Cut from each corner toward the center (leaving about 2cm uncut in the middle). Fold every other point to the center, pressing gently to seal." }, { "@type": "HowToStep", "name": "Final Proof", "text": "Transfer the shaped pastries to prepared baking sheets, leaving 5cm between each. Cover loosely with plastic wrap and let rise in a warm place for 45-60 minutes until puffy (but not doubled). The pastries should look slightly swollen and feel soft when gently pressed." }, { "@type": "HowToStep", "name": "Bake", "text": "Preheat your oven to 190°C. Just before baking, brush the pastries with egg wash for a golden shine. Bake for 18-20 minutes, rotating the pans halfway through, until deeply golden brown. The high heat helps create the characteristic flaky texture as the butter between layers creates steam." }, { "@type": "HowToStep", "name": "Glaze and Serve", "text": "Allow the Danish pastries to cool on the baking sheets for 5 minutes, then transfer to a wire rack. If desired, while still warm, prepare the glaze by whisking together powdered sugar, milk, and vanilla until smooth. Drizzle over the pastries. Serve slightly warm or at room temperature." } ], "aggregateRating": { "@type": "AggregateRating", "ratingValue": "5", "ratingCount": "175" }, "review": [ { "@type": "Review", "author": "Mikael Svensson", "datePublished": "2024-06-02", "reviewBody": "Perfect flakiness with rich chocolate center! I've tried many Danish recipes and this one delivers the perfect balance of buttery layers and decadent chocolate. The lamination technique works beautifully.", "name": "Bakery-Quality Results", "reviewRating": { "@type": "Rating", "ratingValue": "5" } }, { "@type": "Review", "author": "Priya Sharma", "datePublished": "2024-06-05", "reviewBody": "Better than bakery versions! I was intimidated by the lamination process at first, but the detailed instructions made it manageable. The chocolate filling is absolutely divine - rich without being too sweet.", "name": "Worth Every Minute", "reviewRating": { "@type": "Rating", "ratingValue": "5" } }, { "@type": "Review", "author": "Claire Dubois", "datePublished": "2024-06-08", "reviewBody": "Family devoured these in minutes! The pastry has that perfect contrast between crisp exterior and tender interior. I'll be making these again for our next brunch gathering.", "name": "Perfect Weekend Project", "reviewRating": { "@type": "Rating", "ratingValue": "5" } }, { "@type": "Review", "author": "Hiroshi Tanaka", "datePublished": "2024-06-10", "reviewBody": "Impressive results for my first attempt! I never thought I could make something this professional looking at home. The step-by-step instructions were clear and the pastries turned out beautifully layered.", "name": "Surprisingly Achievable", "reviewRating": { "@type": "Rating", "ratingValue": "5" } }, { "@type": "Review", "author": "Isabella Rossi", "datePublished": "2024-06-12", "reviewBody": "Buttery layers melted in mouth! The chocolate filling recipe is perfect - not too sweet and with deep chocolate flavor. I added some orange zest to the filling which complemented the chocolate beautifully.", "name": "Chocolate Perfection", "reviewRating": { "@type": "Rating", "ratingValue": "5" } } ], "url": "https://www.whatsbaking.co/recipes/chocolate-danish-recipe" }
{ "@context": "https://schema.org", "@type": "FAQPage", "mainEntity": [ { "@type": "Question", "name": "What ingredients are used in Chocolate Danish Recipe?", "acceptedAnswer": { "@type": "Answer", "text": "The key ingredients include all-purpose flour, granulated sugar, active dry yeast, cold milk, eggs, vanilla extract, and cold unsalted butter for the dough. The chocolate filling requires dark chocolate, butter, sugar, cocoa powder, and vanilla. Optional glaze uses powdered sugar and milk." } }, { "@type": "Question", "name": "How to cook Chocolate Danish Recipe at home?", "acceptedAnswer": { "@type": "Answer", "text": "Learn how to cook Chocolate Danish by preparing a laminated dough with cold butter folded in three times, creating delicate layers. After shaping squares with chocolate filling, let them rise before baking at 190°C for 18-20 minutes until golden brown. The careful folding technique creates a professional-quality pastry with a flaky texture." } }, { "@type": "Question", "name": "What makes Danish pastry dough different from regular bread dough?", "acceptedAnswer": { "@type": "Answer", "text": "Danish pastry dough is a laminated dough, similar to croissants, where butter is folded between layers of yeasted dough. This creates the characteristic flaky, buttery texture with distinct layers, unlike regular bread dough which is simply kneaded. The process of folding creates hundreds of thin layers." } }, { "@type": "Question", "name": "Can I freeze unbaked Danish pastries for later use?", "acceptedAnswer": { "@type": "Answer", "text": "Yes, after shaping but before the final rise, place pastries on a tray in the freezer until solid, then transfer to freezer bags for up to 1 month. When ready to bake, thaw overnight in the refrigerator, let rise at room temperature for 1-2 hours, then bake as directed." } }, { "@type": "Question", "name": "What's the secret to achieving perfectly flaky layers in laminated pastry?", "acceptedAnswer": { "@type": "Answer", "text": "The key to perfect flaky layers is keeping everything cold throughout the process. Use cold butter, chill the dough between folds, and work quickly. Maintaining straight edges when rolling ensures even layers, and allowing proper resting time between folds helps the gluten relax." } } ] }