Cherry Danish Recipe
Ingredients
Equipment
Directions
FAQs
Find answers to your most pressing questions about this delicious recipe right here.
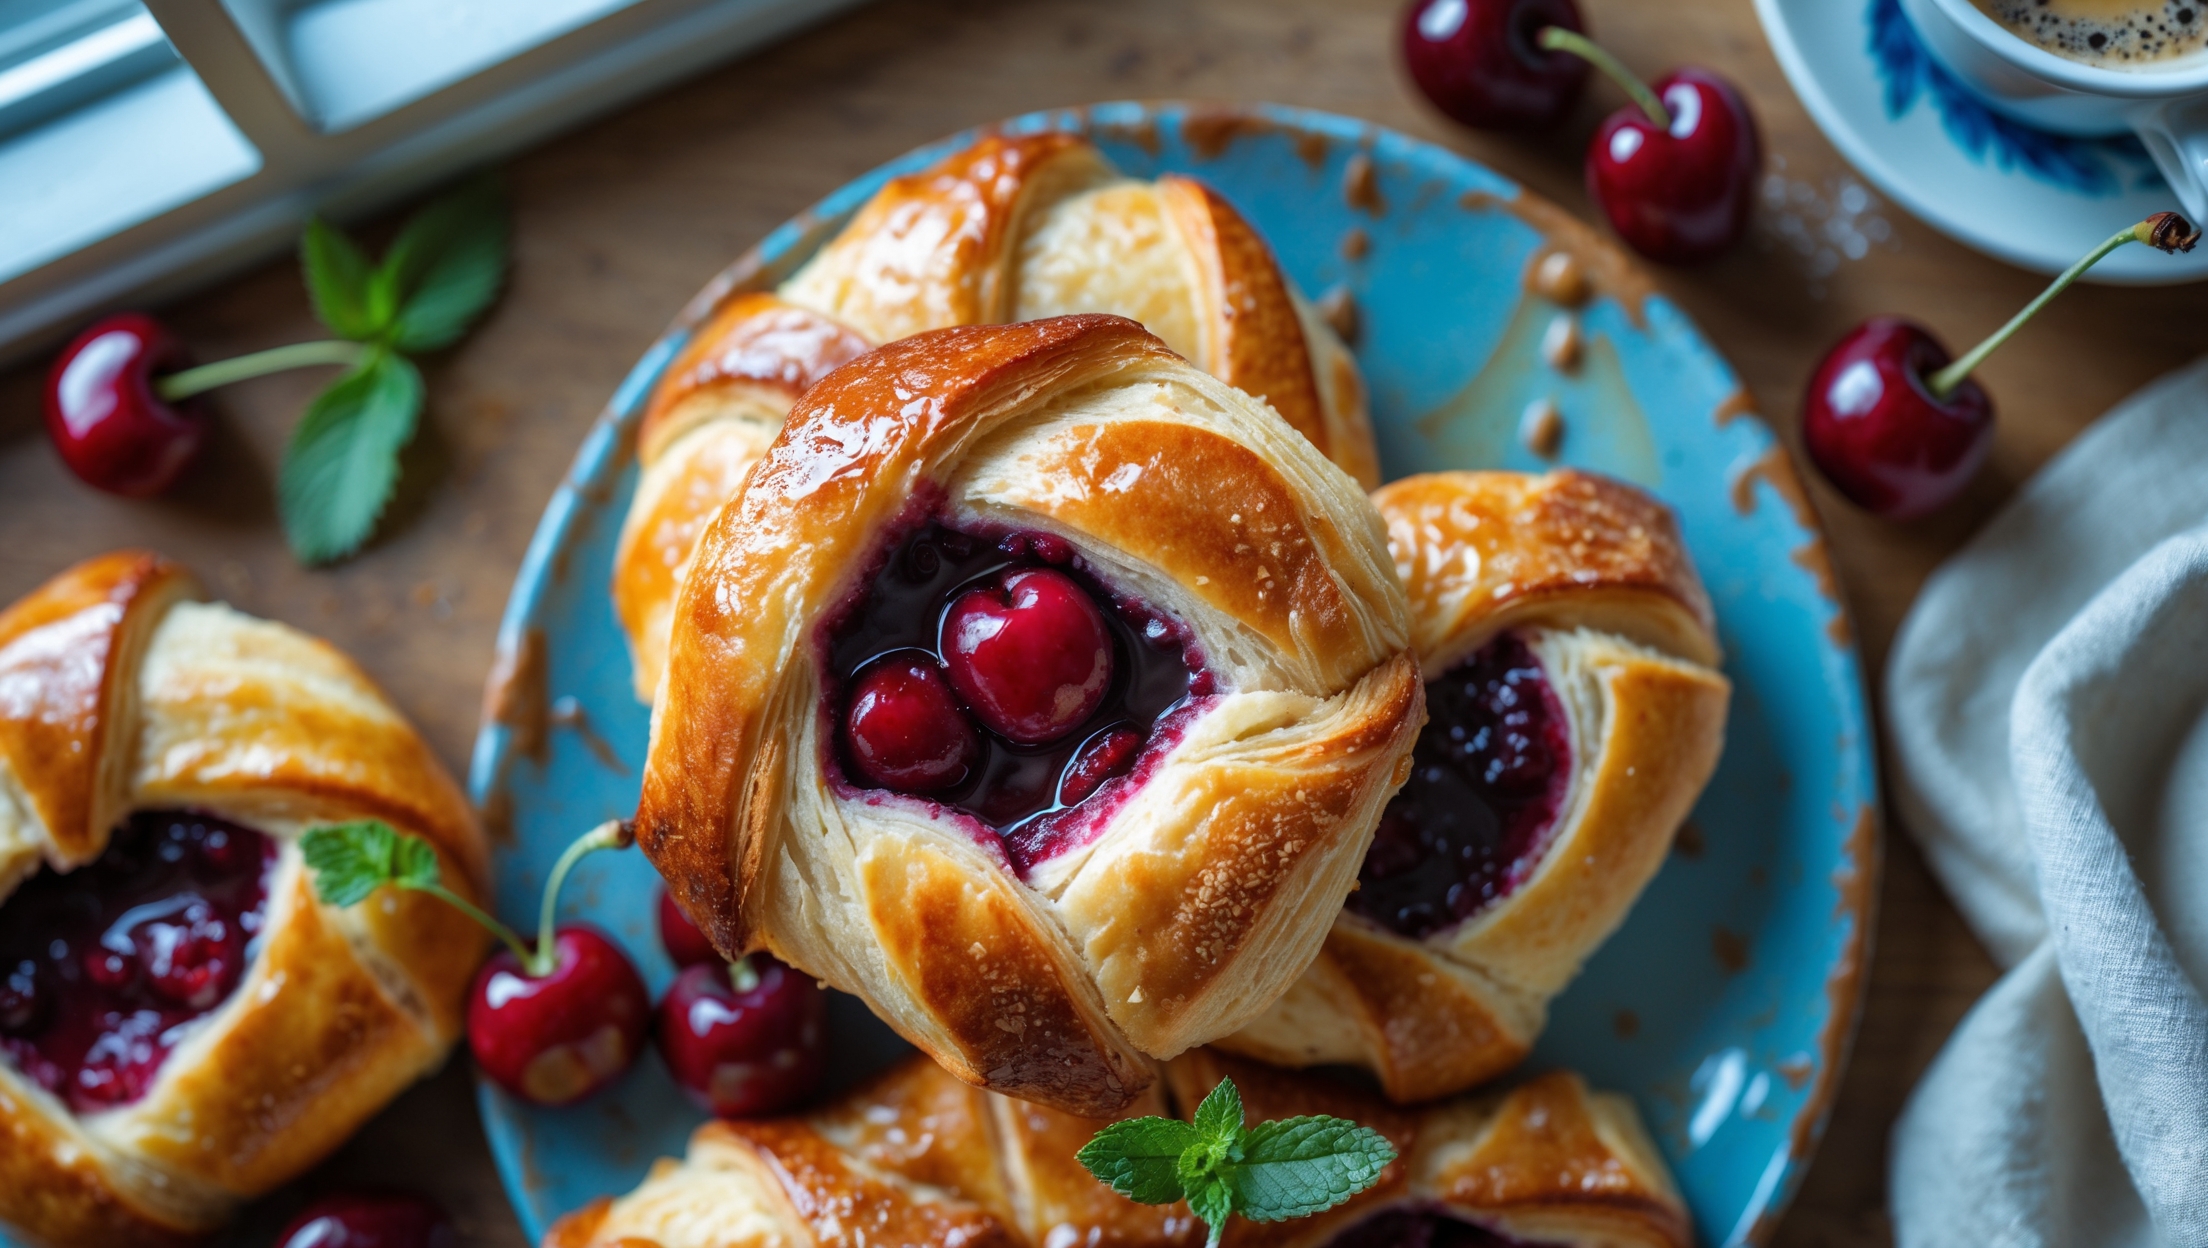
Cherry Danish Recipe requires strong bread flour, yeast, sugar, eggs, milk, water, unsalted butter, fresh or frozen cherries, lemon juice, cornstarch, almond extract (optional), powdered sugar for glaze, and optional pearl sugar for decoration.
Learn how to cook Cherry Danish Recipe by making a laminated dough with three butter folds, preparing a homemade cherry filling, shaping the pastries, and baking at 190°C for 18-20 minutes until golden brown. The key to perfect danishes is allowing proper chilling time between folds and ensuring the cherry filling is completely cooled before use.
The secret lies in the lamination process - keeping butter cold between folds, maintaining the correct temperature throughout, and allowing proper resting time between folds. The cold butter creates steam during baking, pushing the dough layers apart to create that coveted flaky texture.
Absolutely! While cherry filling creates a classic flavour, you can substitute with other fruit compotes like apple, blueberry or apricot. Cream cheese fillings, chocolate, or almond frangipane also work beautifully. Just ensure any filling is thick enough not to make the pastry soggy.
Properly proofed Danish pastries will look visibly puffy and have increased in size by about 50% (not fully doubled). When gently pressed with a finger, the dough should spring back slowly but not completely. Underproofed pastries will be dense, while overproofed ones may collapse.
Danish Pastry
Try following recommended recipes


