Cheese Danish Recipe
Ingredients
Equipment
Directions
FAQs
Find answers to your most pressing questions about this delicious recipe right here.
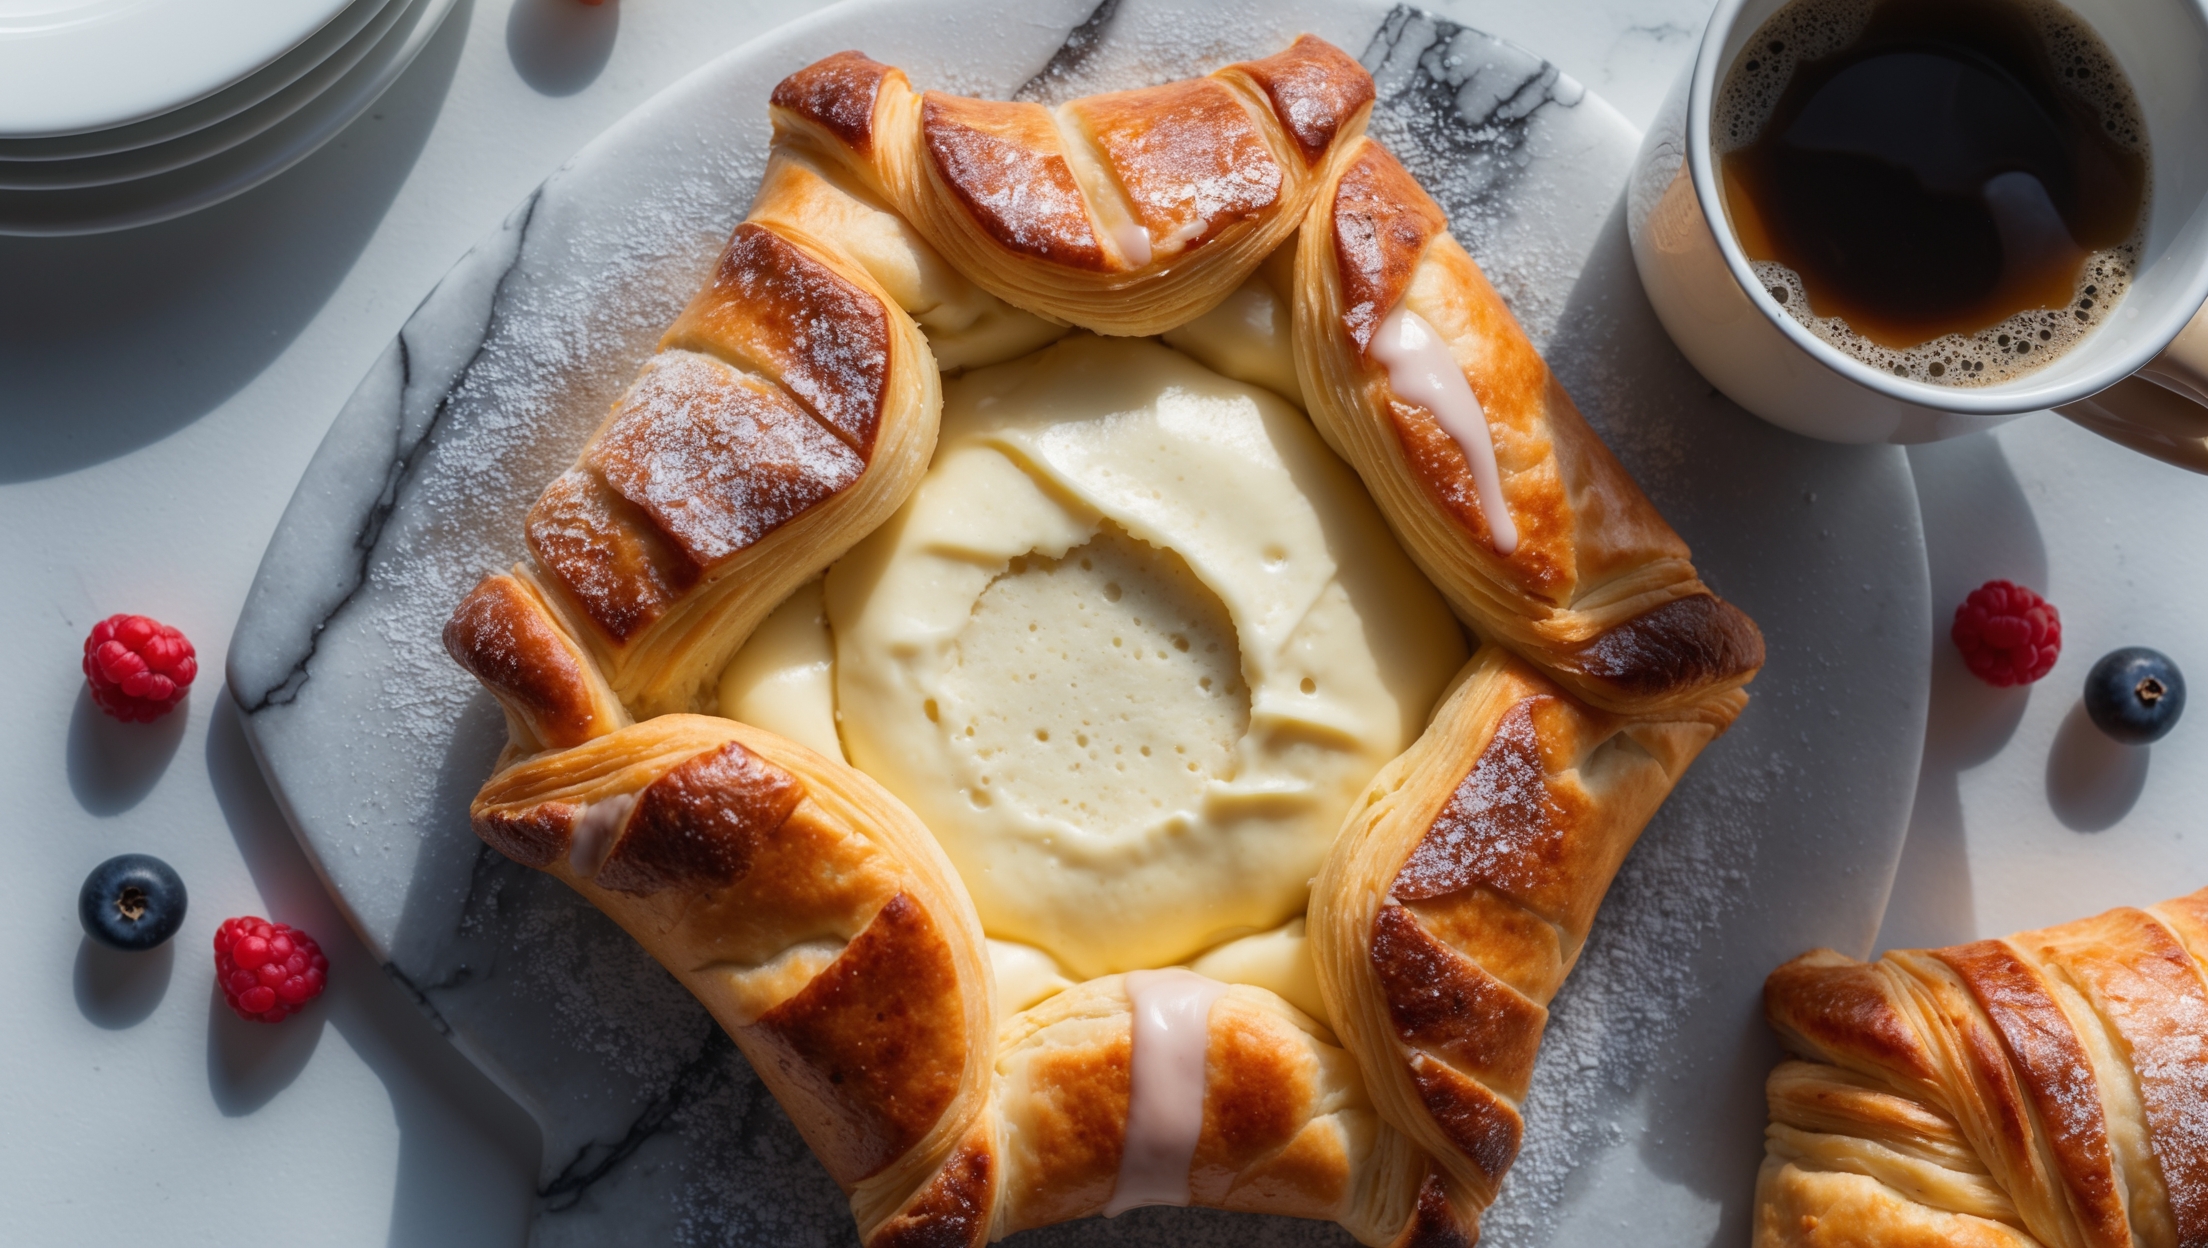
The key ingredients for cheese danish are all-purpose flour, sugar, yeast, milk, egg, butter for lamination, cream cheese, vanilla extract, and lemon juice. The pastry requires cold butter for creating those signature flaky layers, while the filling needs full-fat cream cheese for the perfect creamy texture.
Learn how to cook Cheese Danish Recipe by creating laminated dough through a series of folds, preparing a cream cheese filling, and shaping the pastries before baking. The process involves chilling the dough between folds to develop layers, then cutting into squares, adding filling, folding corners inward, and baking at 190°C until golden brown. Finish with a sweet vanilla glaze.
Lamination creates distinct layers of dough separated by butter, which produce the signature flaky texture when baked. As the pastry heats up, the butter melts and creates steam, forcing the dough layers apart. This process results in that characteristic light, airy, and delicately crisp pastry with visible layers.
Yes, danish pastry dough benefits from advance preparation. After completing the lamination process, you can refrigerate the dough for up to 48 hours or freeze it for up to 1 month. This not only saves time but also allows the gluten to relax and the butter layers to firm up, resulting in better texture.
The secret lies in using room temperature cream cheese, beating it thoroughly with sugar until completely smooth, and adding cornstarch as a stabiliser. The lemon juice adds brightness while preventing an overly sweet taste. For the silkiest texture, mix just until ingredients are incorporated without overbeating.
Danish Pastry
Try following recommended recipes


