Cardamom Danish Recipe
Ingredients
Equipment
Directions
FAQs
Find answers to your most pressing questions about this delicious recipe right here.
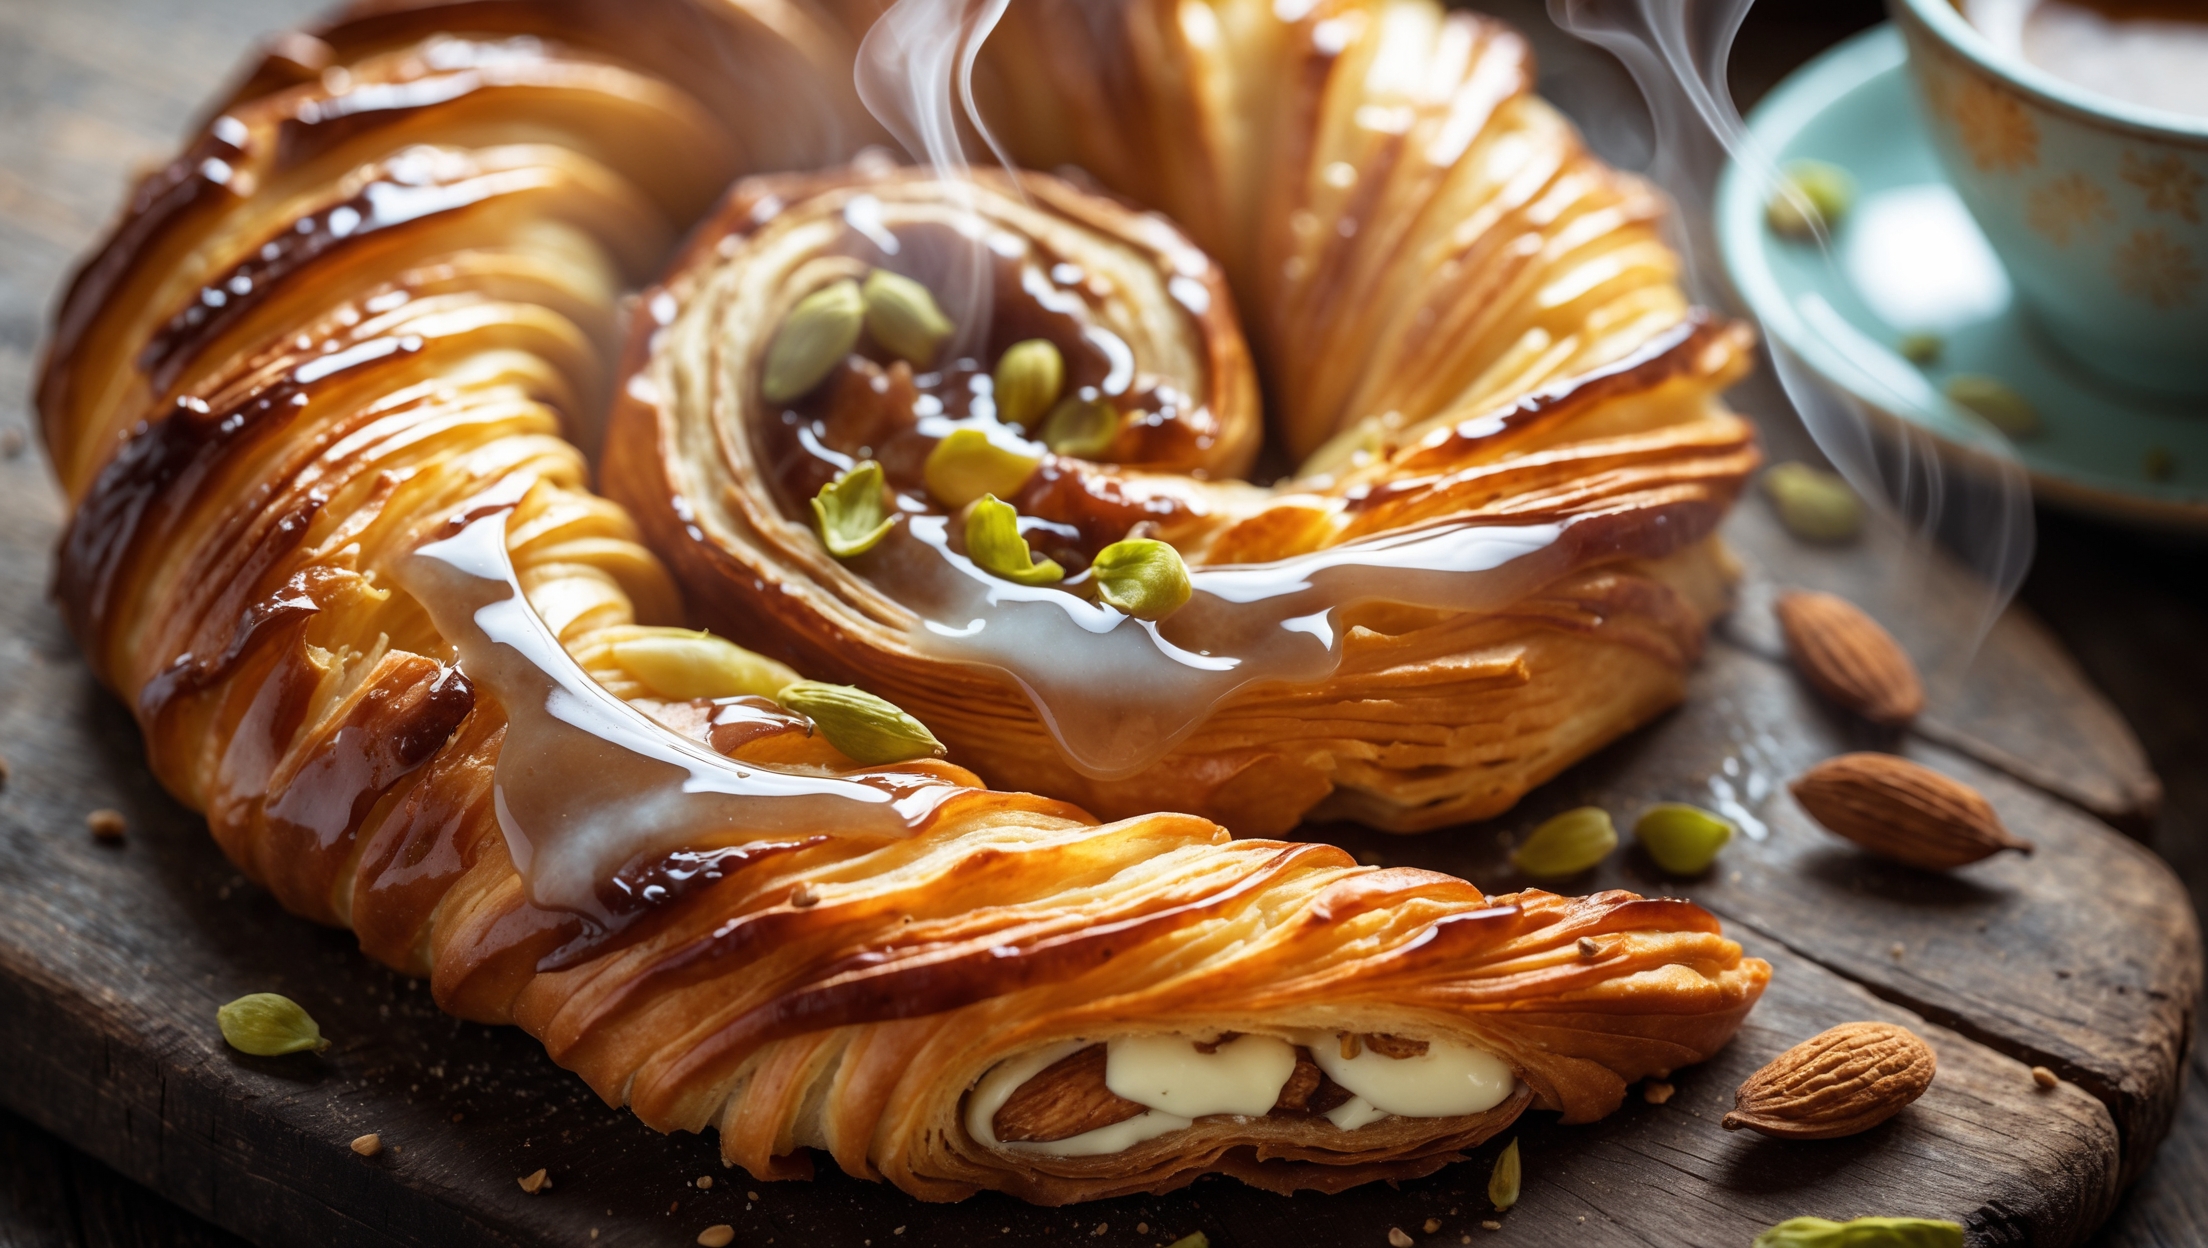
This recipe uses bread flour, sugar, yeast, salt, ground cardamom, eggs, milk, unsalted butter for lamination, and an almond filling made with butter, sugar, ground almonds, eggs, vanilla, and cardamom. It's finished with a simple icing sugar glaze.
Learn how to cook Cardamom Danish Recipe by making a cardamom-infused dough, creating a butter block for lamination, and folding the dough multiple times to create those signature flaky layers. After shaping and filling with almond cream, bake until golden brown and finish with a sweet glaze for that authentic bakery finish.
The key to flaky Danish pastry is maintaining the right temperature - keep butter cold but pliable. Proper folding technique creates distinct layers, and chilling between turns prevents butter from melting into the dough. Patience during the lamination process is essential for bakery-quality results.
Yes, you can prepare the dough and complete the lamination process a day ahead, keeping it refrigerated. Alternatively, shape the pastries, freeze them unproofed, then thaw overnight in the refrigerator before proofing and baking. Baked pastries can also be frozen for up to a month.
Cardamom became popular in Nordic countries through the spice trade routes and pairs perfectly with their baking traditions. Its warm, aromatic qualities complement the butter-rich pastries common in Scandinavian cuisine. The spice adds complexity that balances the sweetness in traditional treats.
Danish Pastry
Try following recommended recipes


