Bear Claws Recipe
Ingredients
Equipment
Directions
FAQs
Find answers to your most pressing questions about this delicious recipe right here.
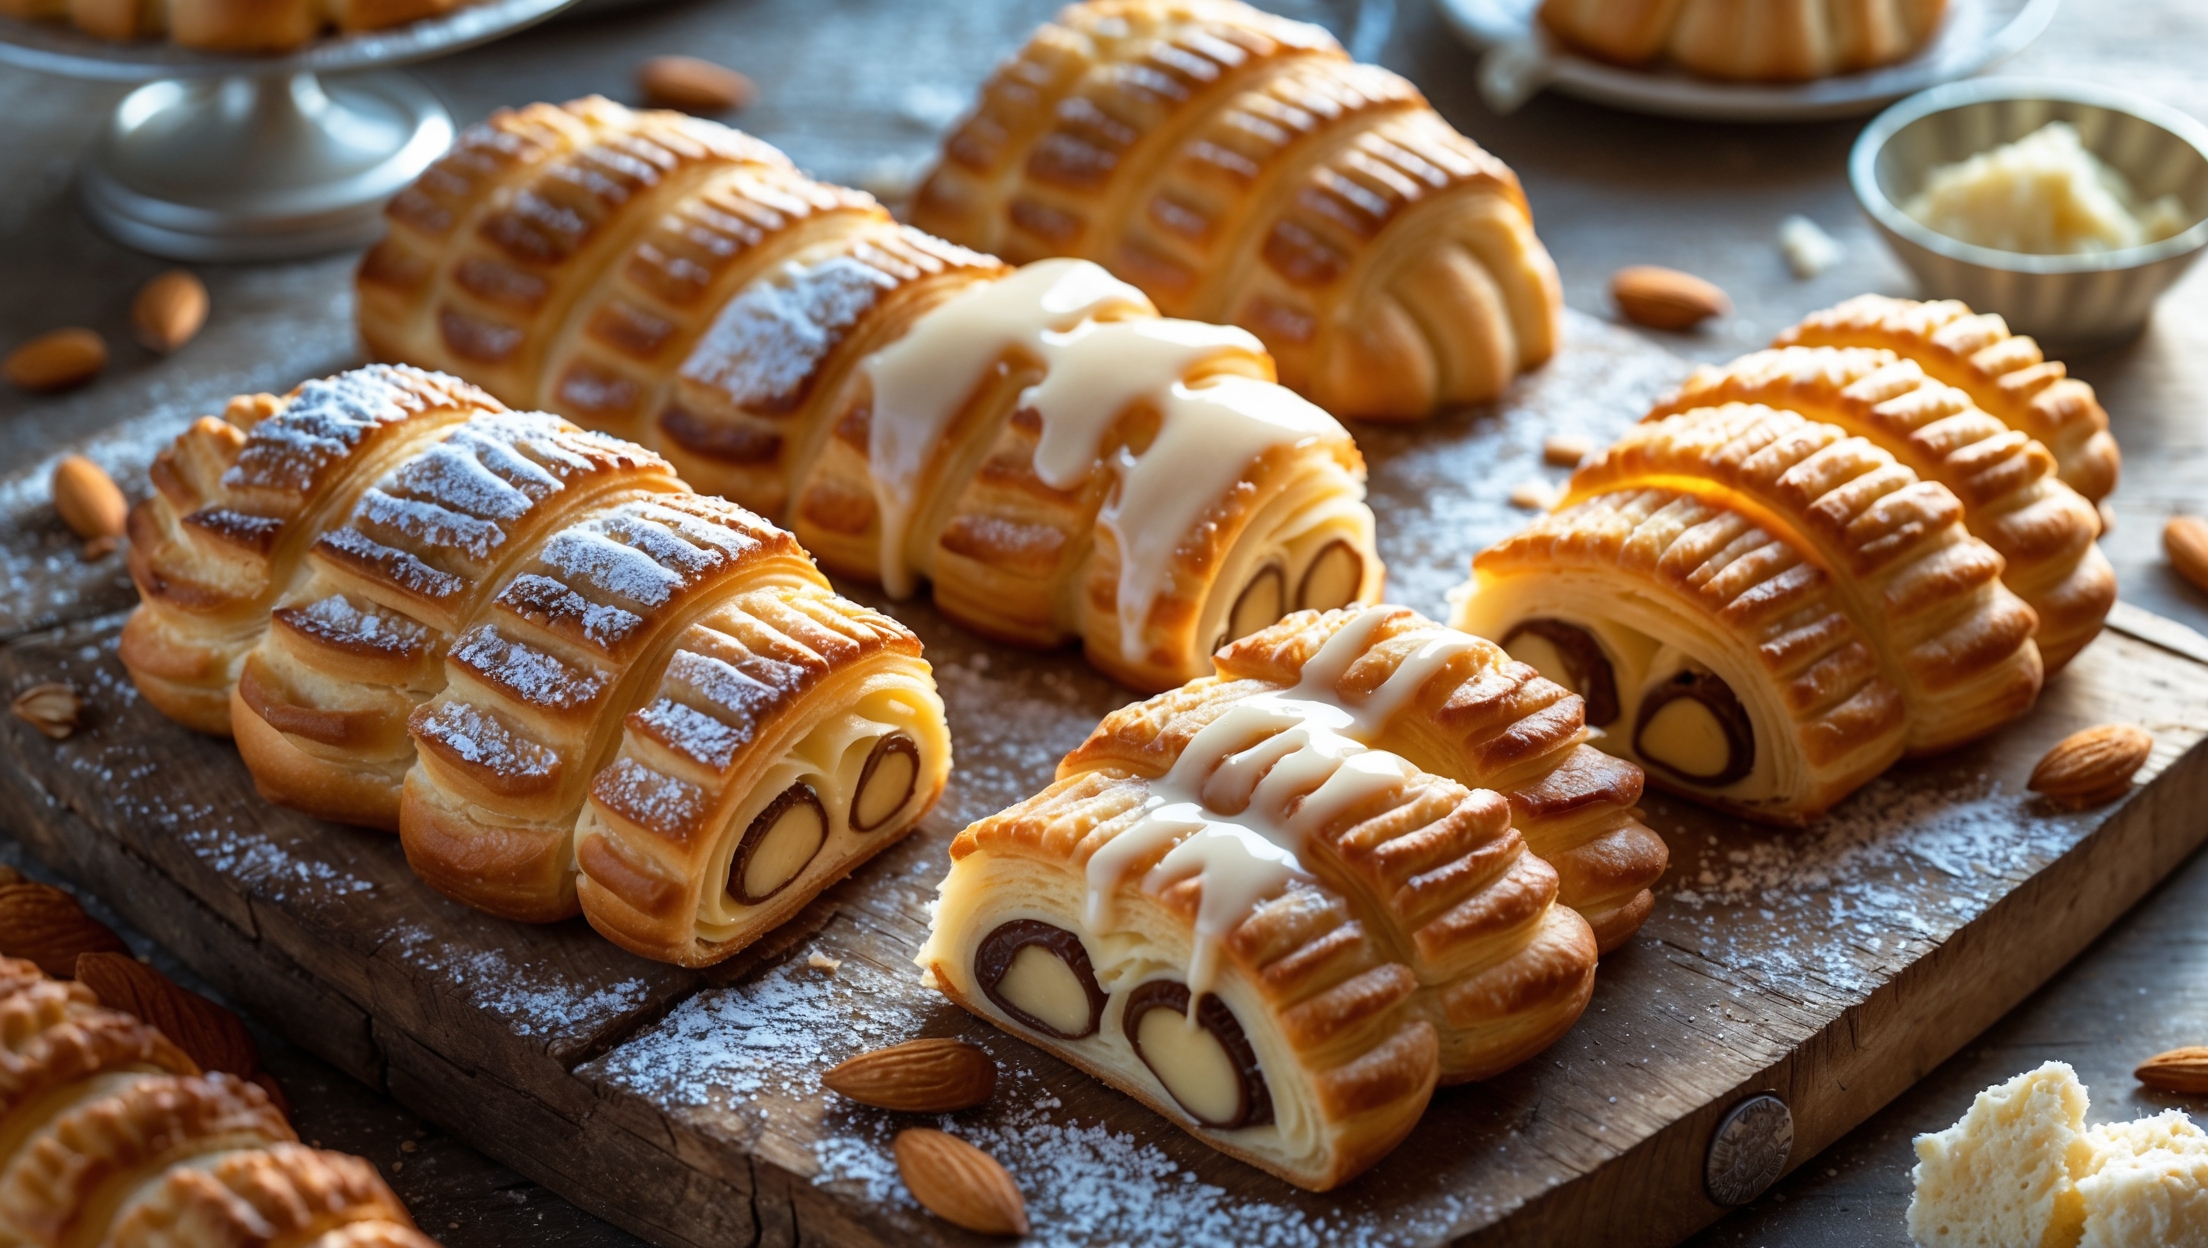
Bear Claws require Danish dough ingredients (flour, yeast, sugar, milk, egg, butter), almond filling components (almond paste, sugar, butter, egg, almond extract), and finishing touches like sliced almonds and a simple powdered sugar glaze.
Learn how to cook Bear Claws Recipe by creating a laminated Danish dough through multiple folding and chilling cycles, then filling with almond paste mixture. Shape into distinctive "claw" forms by cutting slits, brush with egg wash, sprinkle with almonds, and bake at 190°C for 18-20 minutes until golden brown before glazing.
Flakiness issues typically stem from butter melting prematurely during lamination. Keep ingredients cold, work quickly, and maintain proper chilling times between folds. If your kitchen is warm, refrigerate the dough more frequently. The butter must remain solid to create distinct layers.
Yes! The laminated dough can be refrigerated for up to 3 days or frozen for a month. If frozen, thaw overnight in the refrigerator before shaping. This makes bear claws more manageable as you can prepare the time-intensive dough days before assembling and baking.
Almond paste is coarser and less sweet than marzipan, making it ideal for baking. Marzipan contains more sugar and is smoother, typically used for decorating. For bear claws, almond paste is traditional, but marzipan can work if you reduce the added sugar in the filling.
Danish Pastry
Try following recommended recipes


