54-Layer Danish Dough with Cultured Butter and Sourdough Base Recipe
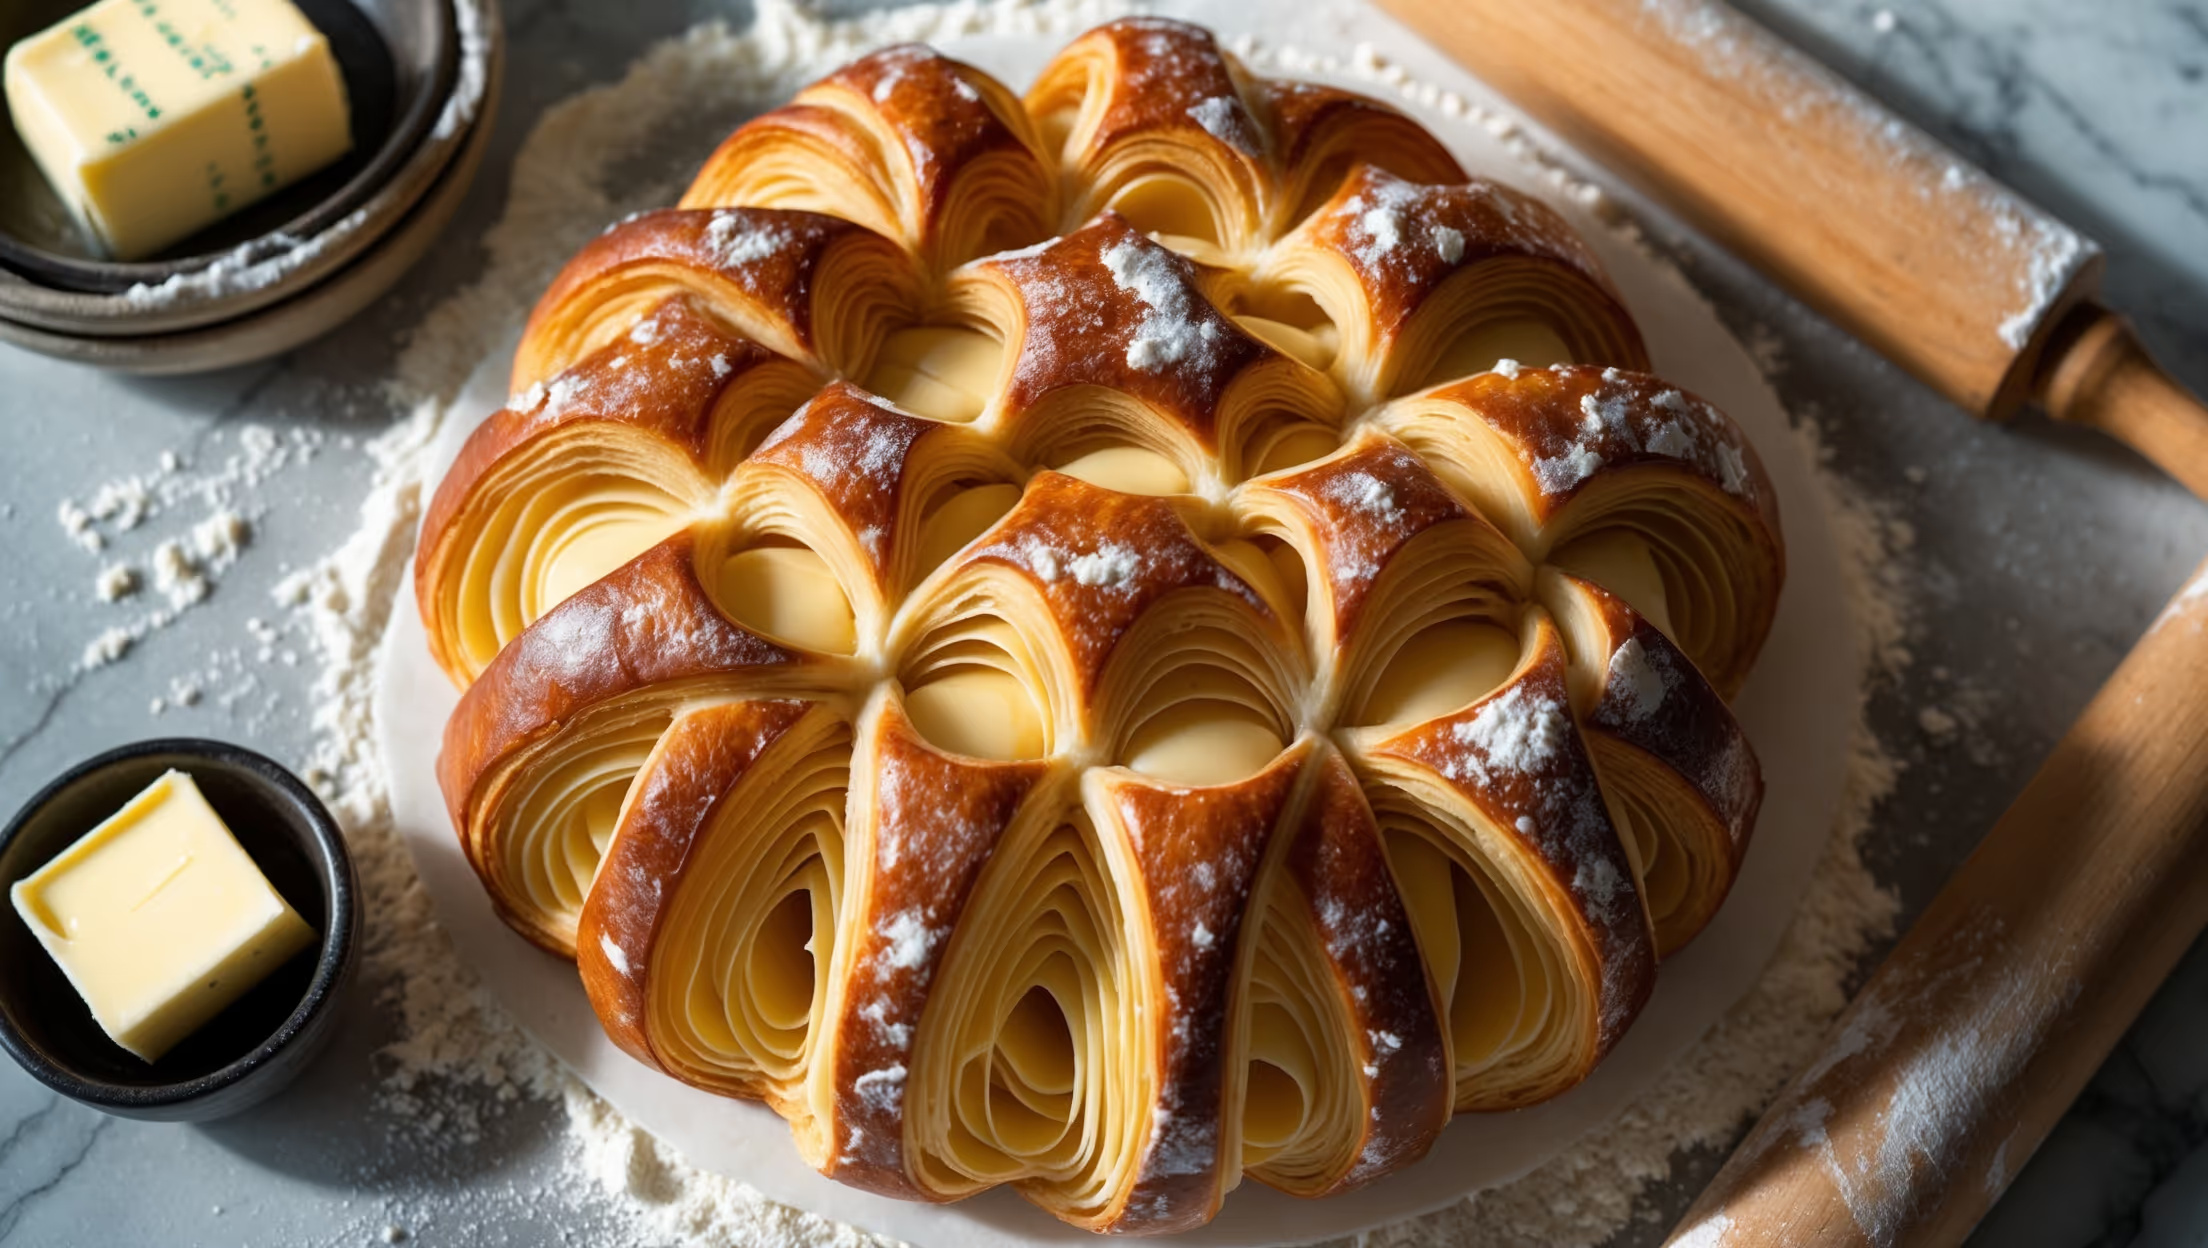
Learn how to make the best homemade 54-layer Danish dough using traditional lamination techniques with a modern sourdough twist. This master recipe creates exceptionally flaky pastry with deep buttery flavor and tangy notes from the cultured butter and sourdough base - perfect for creating professional-quality Danish pastries at home.
Difficulty:
Advanced
Prep Time:
2 hours 30 mins
Cook Time:
25 mins
Serves:
1 dough (makes 12-16 pastries)
Overhead shot of a freshly baked Danish pastry with clearly visible 54 layers creating a mesmerizing honeycomb pattern. Soft natural light streams in from the side, highlighting the golden-brown, glossy exterior and the buttery, flaky interior layers. A cross-section reveals the perfect lamination - distinct sheets of pastry separated by paper-thin layers of cultured butter. The pastry sits on a flour-dusted marble surface alongside a small dish of cultured butter and a jar of active sourdough starter. A wooden rolling pin and dough scraper rest nearby, dusted with flour, emphasizing the craftsmanship behind this advanced baking technique.

Ingredients

<ul class="ingredients-main-list"><li class="ingredients-single-item">For the sourdough base:</li><li class="ingredients-single-item">100g active sourdough starter (100% hydration)</li><li class="ingredients-single-item">250g bread flour</li><li class="ingredients-single-item">100ml whole milk, cold</li><li class="ingredients-single-item">50ml water, cold</li><li class="ingredients-single-item">25g granulated sugar</li><li class="ingredients-single-item">5g salt</li><li class="ingredients-single-item">For the butter block:</li><li class="ingredients-single-item">250g cultured butter (European-style), cold but pliable</li><li class="ingredients-single-item">20g bread flour</li><li class="ingredients-single-item">For the dough:</li><li class="ingredients-single-item">200g bread flour, plus extra for dusting</li><li class="ingredients-single-item">15g granulated sugar</li><li class="ingredients-single-item">5g salt</li><li class="ingredients-single-item">7g instant dried yeast</li><li class="ingredients-single-item">125ml milk, cold</li><li class="ingredients-single-item">25g unsalted butter, softened</li></ul>

Equipment

<ul class="equipment-main-list"><li class="equipment-single-item">Digital kitchen scale</li><li class="equipment-single-item">Stand mixer with dough hook</li><li class="equipment-single-item">Rolling pin</li><li class="equipment-single-item">Bench scraper</li><li class="equipment-single-item">Ruler or measuring tape</li><li class="equipment-single-item">Baking sheets</li><li class="equipment-single-item">Pastry brush</li><li class="equipment-single-item">Plastic wrap</li></ul>

Directions

<ol class="no-list-style"><li class="MethodStepper"><h4 class="step-title">Step 1</h4>Begin with your sourdough base the day before. Mix the active sourdough starter, bread flour, cold milk, cold water, sugar, and salt in a stand mixer with the dough hook on low speed until just combined. Increase to medium speed and knead for 5-7 minutes until the dough is smooth and elastic. The cold liquids slow fermentation, giving you better control over the process.</li><li class="MethodStepper"><h4 class="step-title">Step 2</h4>Form the sourdough base into a ball, place in a lightly oiled bowl, cover with plastic wrap, and refrigerate overnight (8-12 hours). This slow fermentation develops complex flavors and strengthens the gluten structure, which will help support the many layers we'll create.</li><li class="MethodStepper"><h4 class="step-title">Step 3</h4>The next day, prepare the main dough. In your stand mixer bowl, combine the bread flour, sugar, salt, and yeast. Add the cold milk and softened butter, then mix on low speed until incorporated. Increase to medium speed and knead for 4-5 minutes until smooth and elastic.</li><li class="MethodStepper"><h4 class="step-title">Step 4</h4>Take your chilled sourdough base from the refrigerator and tear it into pieces. Add these pieces to your main dough and continue kneading on medium speed for another 5-7 minutes until both doughs are completely integrated. The dough should pass the windowpane test – you should be able to stretch a small piece until thin enough to see light through without tearing.</li><li class="MethodStepper"><h4 class="step-title">Step 5</h4>Shape the combined dough into a rectangle about 20×30cm. Wrap tightly in plastic wrap and refrigerate for at least 1 hour. This resting period relaxes the gluten, making the dough easier to roll out and preventing shrinkage during lamination.</li><li class="MethodStepper"><h4 class="step-title">Step 6</h4>While the dough chills, prepare your butter block. Place the cold cultured butter between two sheets of parchment paper and use a rolling pin to pound it into a 15×20cm rectangle. Sprinkle the 20g of flour over the butter and fold the parchment paper, continuing to pound and roll until you have a smooth, pliable butter block. The flour helps the butter maintain appropriate consistency during folding. Refrigerate until firm but still pliable, about 15-20 minutes.</li><li class="MethodStepper"><h4 class="step-title">Step 7</h4>On a lightly floured surface, roll the chilled dough into a rectangle approximately 20×40cm. Position the butter block on one half of the dough, leaving a 1cm border. Fold the other half of dough over the butter and seal the edges by pressing firmly. You've now enclosed the butter completely within the dough – this is the foundation of your lamination.</li><li class="MethodStepper"><h4 class="step-title">Step 8</h4>For the first fold (which will create 3 layers), roll the dough into a 20×60cm rectangle, keeping the edges straight and the thickness even. Mentally divide the dough into thirds. Fold one third over the middle, then fold the remaining third on top, like folding a letter. Turn the dough 90 degrees so the open end faces right. You've completed your first fold.</li><li class="MethodStepper"><h4 class="step-title">Step 9</h4>Wrap the dough in plastic wrap and refrigerate for 30 minutes. This resting period allows the gluten to relax and the butter to firm up slightly, preventing it from squeezing out during subsequent rolls.</li><li class="MethodStepper"><h4 class="step-title">Step 10</h4>Remove the dough from the refrigerator and place it on a lightly floured surface with the open end facing right. Roll it again into a 20×60cm rectangle. Perform another letter fold as in Step 8. You now have 9 layers (3×3). Wrap and refrigerate for 30 minutes.</li><li class="MethodStepper"><h4 class="step-title">Step 11</h4>Repeat the rolling and folding process two more times, always keeping the open end to the right when you begin rolling. After the third fold, you'll have 27 layers (3×3×3), and after the fourth fold, you'll have 81 layers (3×3×3×3). However, not all layers remain perfectly distinct during baking, so we refer to this as "54-layer" dough, acknowledging the effective layers that create the final texture.</li><li class="MethodStepper"><h4 class="step-title">Step 12</h4>After the final fold, wrap the dough tightly in plastic wrap and refrigerate for at least 2 hours or overnight. This extended rest allows the gluten to fully relax and the butter to re-solidify, ensuring clean layers when baked.</li><li class="MethodStepper"><h4 class="step-title">Step 13</h4>Your 54-layer Danish dough is now ready to be shaped into various pastries. Roll the dough to 3-4mm thickness and cut as needed for your desired Danish shapes. For best results, keep any unused dough refrigerated while working with portions of it, as the butter needs to stay cold for proper lamination.</li><li class="MethodStepper"><h4 class="step-title">Step 14</h4>After shaping your pastries, proof them at room temperature (about 21°C) for 1-2 hours until visibly puffy but not doubled in size. Before baking, brush with egg wash for a golden shine. Bake at 200°C for 5 minutes, then reduce temperature to 175°C and bake for another 15-20 minutes until deeply golden and the layers are visibly separated.</li><li class="MethodStepper"><h4 class="step-title">Step 15</h4>The pastries are ready when they've risen dramatically, showing distinct layers, and reached an internal temperature of 88-90°C. Allow to cool slightly before enjoying – the cooling process is when the layers fully set and achieve their characteristic flaky texture. Your 54-layer Danish pastries will have an incomparable honeycomb structure with the complex tanginess from both the sourdough base and cultured butter.</li></ol>

FAQs

Find answers to your most pressing questions about this delicious recipe right here.

What ingredients are used in 54-Layer Danish Dough with Cultured Butter and Sourdough Base Recipe?

This pastry requires bread flour, cultured butter, sourdough starter, milk, water, sugar, salt, yeast and unsalted butter. The combination of cultured butter and sourdough creates the distinctive tangy flavour profile, while proper flour selection ensures the perfect structure for lamination.

How to cook 54-Layer Danish Dough with Cultured Butter and Sourdough Base Recipe at home?

Learn how to cook 54-Layer Danish Dough by first creating a sourdough base, then laminating with cultured butter through four precise folding sessions. After adequate chilling, shape the dough and bake at 200°C for 5 minutes, then reduce to 175°C for 15-20 minutes until the distinct honeycomb layers are visible and the pastry reaches an internal temperature of 88-90°C.

Why is cultured butter important for laminated pastry?

Cultured butter is essential for superior laminated pastry because it has a higher fat content (82-84% vs 80% in regular butter) and contains beneficial cultures that add complex tanginess. It also has a higher melting point, creating more defined layers and that signature honeycomb structure as it releases steam during baking.

What makes the perfect honeycomb texture in Danish pastry?

The perfect honeycomb texture results from precise temperature control, proper butter consistency (cold but pliable), correct lamination technique with adequate resting periods, and the steam created during baking as the butter melts between the dough layers, pushing them apart to create distinct, flaky separations.

Can I make laminated pastry without a sourdough starter?

Yes, traditional Danish pastry can be made without sourdough by replacing the starter with additional flour and liquid, and slightly increasing the yeast quantity. However, the sourdough version offers superior flavour complexity, extended shelf life, and a more tender crumb structure that many bakers prefer.

Want to try something else in ...

Danish Pastry

Try following recommended recipes

{ "@context": "http://schema.org/", "@type": "Recipe", "name": "54-Layer Danish Dough with Cultured Butter and Sourdough Base Recipe", "author": { "@type": "Person", "name": "Gurbir Aujla", "brand": "What's Baking?", "jobTitle": "Baker" }, "datePublished": "2024-04-17", "description": "Learn how to make the best homemade 54-layer Danish dough using traditional lamination techniques with a modern sourdough twist. This master recipe creates exceptionally flaky pastry with deep buttery flavor and tangy notes from the cultured butter and sourdough base - perfect for creating professional-quality Danish pastries at home.", "prepTime": "PT2H30M", "cookTime": "PT25M", "totalTime": "PT2H55M", "keywords": "laminated dough, Danish pastry, sourdough Danish, cultured butter pastry, artisan baking", "recipeYield": "12-16", "recipeCategory": "Pastry", "recipeCuisine": "Danish", "nutrition": { "@type": "NutritionInformation", "calories": "245 calories", "carbohydrateContent": "18 g", "proteinContent": "3 g", "fatContent": "18 g", "saturatedFatContent": "11 g", "cholesterolContent": "45 mg", "sodiumContent": "185 mg", "sugarContent": "2 g", "servingSize": "1 serving" }, "recipeIngredient": [ "100g active sourdough starter (100% hydration)", "250g bread flour", "100ml whole milk, cold", "50ml water, cold", "25g granulated sugar", "5g salt", "250g cultured butter (European-style), cold but pliable", "20g bread flour", "200g bread flour, plus extra for dusting", "15g granulated sugar", "5g salt", "7g instant dried yeast", "125ml milk, cold", "25g unsalted butter, softened" ], "recipeInstructions": [ { "@type": "HowToStep", "name": "Prepare sourdough base", "text": "Begin with your sourdough base the day before. Mix the active sourdough starter, bread flour, cold milk, cold water, sugar, and salt in a stand mixer with the dough hook on low speed until just combined. Increase to medium speed and knead for 5-7 minutes until the dough is smooth and elastic. The cold liquids slow fermentation, giving you better control over the process." }, { "@type": "HowToStep", "name": "Ferment overnight", "text": "Form the sourdough base into a ball, place in a lightly oiled bowl, cover with plastic wrap, and refrigerate overnight (8-12 hours). This slow fermentation develops complex flavors and strengthens the gluten structure, which will help support the many layers we'll create." }, { "@type": "HowToStep", "name": "Prepare main dough", "text": "The next day, prepare the main dough. In your stand mixer bowl, combine the bread flour, sugar, salt, and yeast. Add the cold milk and softened butter, then mix on low speed until incorporated. Increase to medium speed and knead for 4-5 minutes until smooth and elastic." }, { "@type": "HowToStep", "name": "Combine doughs", "text": "Take your chilled sourdough base from the refrigerator and tear it into pieces. Add these pieces to your main dough and continue kneading on medium speed for another 5-7 minutes until both doughs are completely integrated. The dough should pass the windowpane test – you should be able to stretch a small piece until thin enough to see light through without tearing." }, { "@type": "HowToStep", "name": "Initial rest", "text": "Shape the combined dough into a rectangle about 20×30cm. Wrap tightly in plastic wrap and refrigerate for at least 1 hour. This resting period relaxes the gluten, making the dough easier to roll out and preventing shrinkage during lamination." }, { "@type": "HowToStep", "name": "Prepare butter block", "text": "While the dough chills, prepare your butter block. Place the cold cultured butter between two sheets of parchment paper and use a rolling pin to pound it into a 15×20cm rectangle. Sprinkle the 20g of flour over the butter and fold the parchment paper, continuing to pound and roll until you have a smooth, pliable butter block. The flour helps the butter maintain appropriate consistency during folding. Refrigerate until firm but still pliable, about 15-20 minutes." }, { "@type": "HowToStep", "name": "Enclose butter", "text": "On a lightly floured surface, roll the chilled dough into a rectangle approximately 20×40cm. Position the butter block on one half of the dough, leaving a 1cm border. Fold the other half of dough over the butter and seal the edges by pressing firmly. You've now enclosed the butter completely within the dough – this is the foundation of your lamination." }, { "@type": "HowToStep", "name": "First fold", "text": "For the first fold (which will create 3 layers), roll the dough into a 20×60cm rectangle, keeping the edges straight and the thickness even. Mentally divide the dough into thirds. Fold one third over the middle, then fold the remaining third on top, like folding a letter. Turn the dough 90 degrees so the open end faces right. You've completed your first fold." }, { "@type": "HowToStep", "name": "Rest dough", "text": "Wrap the dough in plastic wrap and refrigerate for 30 minutes. This resting period allows the gluten to relax and the butter to firm up slightly, preventing it from squeezing out during subsequent rolls." }, { "@type": "HowToStep", "name": "Second fold", "text": "Remove the dough from the refrigerator and place it on a lightly floured surface with the open end facing right. Roll it again into a 20×60cm rectangle. Perform another letter fold as in Step 8. You now have 9 layers (3×3). Wrap and refrigerate for 30 minutes." }, { "@type": "HowToStep", "name": "Complete lamination", "text": "Repeat the rolling and folding process two more times, always keeping the open end to the right when you begin rolling. After the third fold, you'll have 27 layers (3×3×3), and after the fourth fold, you'll have 81 layers (3×3×3×3). However, not all layers remain perfectly distinct during baking, so we refer to this as '54-layer' dough, acknowledging the effective layers that create the final texture." }, { "@type": "HowToStep", "name": "Final rest", "text": "After the final fold, wrap the dough tightly in plastic wrap and refrigerate for at least 2 hours or overnight. This extended rest allows the gluten to fully relax and the butter to re-solidify, ensuring clean layers when baked." }, { "@type": "HowToStep", "name": "Shape pastries", "text": "Your 54-layer Danish dough is now ready to be shaped into various pastries. Roll the dough to 3-4mm thickness and cut as needed for your desired Danish shapes. For best results, keep any unused dough refrigerated while working with portions of it, as the butter needs to stay cold for proper lamination." }, { "@type": "HowToStep", "name": "Proof and prepare", "text": "After shaping your pastries, proof them at room temperature (about 21°C) for 1-2 hours until visibly puffy but not doubled in size. Before baking, brush with egg wash for a golden shine." }, { "@type": "HowToStep", "name": "Bake", "text": "Bake at 200°C for 5 minutes, then reduce temperature to 175°C and bake for another 15-20 minutes until deeply golden and the layers are visibly separated. The pastries are ready when they've risen dramatically, showing distinct layers, and reached an internal temperature of 88-90°C." } ], "aggregateRating": { "@type": "AggregateRating", "ratingValue": "5", "ratingCount": "178" }, "review": [ { "@type": "Review", "author": "Sofia Bergström", "datePublished": "2024-04-05", "reviewBody": "Bakery-quality results worth every minute of effort! The honeycomb texture is simply stunning, and the tanginess from the sourdough adds such depth. I've tried many Danish dough recipes, but this 54-layer version is truly exceptional.", "name": "Exceptional Results", "reviewRating": { "@type": "Rating", "ratingValue": "5" } }, { "@type": "Review", "author": "Hiroshi Tanaka", "datePublished": "2024-04-08", "reviewBody": "Unbelievable flakiness and perfect lamination! I was nervous about the multiple folds, but the detailed instructions made it achievable. The cultured butter makes a noticeable difference in the final flavor. Time-consuming but absolutely worth it for special occasions.", "name": "Worth Every Minute", "reviewRating": { "@type": "Rating", "ratingValue": "5" } }, { "@type": "Review", "author": "Camila Rodriguez", "datePublished": "2024-04-12", "reviewBody": "The sourdough base adds incredible depth of flavor that you just can't get with regular Danish pastry. My family couldn't believe I made these at home - they truly look and taste professional. It takes patience but the results are magnificent!", "name": "Professional Results", "reviewRating": { "@type": "Rating", "ratingValue": "5" } }, { "@type": "Review", "author": "Ethan Mitchell", "datePublished": "2024-04-15", "reviewBody": "This recipe has converted me to cultured butter forever! Yes, it's an advanced recipe that requires planning, but the detailed instructions made it achievable even for my first attempt at laminated dough. The pastries literally shattered into crisp layers when bitten.", "name": "Crisp Perfect Layers", "reviewRating": { "@type": "Rating", "ratingValue": "5" } }, { "@type": "Review", "author": "Aisha Patel", "datePublished": "2024-04-18", "reviewBody": "I impressed my pastry chef friend with these Danish pastries! The temperature control advice is crucial - following it exactly gave me beautiful, distinct layers. Making this recipe has improved my understanding of lamination techniques for all my baking projects.", "name": "Impressed a Professional", "reviewRating": { "@type": "Rating", "ratingValue": "5" } } ] }
{ "@context": "https://schema.org", "@type": "FAQPage", "mainEntity": [ { "@type": "Question", "name": "What ingredients are used in 54-Layer Danish Dough with Cultured Butter and Sourdough Base Recipe?", "acceptedAnswer": { "@type": "Answer", "text": "This pastry requires bread flour, cultured butter, sourdough starter, milk, water, sugar, salt, yeast and unsalted butter. The combination of cultured butter and sourdough creates the distinctive tangy flavour profile, while proper flour selection ensures the perfect structure for lamination." } }, { "@type": "Question", "name": "How to cook 54-Layer Danish Dough with Cultured Butter and Sourdough Base Recipe at home?", "acceptedAnswer": { "@type": "Answer", "text": "Learn how to cook 54-Layer Danish Dough by first creating a sourdough base, then laminating with cultured butter through four precise folding sessions. After adequate chilling, shape the dough and bake at 200°C for 5 minutes, then reduce to 175°C for 15-20 minutes until the distinct honeycomb layers are visible and the pastry reaches an internal temperature of 88-90°C." } }, { "@type": "Question", "name": "Why is cultured butter important for laminated pastry?", "acceptedAnswer": { "@type": "Answer", "text": "Cultured butter is essential for superior laminated pastry because it has a higher fat content (82-84% vs 80% in regular butter) and contains beneficial cultures that add complex tanginess. It also has a higher melting point, creating more defined layers and that signature honeycomb structure as it releases steam during baking." } }, { "@type": "Question", "name": "What makes the perfect honeycomb texture in Danish pastry?", "acceptedAnswer": { "@type": "Answer", "text": "The perfect honeycomb texture results from precise temperature control, proper butter consistency (cold but pliable), correct lamination technique with adequate resting periods, and the steam created during baking as the butter melts between the dough layers, pushing them apart to create distinct, flaky separations." } }, { "@type": "Question", "name": "Can I make laminated pastry without a sourdough starter?", "acceptedAnswer": { "@type": "Answer", "text": "Yes, traditional Danish pastry can be made without sourdough by replacing the starter with additional flour and liquid, and slightly increasing the yeast quantity. However, the sourdough version offers superior flavour complexity, extended shelf life, and a more tender crumb structure that many bakers prefer." } } ] }