On this page
There is something especially inviting about a spiral of soft cinnamon bread finished with a glossy sweep of chocolate. Icelandic snúður brings those comforting elements together in a pastry that looks striking on a bakery counter and feels entirely at home beside afternoon coffee. It is a wonderful baking project for anyone who knows classic cinnamon rolls but wants to explore a different style of finish.
This guide is a companion to the published What’s Baking? Icelandic Cinnamon Rolls Snúður Recipe. The recipe card provides the quantities and formal cooking sequence. Here, we go further: explaining what the ingredients do, how to assess dough by feel, why the spirals sometimes open, how to handle the chocolate without scorching it, and what to do when things go wrong. The aim is to make you more confident at every stage, not to invent a second, competing recipe.
Snúður can be made in different shapes and finishes, and chocolate is one popular topping rather than a rule governing every bakery version. The particular What’s Baking? version uses cardamom-scented enriched dough, cinnamon-brown-sugar butter filling, and a dark chocolate glaze. It makes twelve rolls. If you follow the recipe, use its ingredient amounts rather than estimating from the editorial descriptions below.

At a glance: What makes this bake special?
- The dough: A yeasted bread enriched with milk, egg, sugar, and butter for a tender bite.
- The aroma: Cinnamon in the filling, with ground cardamom adding a fragrant background note to the dough.
- The shape: A rolled rectangle sliced into visible spirals, then proofed again before baking.
- The finish: Dark chocolate melted with butter, honey, and a little milk, spooned over slightly warm rolls.
- The learning opportunity: Recognizing correctly risen dough, balancing the spread of the filling, and managing chocolate at a gentle temperature.
The recipe is achievable in a home kitchen, but it rewards attention. Rather than depending on a timer alone, use the visual and tactile cues in the sections that follow.
What is Icelandic snúður?
Snúður is the Icelandic word commonly used for a type of spiral bun or cinnamon roll. You may encounter versions glazed with chocolate, sugar icing, or other finishes, depending on the baker. Like many everyday pastries, it is not confined to one rigid historical formula. A bun sold at a bakery may be larger, more tightly coiled, or finished differently than one prepared at home.
Our Icelandic Snúður guide compares the bun's dough, shaping and glaze with related cinnamon rolls.
For readers familiar with North American cinnamon buns, this chocolate-topped variation feels both recognizable and distinctive. It has the cinnamon spiral, a tender yeasted crumb, and a generous topping, but instead of cream-cheese frosting the finish is chocolate-based. The taste will depend on the cocoa percentage of the chocolate, the sweetness of the filling, and how generously you glaze the surface.
Cardamom is familiar in Nordic sweet baking, although not every Icelandic snúður includes it in the same amount. In this recipe it adds a citrusy, floral warmth that makes the cinnamon seem deeper without overpowering it. The combination is particularly satisfying when the finished bun is served with an unsweetened coffee or tea.
Start with the actual recipe, not an improvised formula
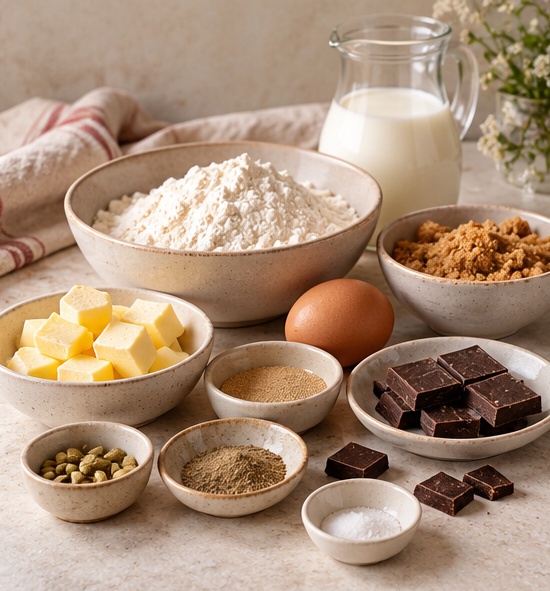
The linked Icelandic Cinnamon Rolls Snúður Recipe specifies a dough made with 500 g all-purpose flour, 80 g sugar, 7 g active dry yeast, 80 g melted butter, 250 ml lukewarm whole milk, one egg, 1 teaspoon salt, and 1 teaspoon ground cardamom. Its filling combines 70 g softened butter, 100 g brown sugar, and 2 tablespoons ground cinnamon. The chocolate glaze combines 150 g dark chocolate, 50 g butter, 2 tablespoons honey, and 2 tablespoons milk.
Those are the published recipe quantities, not tested alternate versions. We include them here so readers can understand the composition, but the recipe card remains the reference for detailed directions, equipment notes, and the complete method. If you change the batch size, scale every ingredient consistently. Halving only the dough while keeping the full filling and glaze will change the structure and sweetness substantially.
A common source of baking mistakes is measuring flour or yeast casually. For this particular dough, a scale is especially useful because too much flour can change the softness that makes the roll appealing. If you only have measuring cups, spoon the flour into the cup and level it rather than packing it down, but expect greater variation from batch to batch.
Understanding the enriched dough
An enriched dough contains ingredients beyond flour, water, yeast, and salt. Milk brings liquid and milk solids, the egg contributes richness and structure, and butter tenderizes the crumb. Sugar adds sweetness and encourages browning. All of these ingredients make the roll taste luxurious, but they also mean the dough behaves differently from a lean loaf of bread.
A lean dough can feel firm and elastic quite quickly. An enriched dough may look slightly sticky during early mixing because the flour needs time to hydrate and the fat influences gluten development. Resist the temptation to add large scoops of flour as soon as it clings to the mixer bowl. First, allow the kneading time described in the recipe, pause if needed, and reassess. Aim for dough that is smooth, extensible, and slightly tacky rather than dry and stiff.
The butter should be melted as directed in the recipe but not so hot that it overheats the dough when mixed with the yeast and egg. Lukewarm milk is similarly important. A thermometer can help, although you do not need laboratory precision: warm to the touch rather than hot is the practical goal. If ingredients are too hot, yeast activity can be compromised; if they are cool, fermentation may simply take longer.
Why cardamom belongs in the conversation
Cinnamon provides the direct, familiar sweetness of the filling. Cardamom works differently. It has a complex aroma that can read as citrusy, eucalyptus-like, and gently floral. In a modest amount, it adds another layer to the dough so that the bun tastes interesting even in bites where there is less filling.
For a separate bun that puts the spice more clearly in focus, see Swedish Cardamom Buns. It is a comparison, not a substitute for this Snúður formula.
Ground cardamom loses aroma gradually in storage, so a recently opened jar often tastes brighter than one that has sat in a cupboard for years. You can grind cardamom seeds just before baking if you enjoy a particularly fresh aromatic note. Use the measured quantity in the recipe rather than adding more reflexively: too much can dominate the chocolate and cinnamon.
For a first attempt, bake the original flavor profile without experimentation. On a later batch, you can decide whether you prefer the cardamom softer or more pronounced. Keeping notes makes comparisons more meaningful than guessing which change improved the result.
Active dry yeast: What successful activation looks like
The published recipe begins by dissolving active dry yeast in lukewarm milk with a little sugar. In many kitchens, a light layer of foam appears after several minutes. This is a useful sign of activity, but the exact appearance depends on the yeast, temperature, and vessel. The most important evidence is that the dough eventually expands during proofing.
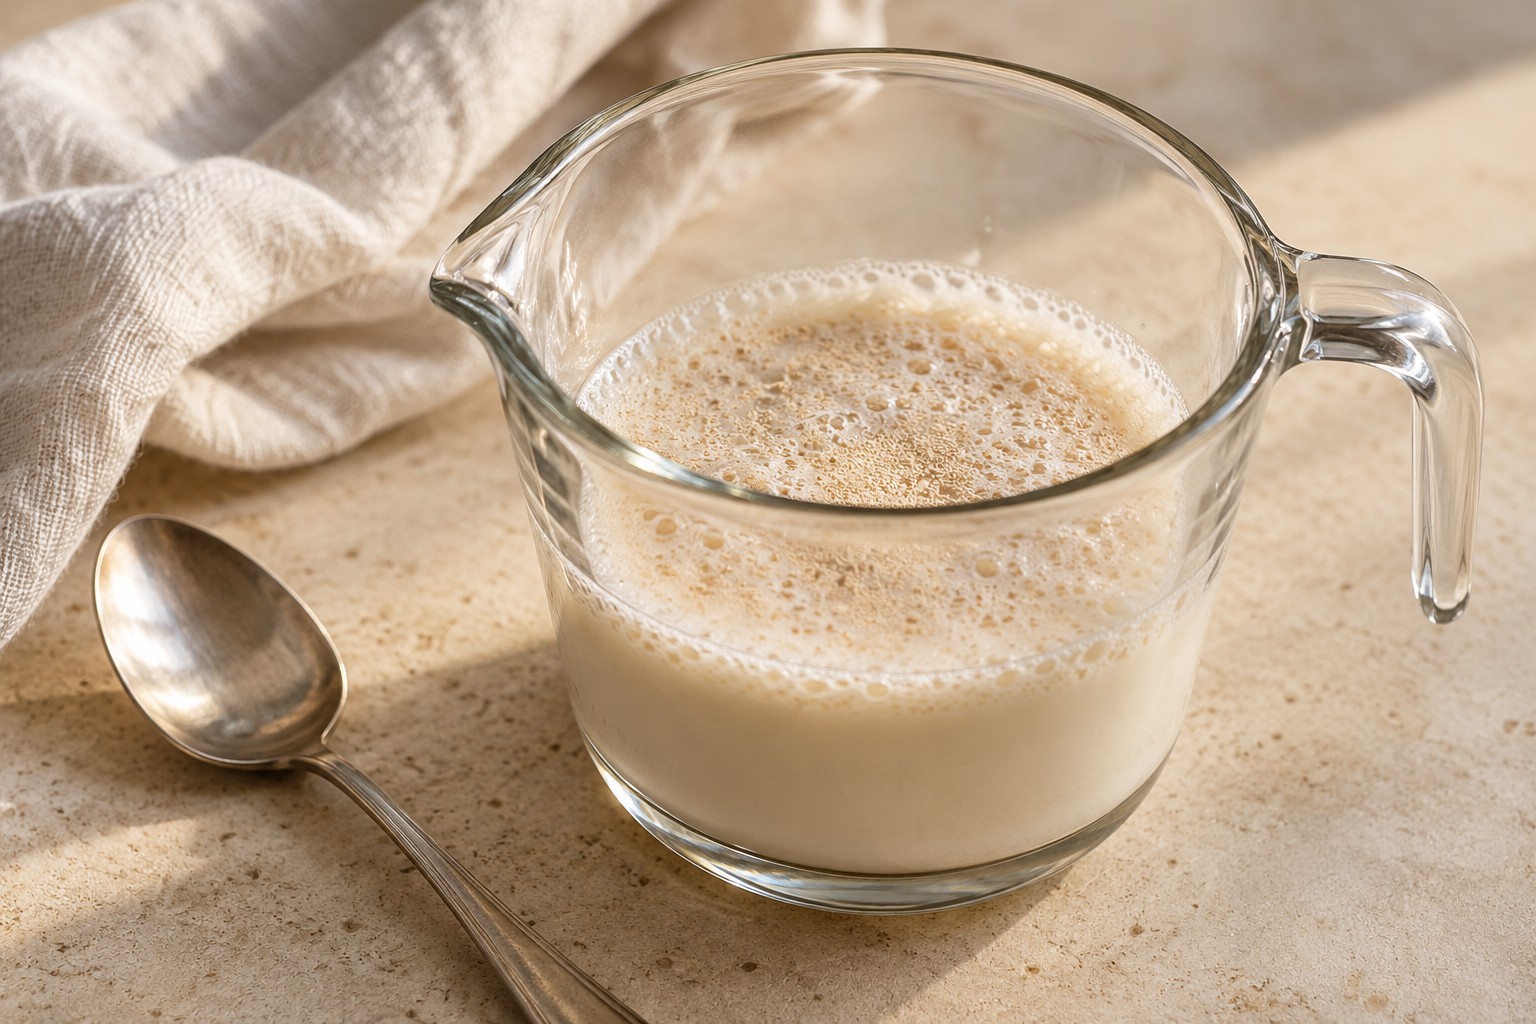
Do not add yeast to very hot milk. If your milk has been heated on the stovetop or in a microwave, stir it well and check the temperature before mixing. Microwave heating can create hot spots. If the yeast has been stored for a long time and the mixture shows no signs of activity, checking its freshness before combining the full dough can save ingredients.
Instant yeast is often mixed directly with flour, but using a different yeast type can change the workflow and rise timing. Follow the manufacturer's guidance if substituting; the linked recipe is written for active dry yeast. Avoid adding extra yeast simply to rush a rise. Faster is not necessarily better for flavor or control.
Mixing and kneading without making the rolls tough
The recipe uses a stand mixer with a dough hook for about seven to eight minutes. That is a starting point, not a universal law for every mixer and flour brand. Mixers develop dough at different speeds, and room temperature affects its consistency. Watch for a dough that becomes more cohesive and smooth as kneading progresses.
If the dough smears around the bowl at first, allow it time. Pause and scrape down the sides if necessary. If it remains batter-like after proper mixing, reassess whether all the flour was added accurately. If it looks dry, crumbly, and breaks rather than stretches, the flour measurement may be too high or the liquid too low. Make very small corrections only after considering the cause.
For kneading by hand, expect the dough to feel sticky at the beginning. Lightly oiling your hands or the work surface may be more helpful than repeatedly showering the dough with flour. Folding and stretching, with short rests, can gradually turn a rough mixture into an elastic dough. Avoid judging it solely by whether it sticks to your fingers at all.
How to tell whether the gluten has developed
A properly kneaded dough looks smoother and stretches more easily than it did at the start. You may be able to stretch a small piece into a thin membrane before it tears, although enriched doughs vary in how dramatically they pass a windowpane test. It should resist slightly and then yield, rather than breaking immediately into short, jagged pieces.
Do not keep kneading forever in pursuit of an idealized windowpane. Long, high-speed mixing can warm the dough excessively, especially in a home mixer. If it seems tense, allow a short rest before deciding whether it genuinely needs more work. A rested dough is easier to shape and less prone to pulling back.

First rise: Look at the dough, not just the clock
The published method estimates around one hour for the first rise, or until roughly doubled in size. That estimate assumes a reasonably warm environment. A cool kitchen may require considerably longer, while a warm one can accelerate fermentation. Judge the dough by its volume and the way it feels: aerated, slightly expanded, and less dense than immediately after kneading.
Choose a covered bowl large enough for the dough to rise. A clear, straight-sided container is helpful because it makes the increase in volume easier to see. Marking the starting height with tape is an excellent low-tech trick. Keep the bowl away from direct radiator heat or a hot oven surface, where the outside might warm far more than the center.
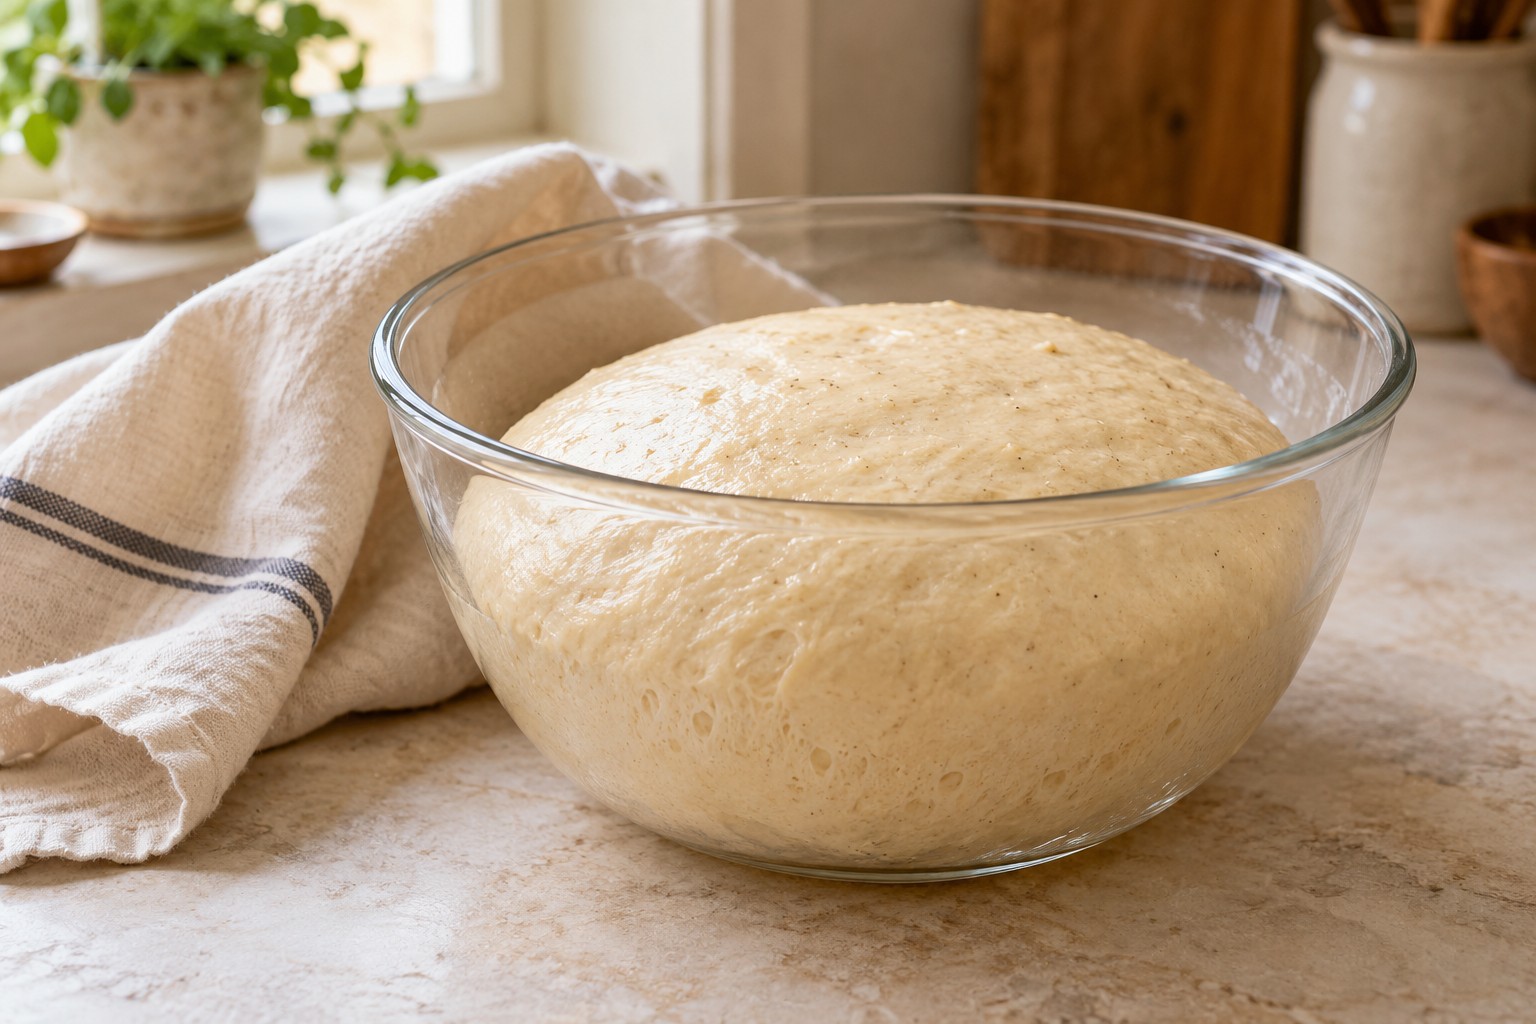
A dough that has barely expanded is not ready simply because sixty minutes have elapsed. At the other extreme, dough that collapses and smells sharply alcoholic may have risen too far. If you overproof in the first rise, handle it gently and observe how it behaves, but recognize that extreme overfermentation can be hard to reverse completely.
Making a filling that spreads evenly
The cinnamon filling is simple: softened butter mixed with brown sugar and cinnamon. The key is consistency. If the butter is very cold, it will drag across the dough and potentially tear it. If it is melted and runny, it can pool or leak during shaping and baking. Soft and spreadable, like a thick paste, is the ideal middle ground.
Mix the ingredients until the sugar and spice are evenly distributed. Spread the filling gently with an offset spatula, the back of a spoon, or a butter knife. Do not press so hard that you flatten the dough aggressively. A thin, consistent layer tends to give a more even swirl than thick piles in a few spots.
Leave the clean border recommended by the recipe on one long edge so that the log can seal. If some filling reaches the edge anyway, wipe a narrow strip clear rather than forcing sticky dough to adhere to sugary butter. Slightly uneven filling is rarely a disaster; the real goal is avoiding large gaps and pockets.

Rolling the dough into a neat rectangle
The published recipe suggests a rectangle of approximately 35 by 45 cm and a roughly 5 mm thickness. These measurements are guides for evenness and portioning, not a reason to stretch a resistant dough until it tears. A rectangle of consistent thickness is more important than sharp ninety-degree corners.
Lightly flour the work surface, then roll from the middle outward. Lift and rotate the dough occasionally to ensure it is not sticking underneath. If it shrinks back dramatically, cover it and allow ten minutes to relax. Forcing a tight dough to stay stretched may cause it to spring back or distort after filling.
Aim to keep the short sides reasonably straight so the ends of the finished log do not become tiny, irregular rolls. You can gently reposition the corners by hand. If you use too much bench flour, the dough layers may have difficulty adhering at the final seam; brush away excess before sealing.
Shaping the spiral and cutting twelve rolls
Starting from the long edge opposite the clean border, roll the dough into a log with consistent, moderate tension. A loose roll creates large holes between layers; an extremely tight roll can push filling out and prevent comfortable expansion. Think of creating a secure spiral that still has room to grow.
Keep the log even from one end to the other. Pinch the seam where the dough meets itself. Position the seam underneath before measuring your slices. To produce twelve pieces from a log of roughly 45 cm, mark the center, then quarters, then divide each quarter into three even pieces. Marking first reduces the chance of ending up with a mixture of very large and tiny buns.
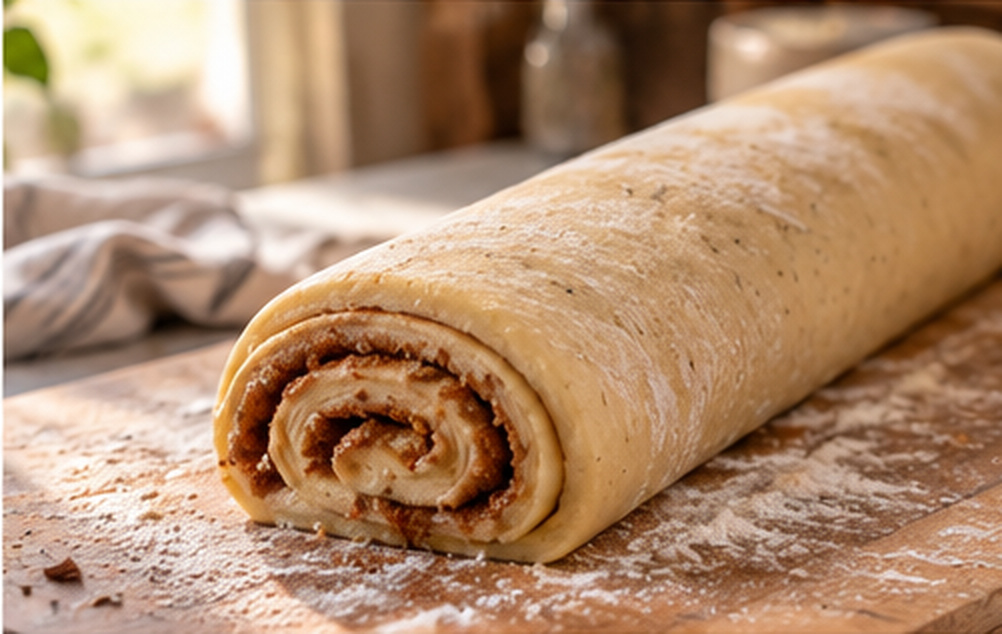
A sharp serrated knife can work with a gentle sawing action. Plain, unflavored dental floss is another option: slide it underneath, cross the ends over the log, and pull in opposite directions to create a clean cut without much downward pressure. If the log feels very soft, a brief chill may make it easier to portion cleanly.
What if the spirals open while baking?
The seam may not have sealed well, the log may have been too loose, or the rolls may have been placed with little support around their outer edges. Some expansion is entirely normal. For a first batch, focus on consistent shaping and proofing rather than bakery-perfect geometry. You can tuck a loose end gently underneath before the second rise, but avoid rough handling once the buns have become airy.
Second proof: The most overlooked step
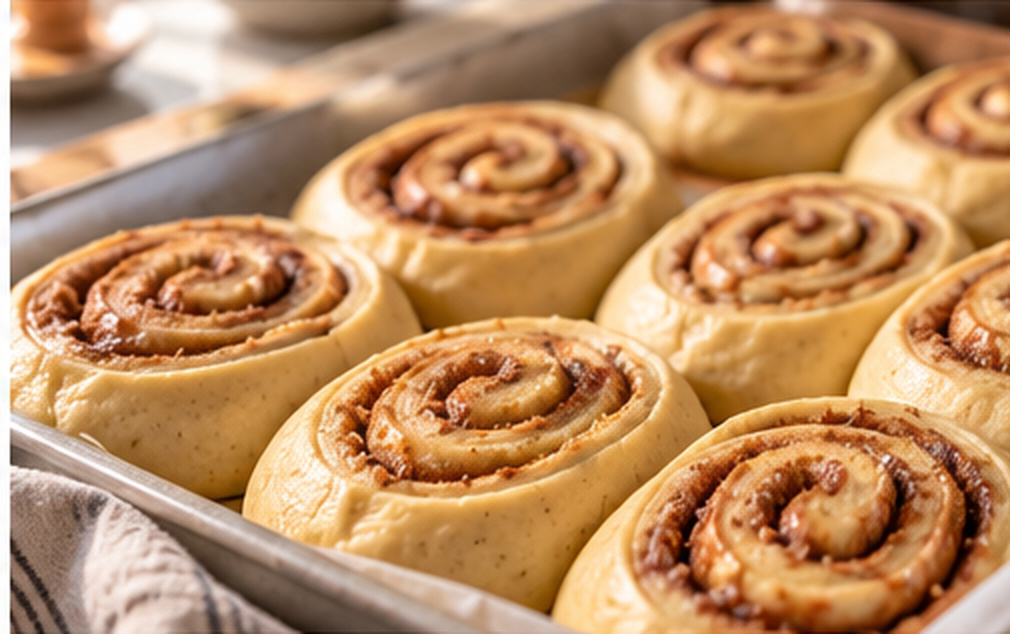
After shaping, the published recipe asks for approximately thirty to forty-five minutes of additional rising. This stage matters because slicing and handling compress the dough. The yeast needs time to rebuild some internal gas before the heat of the oven sets the crumb.
The rolls should look visibly fuller and feel lighter, not dense and tight. Lightly touch a side of a bun with a clean finger: a shallow indentation that fills back slowly can be a useful cue. If the dough springs back instantly and feels firm, it may need additional proofing. If it collapses and barely responds, it may have gone too far.
These cues are not perfect tests. Butter content, dough temperature, and flour choice influence the response. Combine several clues—the increased size, airy feel, and indentation behavior—instead of relying on one signal. Cover the rolls loosely to stop the exposed dough from drying out.
Baking at 180°C: How to avoid dry edges
The linked recipe specifies a preheated 180°C (350°F) oven and an approximate 14–16 minute bake. Those instructions apply to its published twelve-roll batch. An oven that runs hot, a dark metal tray, or unusually large rolls may behave differently. Begin checking near the lower end of the suggested time rather than adding extra minutes automatically.
Look for a lightly golden surface and a center that appears set rather than wet and doughy. The undersides should be baked but not excessively dark. If the tops brown too quickly while the centers remain underdone, confirm your oven temperature and rack placement. A small oven thermometer can be invaluable when repeated batches bake unevenly.

The recipe mentions an internal temperature of around 88–90°C (190–195°F). A probe thermometer can help, but inserting it through a swirl full of cinnamon filling can produce confusing results. Probe into the dough portion near the center, avoiding pockets of filling, and interpret temperature alongside appearance and texture.
Resist overbaking in pursuit of a deep dark crust. These buns are most enjoyable when they retain moisture. Once baked, move them to a rack so steam does not collect underneath. They should cool enough for the chocolate to sit on the surface rather than instantly running off.
Chocolate glaze: Glossy, smooth, and not scorched
The published chocolate topping uses chopped dark chocolate, butter, honey, and milk. The aim is a cohesive, pourable glaze that coats the top of each bun. You are not trying to temper couverture for a brittle shell. You are creating a soft, rich finish that remains pleasant to bite through.
Chop the chocolate into similarly sized pieces to help it melt evenly. Set a heatproof bowl over barely simmering water and ensure its bottom does not touch the water. Gentle heat gives you more control than a vigorously boiling saucepan. Stir until the chocolate and fat blend, then remove the bowl from the heat before the mixture gets overly hot.
Avoid splashing water into the bowl; stray droplets can sometimes cause a chocolate mixture to thicken unexpectedly. Adding the recipe's milk as directed is a controlled part of the formula and different from accidental drops of water. If the glaze is thick, warm it gently and stir patiently. Do not pour in large unmeasured amounts of liquid, which can upset its balance.
The sweetness depends on the chocolate you choose. A darker chocolate can give a more pronounced cocoa character, while a sweeter dark chocolate will make the finished bun more dessert-like. Using a chocolate you enjoy eating is a sensible starting point, since its flavor stays prominent in this recipe.

When is the right moment to glaze?
If the rolls are piping hot, a soft chocolate glaze may slide toward the sides or run onto the tray. If they are completely cold, the glaze may hold its shape more sharply and spread less. The linked recipe recommends glazing while they are slightly warm rather than hot, which is a useful compromise.
Set the buns on a rack over a tray or parchment if you want to catch drips. Spoon chocolate onto the centers and nudge it outward with the back of the spoon. Some irregular drips are part of the charm. If you want more consistent coverage, make a small first pass over all twelve buns, then use the remaining glaze to build up a similar thickness across the batch.
Allow the coating time to settle before moving the buns to a serving plate. During cooler weather it will firm faster than in a very warm kitchen. The texture may remain softly set rather than becoming a crisp, snappable chocolate shell; that is expected for this butter-and-milk glaze.
A practical baking timeline
The active preparation time in the recipe card is listed separately from the rising stages. Plan for more than a short half-hour project. The dough must be mixed, given its first rise, rolled, filled, sliced, and proofed again before baking. Cooling and glazing also take time.
A sensible sequence is to measure all ingredients first, prepare the dough, and use the first rise to mix the cinnamon filling and line a baking tray. Once the buns are shaped, preheat the oven while they complete the second rise. Chop the glaze chocolate while they bake. Melt the glaze as the buns cool slightly.
This staggered workflow reduces clutter and avoids a common mistake: finishing the glaze too early, then having to rewarm it repeatedly while waiting for the dough. If you are baking for guests, leave some flexibility. Yeast dough follows temperature and fermentation, not a dinner-party schedule.
Troubleshooting: Why are my Snúður dense?
Dense buns can result from several different problems. The dough may have been too dry because excessive flour was added during kneading; the yeast may have been weak; or the rolls may not have completed either rise. Overbaking can also make a properly risen bun feel firmer the next day.
If the dough never expanded properly, check yeast freshness and proofing temperature before changing the flour amount. If it rose beautifully in the bowl but the baked buns were compact, examine the second proof. If the dough felt stiff from the beginning and resisted rolling, review how the flour was measured.
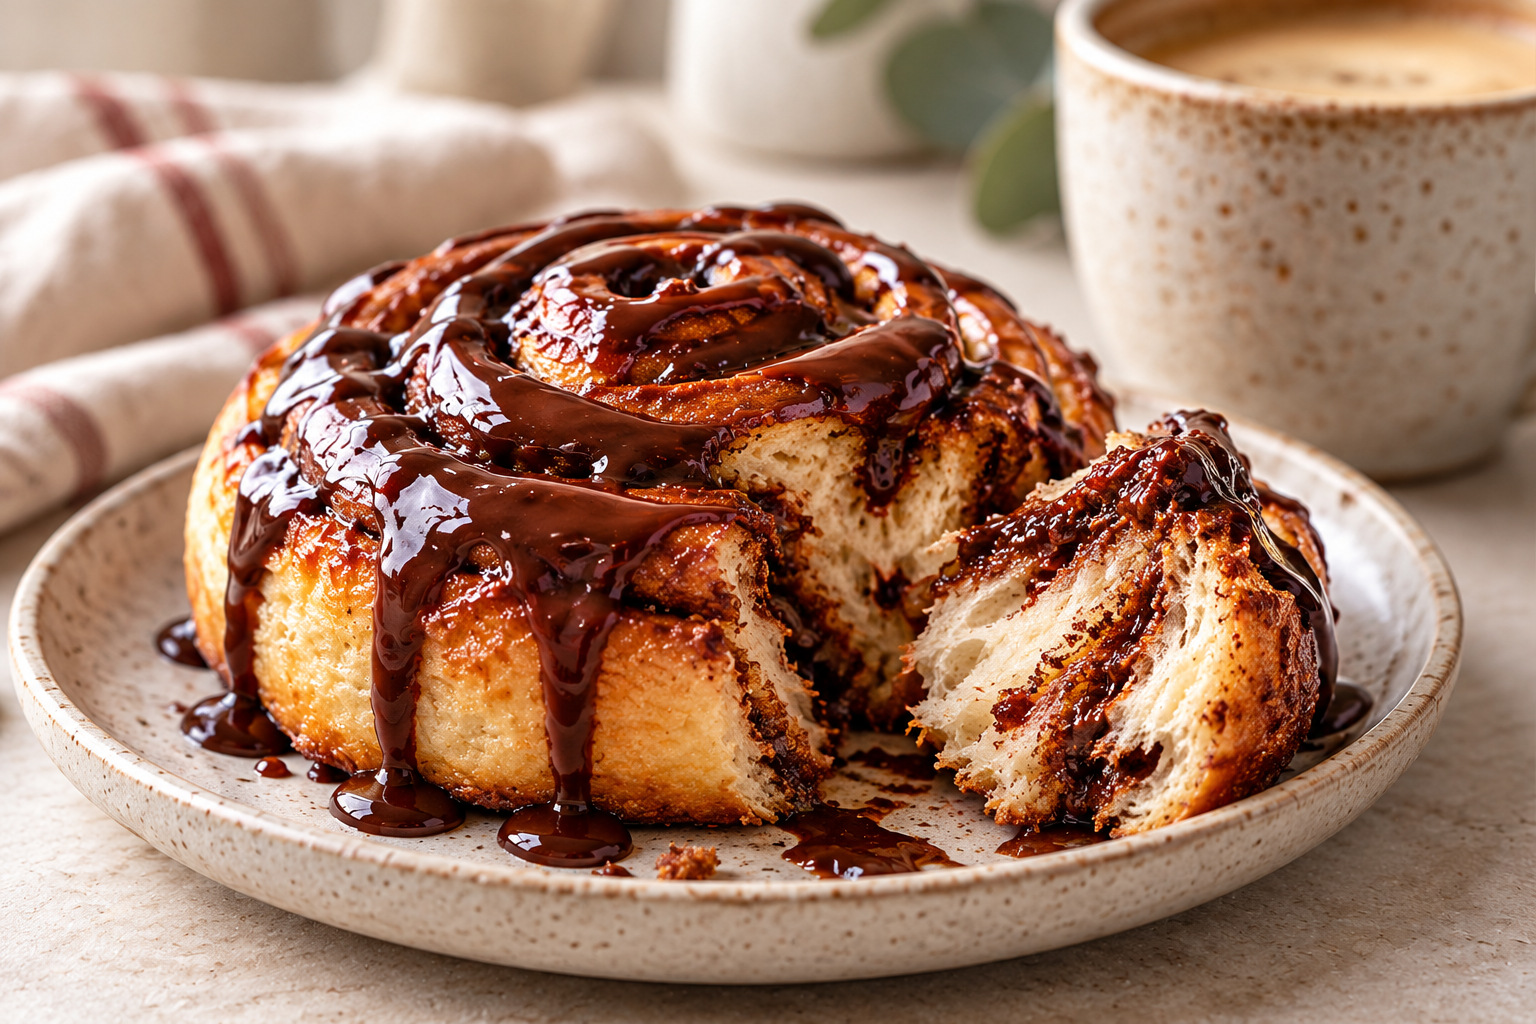
For the next batch, change one factor at a time and record the outcome. Randomly increasing yeast, milk, sugar, and baking time together makes it impossible to identify which adjustment mattered.
Troubleshooting: Why did the filling leak?
Some melted butter or sugar escaping onto the tray is normal. Excessive leakage can happen when the filling is too warm, too thick in isolated patches, or the log has been rolled loosely. A tray with parchment makes cleanup easier and prevents sticky sugar from hardening directly onto the metal.
The dough layers also expand as they proof and bake, gently squeezing the filling. Avoid attempting to prevent every drop by tightly compressing the rolls. Instead, start with softened-not-melted butter, spread the filling thinly, and keep the spiral even.
A little caramelized cinnamon sugar at the edge is often delicious. It only becomes a problem when the interior of the rolls seems empty or the tray is coated with most of the filling.
Troubleshooting: Why are the rolls dry?
Dryness may be caused by excess flour, insufficient proofing, too much baking time, or poor storage after baking. Chocolate on top can make the surface feel rich while the dough underneath remains dry; glaze is not a substitute for correct fermentation and baking.
Check the bottoms and centers before extending oven time. Remove the rolls when baked through and lightly golden. Cool them without leaving them exposed for hours in a very dry room. Once sufficiently cooled, store appropriately in a covered container.
If yesterday's roll is slightly stale, warming it gently can improve the eating experience. A long or aggressive reheat, however, can dry the crumb further and cause the chocolate topping to melt excessively.
Troubleshooting: Why is my glaze grainy or oily?
Chocolate can behave badly when overheated or mixed with ingredients at very different temperatures. If you notice an oily sheen separating from the thicker chocolate phase, remove the glaze from heat immediately and stir gently. Excessive heat is rarely the solution to a broken emulsion.
Use low, controlled heat from the start. Make sure your chocolate is chopped evenly and your bowl and utensils are clean. Work gradually rather than treating the glaze like something to boil. Since this formula includes milk and butter, it will not behave exactly like plain melted chocolate.
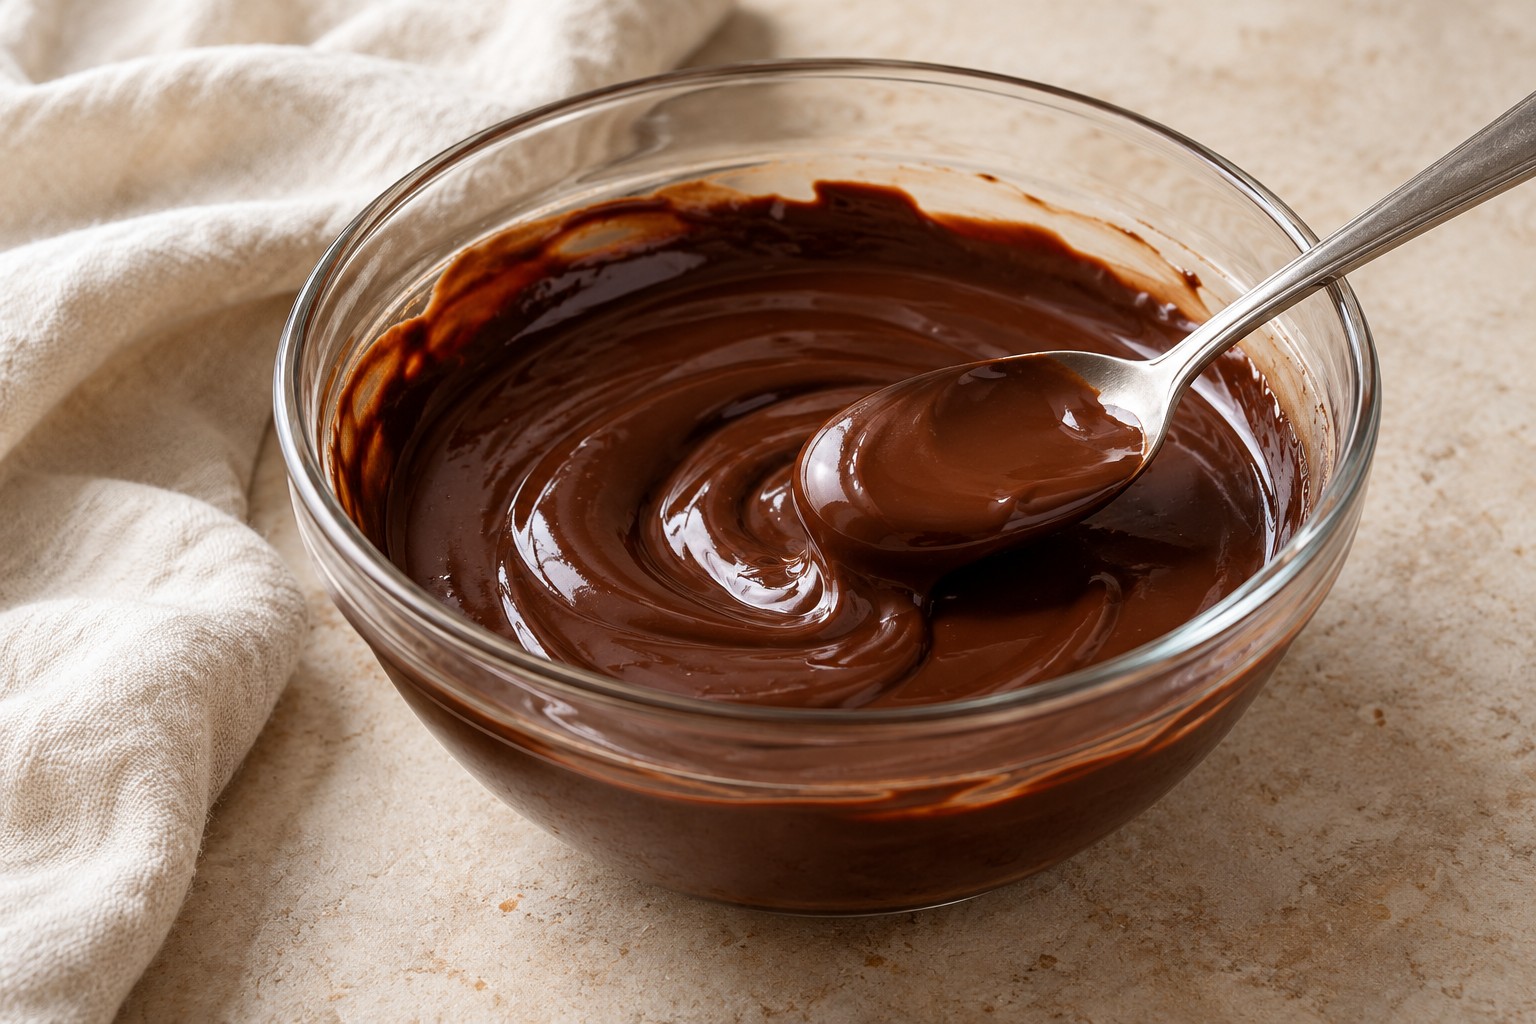
If the glaze thickens as it cools, a brief gentle rewarming may restore spreadability. If it has genuinely seized or split, you may need to remake it for a polished finish; do not continue adding random ingredients without understanding the change.
Choosing equipment that genuinely helps
A kitchen scale is probably the most valuable tool for the dough. A stand mixer can save effort, but the pastry can be made by hand with patience. A rolling pin helps shape an even rectangle, while a small offset spatula makes spreading the filling easier. Parchment protects the tray from caramelized sugar.
A ruler may sound fussy, but it makes dividing a log into twelve equal rolls much simpler. A digital instant-read thermometer can help check milk temperature and doneness, although it is not necessary if you are comfortable assessing visual cues. For the glaze, use a heatproof bowl and a pan that allows gentle indirect heating.
You do not need an enormous specialty equipment collection. Consistent measurements, a reliable oven, and a little care during shaping are more important than owning the fanciest mixer.
Serving ideas and simple variations
These rolls pair naturally with coffee, black tea, or a glass of milk. The warm spices and chocolate feel especially suited to a slow weekend breakfast or afternoon gathering, but the buns are also enjoyable as a dessert. Serve on a platter once the glaze has had time to settle so the tops do not smear against one another.
If you want to bake another style of spiral bun on a different day, compare Cinnamon Rolls and Sourdough Cinnamon Rolls. Use each dough's own fermentation and glaze instructions.

To change the experience without changing the recipe, serve a smaller bun with fruit or a larger one on its own. If you prefer more intense chocolate, choose a chocolate with a stronger cocoa taste within the dark-chocolate category. If you want the cardamom to stand out, pair the rolls with a less sweet drink.
For first-time bakers, avoid multiple ingredient variations until you know how the original behaves. Swapping flour, egg, milk, butter, and chocolate all at once creates an entirely different formula. Dietary adaptations require more than a simple one-to-one substitution in many enriched breads.
Can you make the dough ahead?
The original article suggests an overnight refrigeration option. Cold fermentation can be convenient, but it changes yeast activity and dough handling. If you try it, use a large covered container, allow room for some expansion, and avoid assuming chilled dough will proof on precisely the same schedule as room-temperature dough.
The published recipe card is designed around two rises at ordinary kitchen temperatures, so an overnight version is an adaptation rather than a separately validated schedule. When you remove the dough from the refrigerator, assess its actual condition before rolling. Cold, firm dough may be easier to handle, but it also may need time to relax if it resists stretching.
For maximum predictability, follow the card as written on your first bake. Once you know how the dough rises in your kitchen, you can explore refrigeration with more confidence.
How to store and freeze finished buns
Snúður tastes best relatively soon after baking, when the crumb is tender and the filling aromatic. The original recipe allows storage in an airtight container at room temperature for up to two days. Follow safe handling practices and be mindful that a topping containing milk and butter may have storage considerations that depend on room temperature and the specific glaze formulation.
For longer storage, freezing baked, unglazed rolls is often more practical than freezing a soft chocolate finish. Wrap cooled rolls tightly, label them with the date, and reheat gently after thawing. Glaze after the rolls have warmed slightly so the chocolate keeps its appearance.
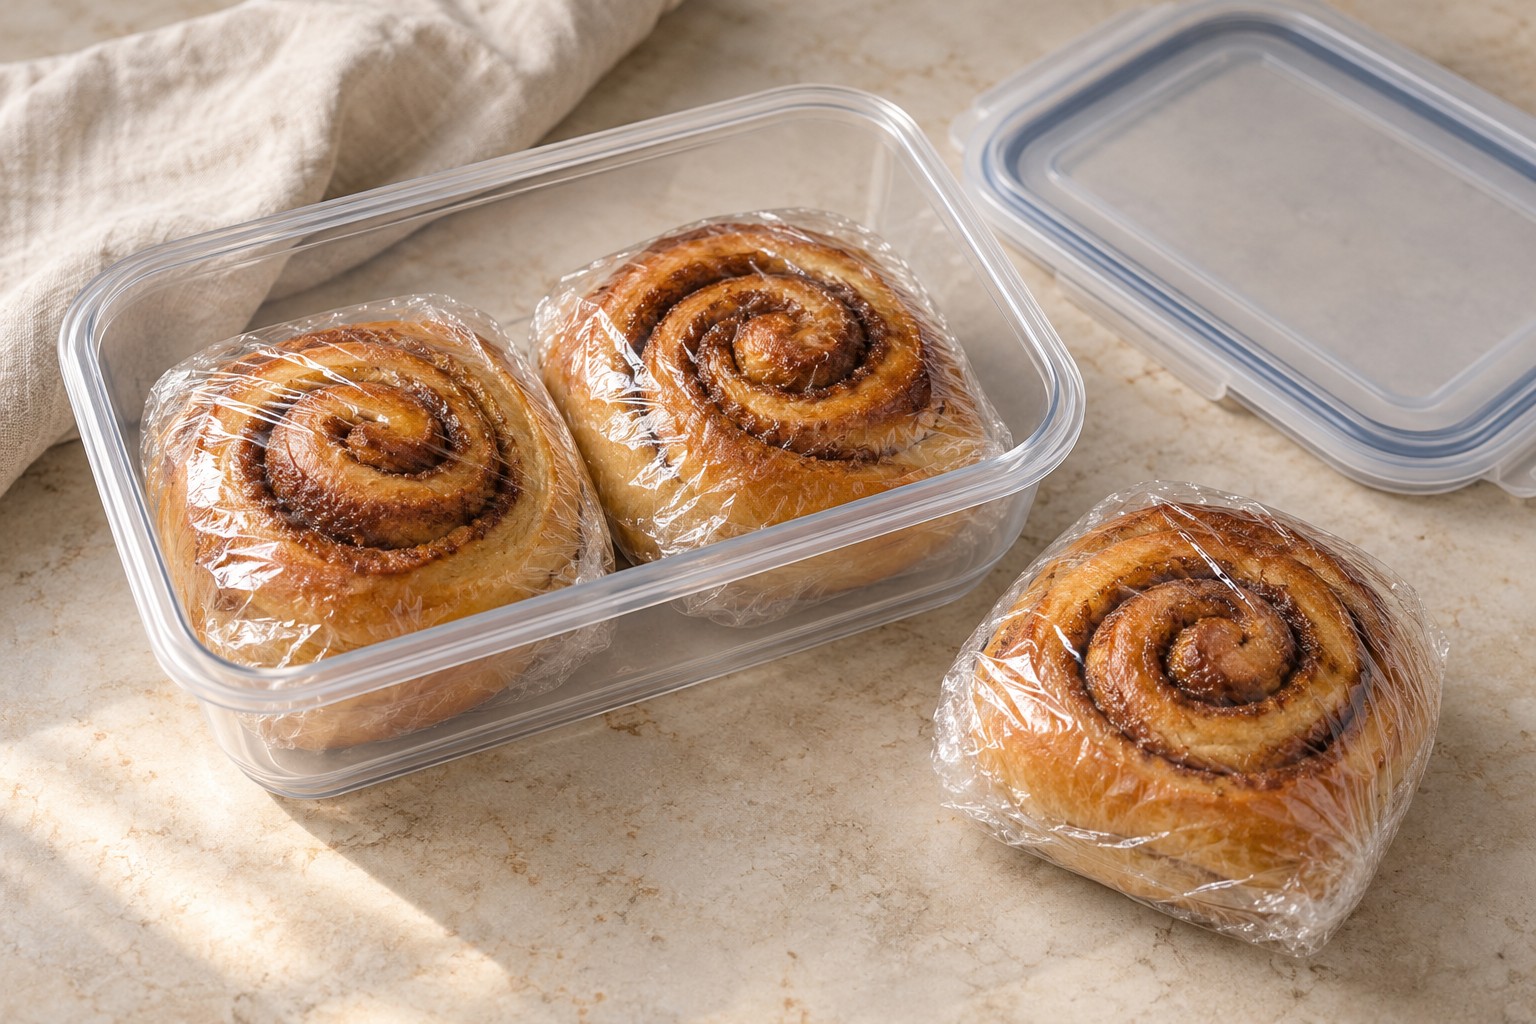
If you freeze the complete glazed buns, the topping may lose some of its gloss when thawed, even if the roll still tastes good. For a special gathering, freezing unglazed buns and adding fresh chocolate at serving time offers more control.
Frequently asked questions
Is every Icelandic snúður topped with chocolate?
No. Chocolate is a recognizable and popular finish, but icing styles vary among bakers. This article focuses on the dark-chocolate-glazed version published by What’s Baking?. It would be misleading to claim that every bakery sells only this exact variation.
What does cardamom add to a cinnamon roll?
It contributes a warm, fragrant note that complements cinnamon without duplicating its flavor. Cardamom can smell floral, citrusy, and subtly peppery. Freshness and quantity both affect its prominence.
Can I use bread flour instead of all-purpose flour?
Bread flour generally has a higher protein content and can create a chewier structure. It may also absorb liquid differently. Because the published dough is formulated with all-purpose flour, changing flour is an experiment and may require adjustment. Follow the original first if you want predictable results.
Why does my dough spring back when rolled?
Gluten tension can make an enriched dough resist stretching. Let it rest covered for several minutes, then try again with gentle pressure. Adding heavy force can tear the surface and make the finished spiral uneven.
How tightly should I roll the log?
Firm enough to make an even spiral without giant gaps, but not so tightly that you squeeze out the butter filling. Keep the tension moderate across the full length of the log and seal the clean edge.
What if my rolls are not rising in thirty minutes?
Use the dough's size and feel as your guide. A cool room, cool dough, or slow yeast can extend the proof. If they remain dense after a long period, evaluate yeast freshness and dough temperature rather than baking them prematurely.
Should chocolate go on hot or cool buns?
Slightly warm buns work well for this particular glaze. Very hot buns can cause excessive runoff, while completely cold buns may make it harder to spread a thickening topping. Use a rack or tray to catch drips.
Can I omit the egg or use non-dairy milk?
Possibly, but those changes affect moisture, fat balance, browning, and structure. They are untested adaptations to this published enriched-dough recipe. For an egg-free or dairy-free result, use a recipe designed and tested for those requirements where possible.
Is the recipe gluten-free?
No. Its published ingredient list contains wheat flour. Simply replacing the flour with a gluten-free blend is unlikely to reproduce the same elastic dough without a substantially different formula.
Are the published nutrition figures guaranteed?
No. Per-roll nutrition depends on actual ingredient brands, chocolate selection, portioning, and how much glaze each bun receives. Avoid treating an unsourced estimate as a verified laboratory measurement. If accurate nutrition matters, calculate it using the specific products and actual yield.
Final thoughts: Follow the cues, enjoy the result
Icelandic Snúður is a satisfying example of how thoughtful technique elevates simple ingredients. Flour, yeast, milk, butter, cinnamon, cardamom, and chocolate become something memorable through kneading, rising, shaping, and gentle glazing. Every stage offers a useful lesson in how enriched dough works.
Begin with the published Icelandic Cinnamon Rolls Snúður Recipe, keep its measurements consistent, and pay attention to the signs that your dough is ready for the next step. Save the related Icelandic Snúður Guide: What Makes These Cinnamon Rolls Unique for additional background, while using this article as your practical troubleshooting companion.
The most rewarding part may be the moment you cut open a finished roll and see the cinnamon spiral, still soft beneath the chocolate glaze. Enjoy it fresh, ideally with a favorite warm drink—and take notes so your next batch is even better.
IN PICTURES
From the baking notebook
FROM THE RECIPE BOX