On this page
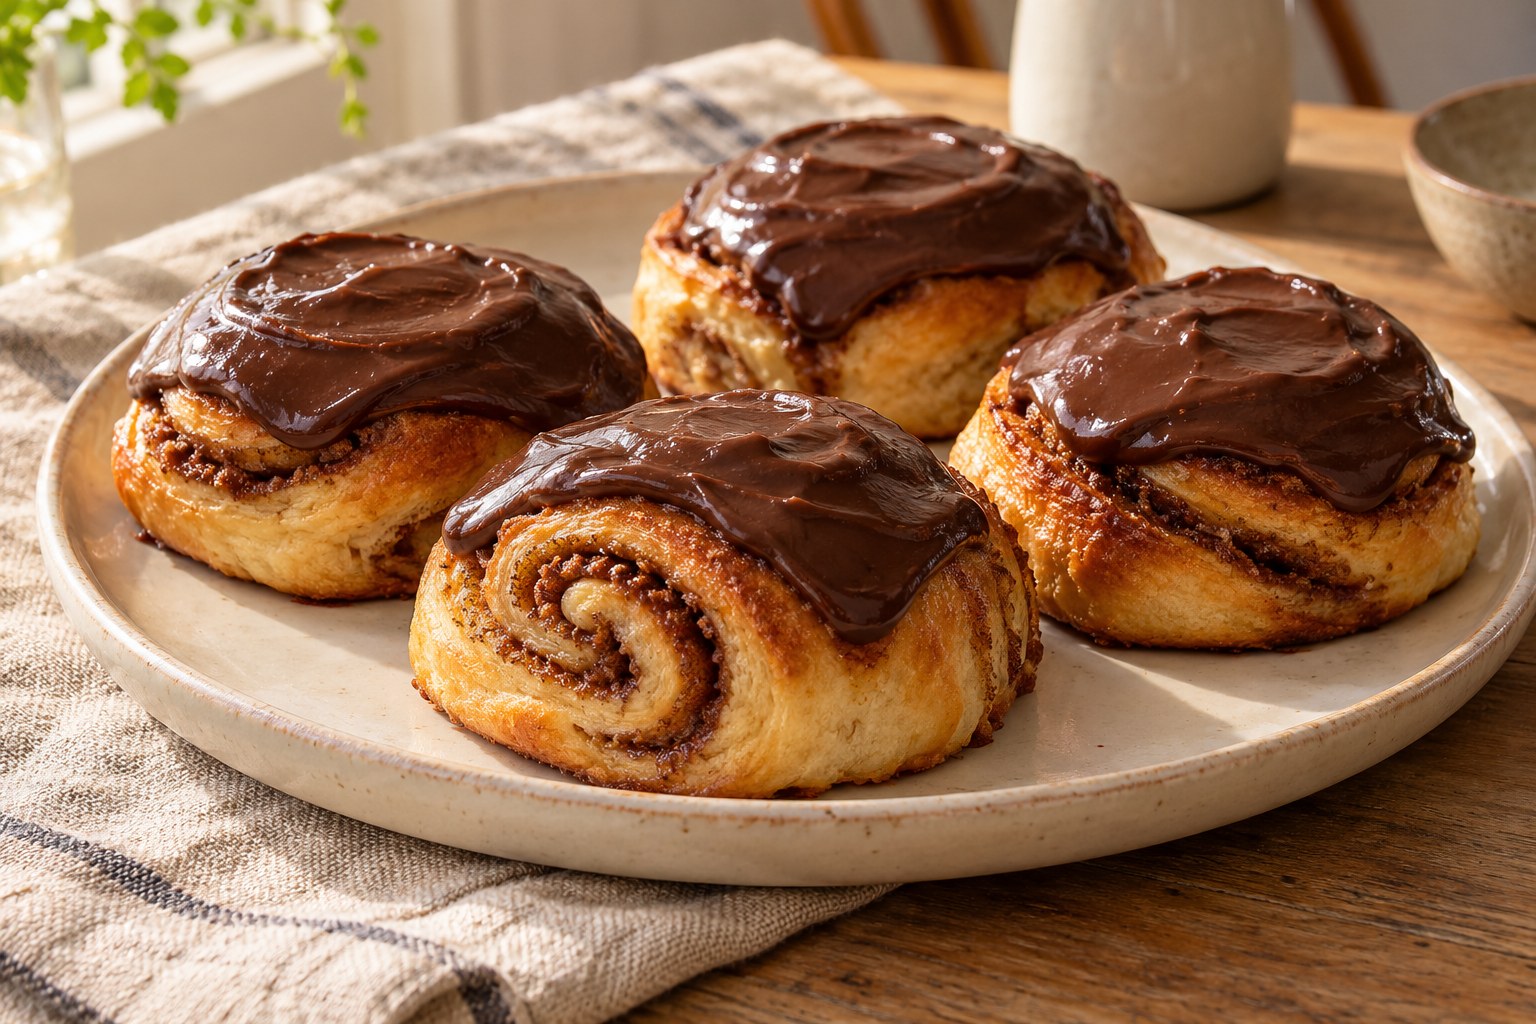
Imagine a cinnamon swirl wide enough to hold in both hands, its fragrant layers covered with a generous sweep of chocolate. That is one of the great pleasures of Icelandic snúður: a familiar yeasted bun with a distinctly bakery-counter personality. Some versions wear chocolate icing; others are finished with a pale or pink glaze, while more modern interpretations may leave the spiral exposed. What matters is the satisfying combination of soft dough, warm spice, visible swirls, and a topping that suits the bun.
If you want to bake the version featured on What's Baking?, start with the complete Icelandic Cinnamon Rolls Snúður recipe. It makes twelve rolls from an egg-and-milk-enriched dough with cardamom, butter, brown sugar and cinnamon, finished with a dark chocolate glaze. This article is its baking and culture companion: how to understand the pastry, choose ingredients, read the dough, shape even spirals, and correct problems before another batch goes into the oven.
For a visual, magazine-style walkthrough of our baked buns, see Icelandic Snúður (Cinnamon Rolls with Chocolate Glaze). That feature includes the approved step photographs. Here, we will concentrate on the why behind those steps, with enough practical detail to help you bake confidently rather than merely follow a timer.
What is snúður, and what makes it Icelandic?
Snúður is an Icelandic cinnamon-roll pastry found in bakeries and home kitchens. The spiral belongs to a wider family of northern European cinnamon bakes, but Icelandic versions are especially associated with a substantial individual bun and an eye-catching icing. The Icelandic Food Centre describes the bakery-style version as a large cinnamon bun largely covered in chocolate; contemporary Icelandic bakeries also sell versions with pink glaze. That is an important nuance: chocolate is a popular finish, not an exclusive definition.
The bakery Reynir Bakarí, established in Kópavogur, lists both chocolate-glazed and pink-glazed snúður. The Iceland Food Centre's snúður article also describes alternative coloured or caramel-style glazes. Those real examples are more useful than treating one internet recipe as the unchanging national standard.
It is also worth avoiding a confident story about exactly who invented the pastry. Icelandic baking traditions reflect multiple influences, including Danish baking, and the Iceland Food Centre explicitly says the origin of bakery-style snúður is uncertain. We can celebrate the tradition without inventing a precise origin or date.
The pleasure is not only historical. Snúður can be a casual coffee-break treat, something picked up from a neighbourhood bakery, or a Saturday project at home. Its broad spiral displays the filling, and the top becomes an inviting canvas for icing. In our own recipe, cardamom gives the dough a delicate fragrant note that works particularly well beside cinnamon and dark chocolate.
Snúður versus a typical American cinnamon roll
The difference is often visual before it is anything else. Many North American cinnamon rolls are baked touching one another in a pan and finished with a cream-cheese frosting. The version linked here is shaped as twelve individual rolls, spaced apart on a parchment-lined tray, and topped with a pourable chocolate mixture. Individual buns can develop their own edges rather than pulling apart as a single pan.
Compare our Cinnamon Rolls and the separately shaped Swedish Kanelbullar for two related bun styles; neither is the formula for the chocolate-glazed Snúður here.
But there is no universal rule saying all American cinnamon rolls are soft while all Icelandic rolls must be dense and chewy. Techniques vary by bakery, dough formula, proofing time, and oven. A well-made snúður should be pleasant to bite through; a hard or dry centre is not an authentic feature to aim for. The enriching milk, egg and butter in our recipe support a tender crumb.
The topping makes another distinction. Chocolate icing changes how a bun tastes from the first bite: cocoa richness counters warm cinnamon and sweeter filling. Some Icelandic bakeries also use coloured sugar icing rather than chocolate. What is important to learn is how to get a stable topping, not insist on one particular colour.
If you are deciding which roll to bake, think about your preferences. Choose a pan-baked style if you want very soft sides and a shared tray; choose our snúður if you enjoy defined spirals, a little individual-edge browning, and a glossy chocolate cap. Either can be delicious when its dough is mixed, risen and baked correctly.
The verified What's Baking? formula at a glance
Use the published Snúður recipe card for its complete ingredient list and twelve detailed steps. Below is the verified ingredient framework, so you can understand which component does what without accidentally changing the formula.
Dough: A soft enriched yeast base
- 500 g all-purpose flour: provides enough gluten-forming protein to support rolling and shaping.
- 80 g granulated sugar: contributes sweetness and browning.
- 7 g active dry yeast: supplies the lift; the recipe begins by blooming it in lukewarm milk.
- 250 ml whole milk, lukewarm: hydrates the dough and contributes tenderness.
- 80 g unsalted butter, melted: enriches the crumb; let very hot butter cool before mixing.
- One large egg: contributes structure, colour, and richness.
- One teaspoon each of salt and ground cardamom: balances sweetness and provides the signature fragrance in this specific formula.
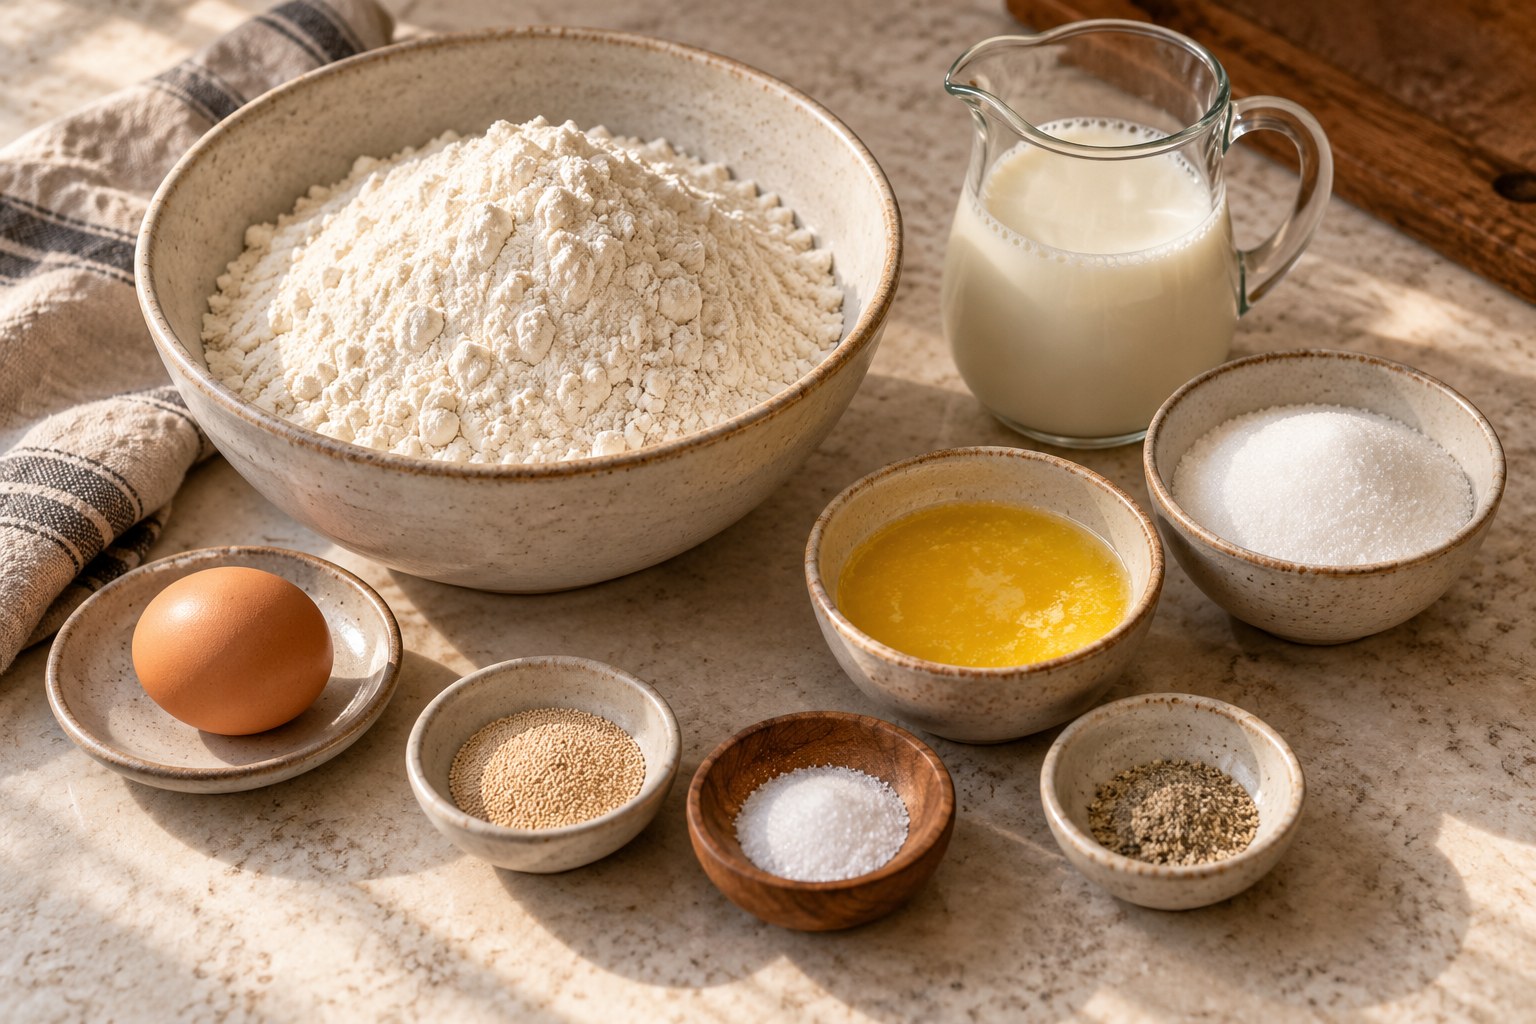
The formula is designed as a whole. Changing the flour type, omitting the egg, or swapping the milk may alter hydration and dough strength. Those modifications can be explored later, but your first batch is most useful as a baseline baked from the published quantities.
A Sourdough Cinnamon Rolls formula illustrates why swapping the leavening changes the process and proofing schedule; make the Snúður recipe as written first.
Filling: Butter, brown sugar and cinnamon
The published filling combines 70 g softened unsalted butter, 100 g brown sugar, and two tablespoons of ground cinnamon. Softened butter should be spreadable, not a puddle. A paste made from the measured ingredients helps the filling remain distributed across the rectangle when rolled.
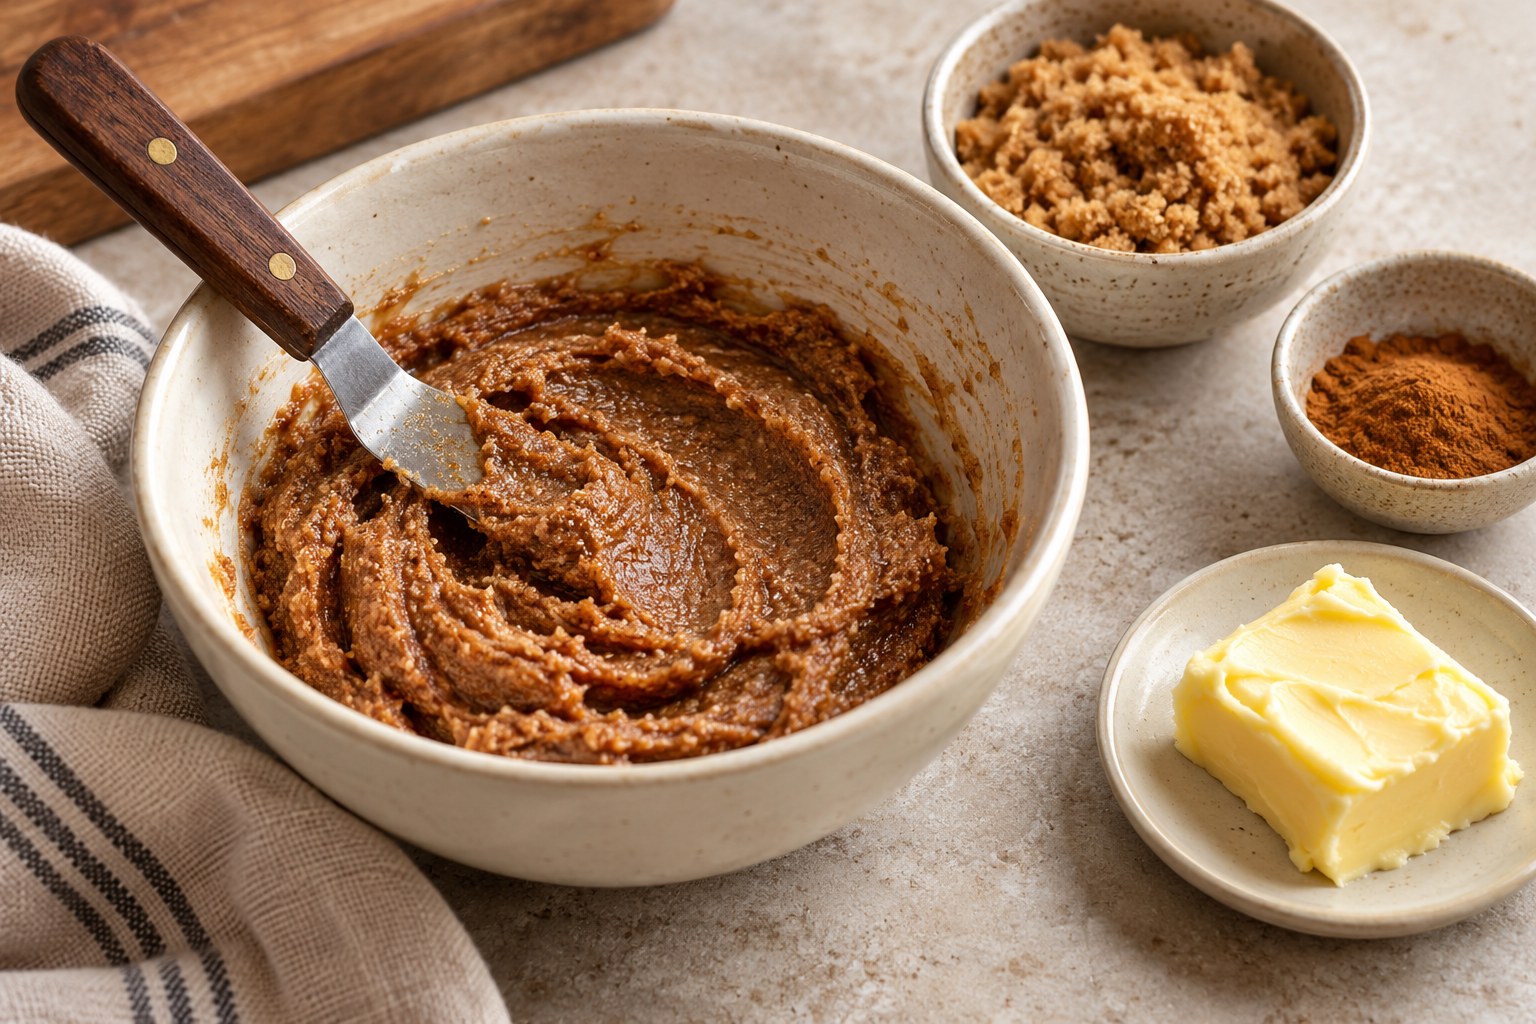
Brown sugar adds a deeper, slightly caramel-like flavour. Cinnamon supplies the recognisable aroma, and an even layer keeps one bite from tasting bland while another has too much spice. Resist scattering extra cinnamon randomly over the paste if you want to evaluate how this recipe is intended to taste.
Glaze: Real dark chocolate, not powdered cocoa icing
Our linked recipe's topping uses 150 g chopped dark chocolate, 50 g unsalted butter, two tablespoons of honey and two tablespoons of milk. It is a chocolate-and-butter glaze, rather than the cocoa-and-icing-sugar frosting used in some other Icelandic recipes. Both styles can belong to the broader snúður tradition, but they are not the same formula.
The glaze needs to be smooth enough to pour while thick enough to settle generously over each swirl. The recipe uses gentle heat in a bowl over barely simmering water. Excess heat can spoil texture, so patience is part of the preparation rather than a fussy optional detail.
Understanding yeast: Start with the milk, not the clock
In the published method, active dry yeast is stirred into milk warmed to approximately 38°C (100°F) with a tablespoon of the already measured sugar. After roughly five to ten minutes, the yeast should show activity. The purpose of the warm liquid is not to cook anything; it is to create favourable conditions for the yeast.
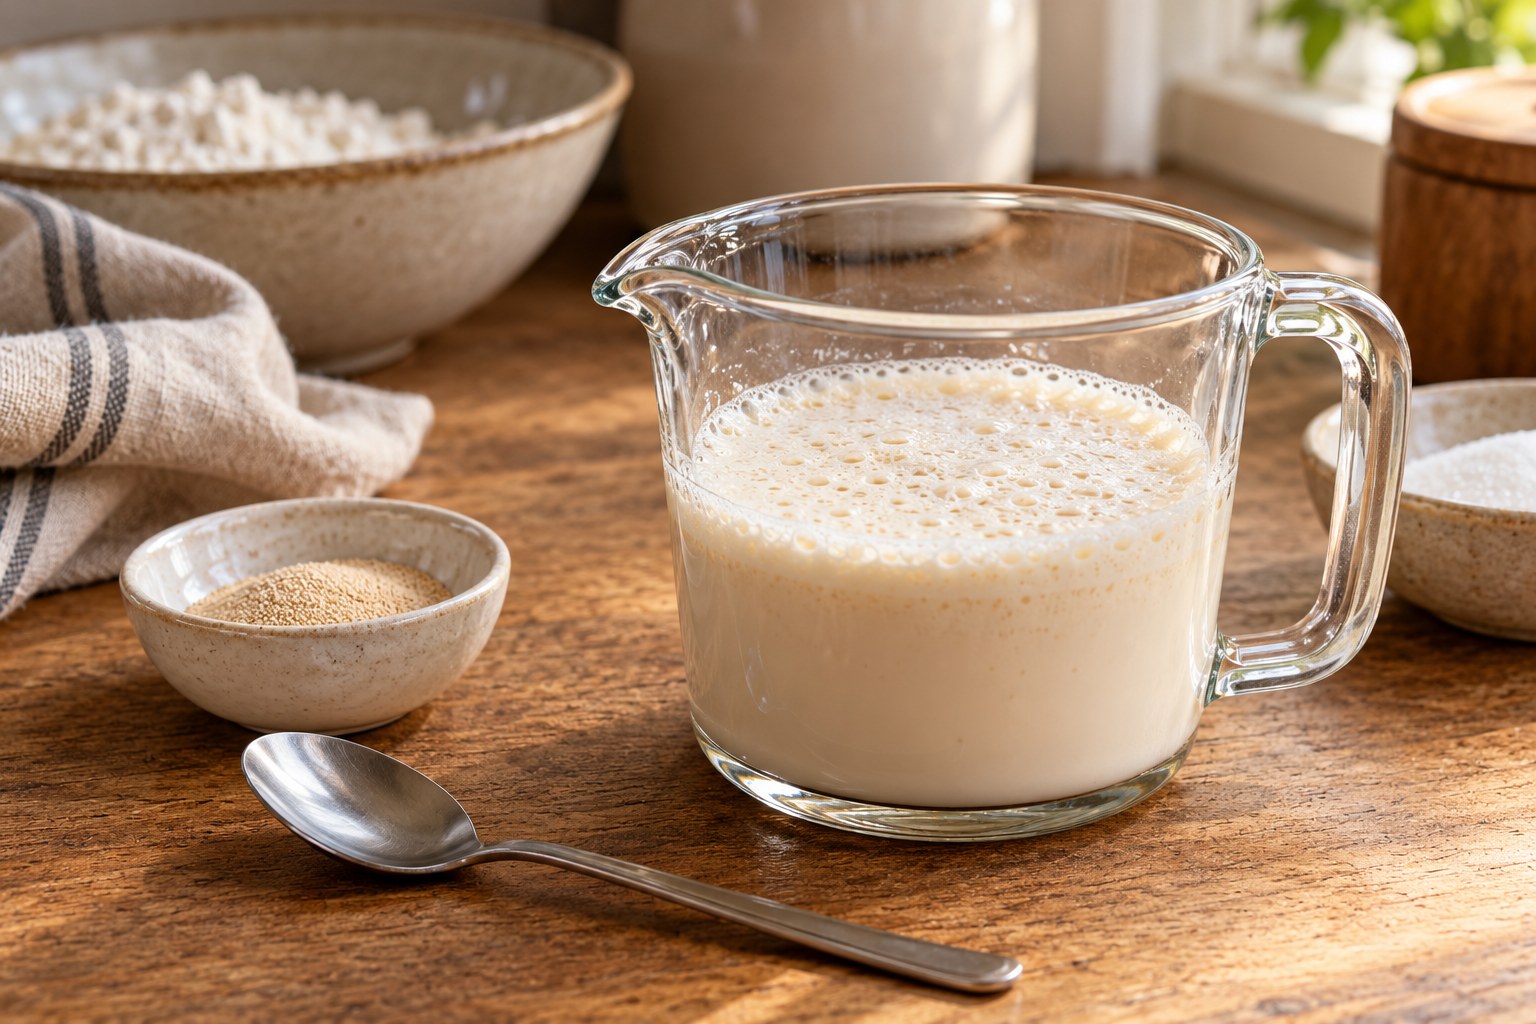
Measure the milk if possible. Water or milk that feels comfortably warm to one person may be too hot for another. Milk that is slightly cooler can still work, but the dough may rise more slowly. Excessively hot liquid can damage yeast. If the mixture never becomes active, confirm the yeast is within date and not compromised before committing all the flour and butter.
Once the dough is mixed, remember that proofing times are estimates. Room temperature, ingredient temperature, yeast activity and the dough's richness all affect how quickly it expands. King Arthur Baking's cinnamon roll guidance makes the same point: use the dough's visible rise and readiness rather than assuming all kitchens produce identical results after an hour.
A warm, reasonably draft-free area is helpful, but avoid placing the bowl directly onto a hot appliance or into an oven that remains turned on. Keep the dough covered to prevent a dry skin forming on the surface. The first rise develops volume and gives you a dough that is easier to shape without tearing.
Kneading: How to recognize dough that's ready
Our recipe mixes the ingredients with a dough hook and kneads for approximately seven to eight minutes until smooth and elastic. That is a starting guide, not permission to ignore the actual dough. Mixing speed, flour absorption and bowl size vary. The dough should become cohesive, stretch without immediately ripping apart, and feel soft rather than dusty.
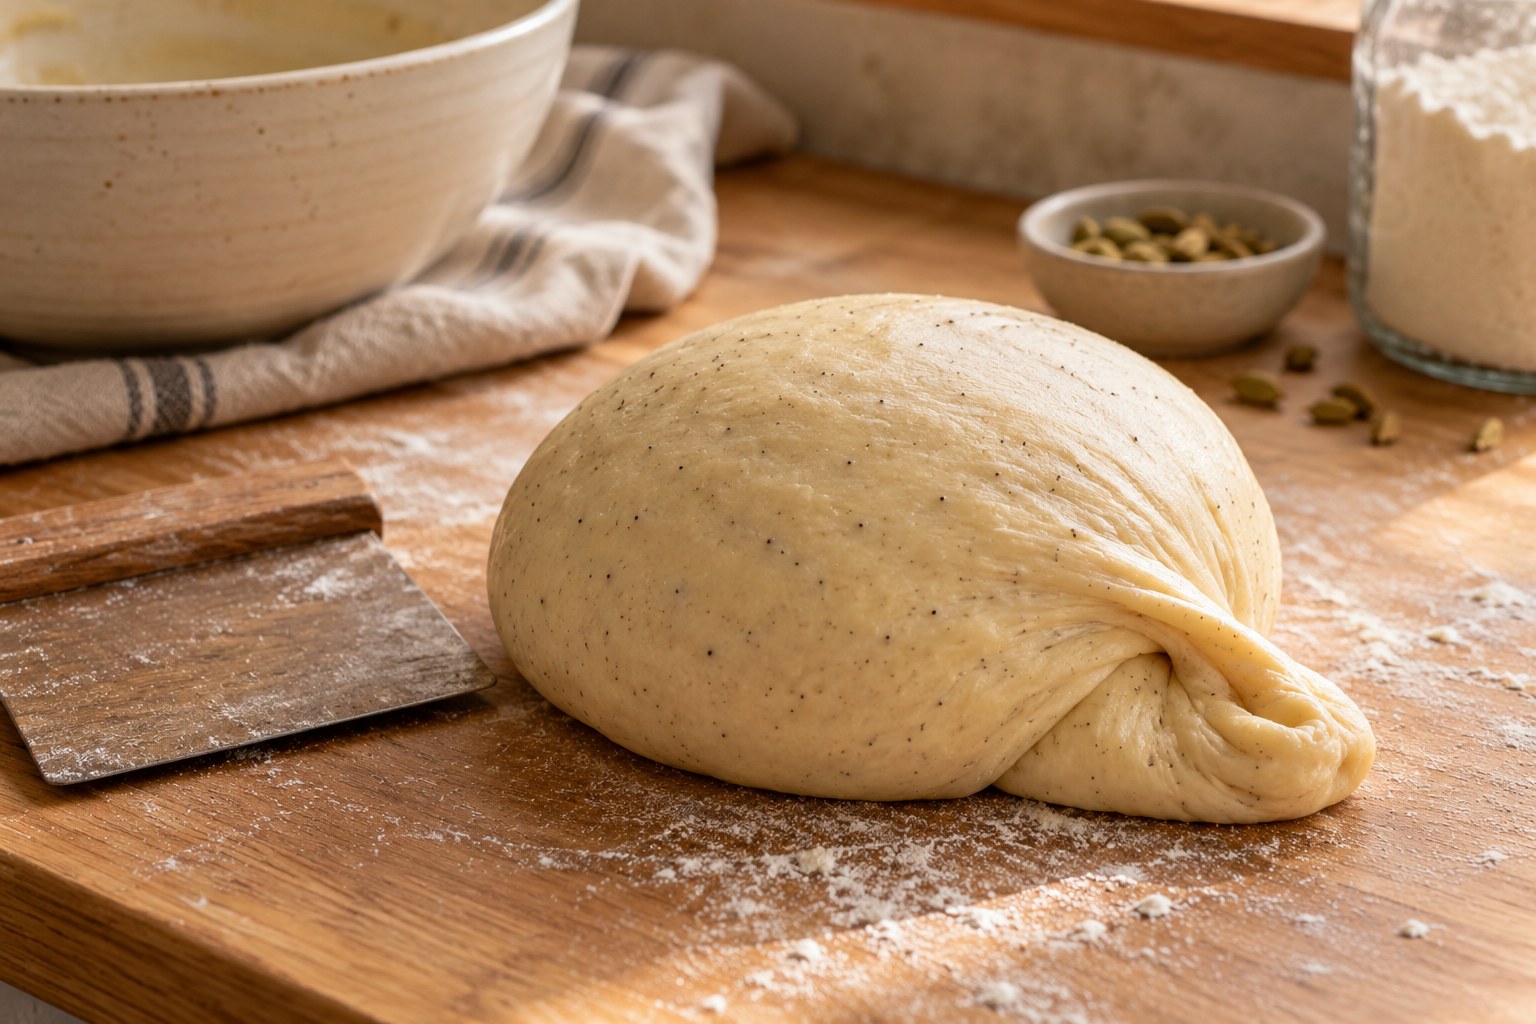
It can be tempting to pour in extra flour whenever the dough clings to your fingers. Additions made too freely change the recipe's hydration and can produce a dry bun. Begin by letting the flour absorb the liquid and continuing the planned kneading. If the dough is genuinely unmanageable, adjust in small increments as the recipe directs.
For bakers working by hand, mixing may require more time. Use a clean surface, stretch and fold the dough in a rhythm, and pause briefly if it resists strongly. If using a stand mixer, check the manufacturer's dough-speed guidance and avoid running the motor harder than recommended.
Enriched dough behaves differently from lean pizza dough because butter, egg, milk and sugar influence gluten development and softness. Do not judge it solely by whether the bowl is perfectly clean. Some tackiness can be normal. The finished dough should feel supple enough to roll without excessive force once it has risen.
The first rise: Look for expansion and resilience
After kneading, the dough goes into a lightly oiled covered bowl and rests for about an hour or until doubled in size, according to the published method. A transparent container makes the change easier to see. Marking the starting height can help you learn what a doubled rise actually looks like without guessing.
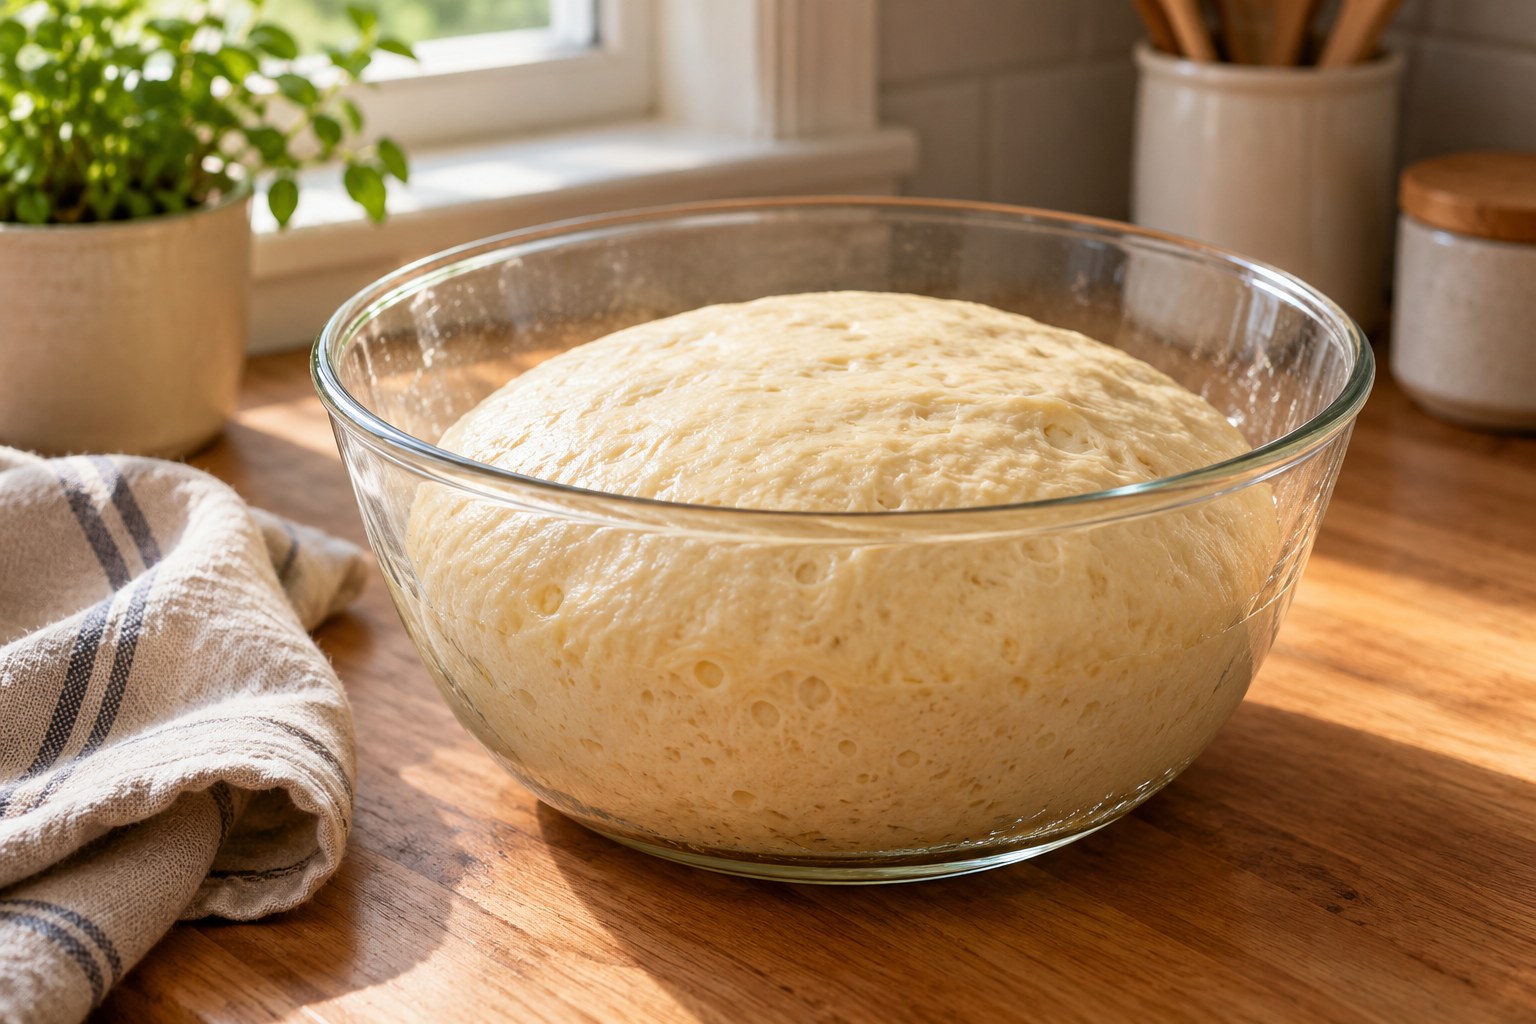
A room that is cool may require extra time. A very warm environment may make the dough race ahead and become harder to handle. The goal is not to force the fastest possible expansion; it is to reach the condition the recipe requires while maintaining pleasant dough texture.
If the dough appears unchanged after the suggested hour, check whether the room is especially cool or the yeast was inactive. Give healthy dough more time before adding ingredients to it or starting again. If it overproofs and becomes fragile, the eventual buns may spread unevenly or lose height. Watching the volume is more reliable than keeping a strict appointment with a timer.
Preparing the filling while the dough rises
Mix the softened butter, brown sugar and cinnamon into a smooth paste, making sure no large pockets of butter or dry sugar remain. Keeping the paste at a spreadable consistency prevents it from tearing the dough when you apply it. If it becomes too soft in a hot kitchen, let it firm up slightly rather than adding flour or other untested ingredients.
Set out parchment, a rolling pin, a small offset spatula or butter knife, and a clean ruler. Having everything ready makes the shaping step calmer, especially once the dough is well risen. Work efficiently but gently; a relaxed dough is easier to stretch into a rectangle.
Shaping the classic spiral without squashing it
The source recipe calls for a rectangle approximately 35 x 45 cm, roughly 5 mm thick. The dimensions help distribute the filling and create twelve reasonably consistent swirls. If your rectangle is much thicker at one end, the finished buns can have dramatically different centres and baking times.
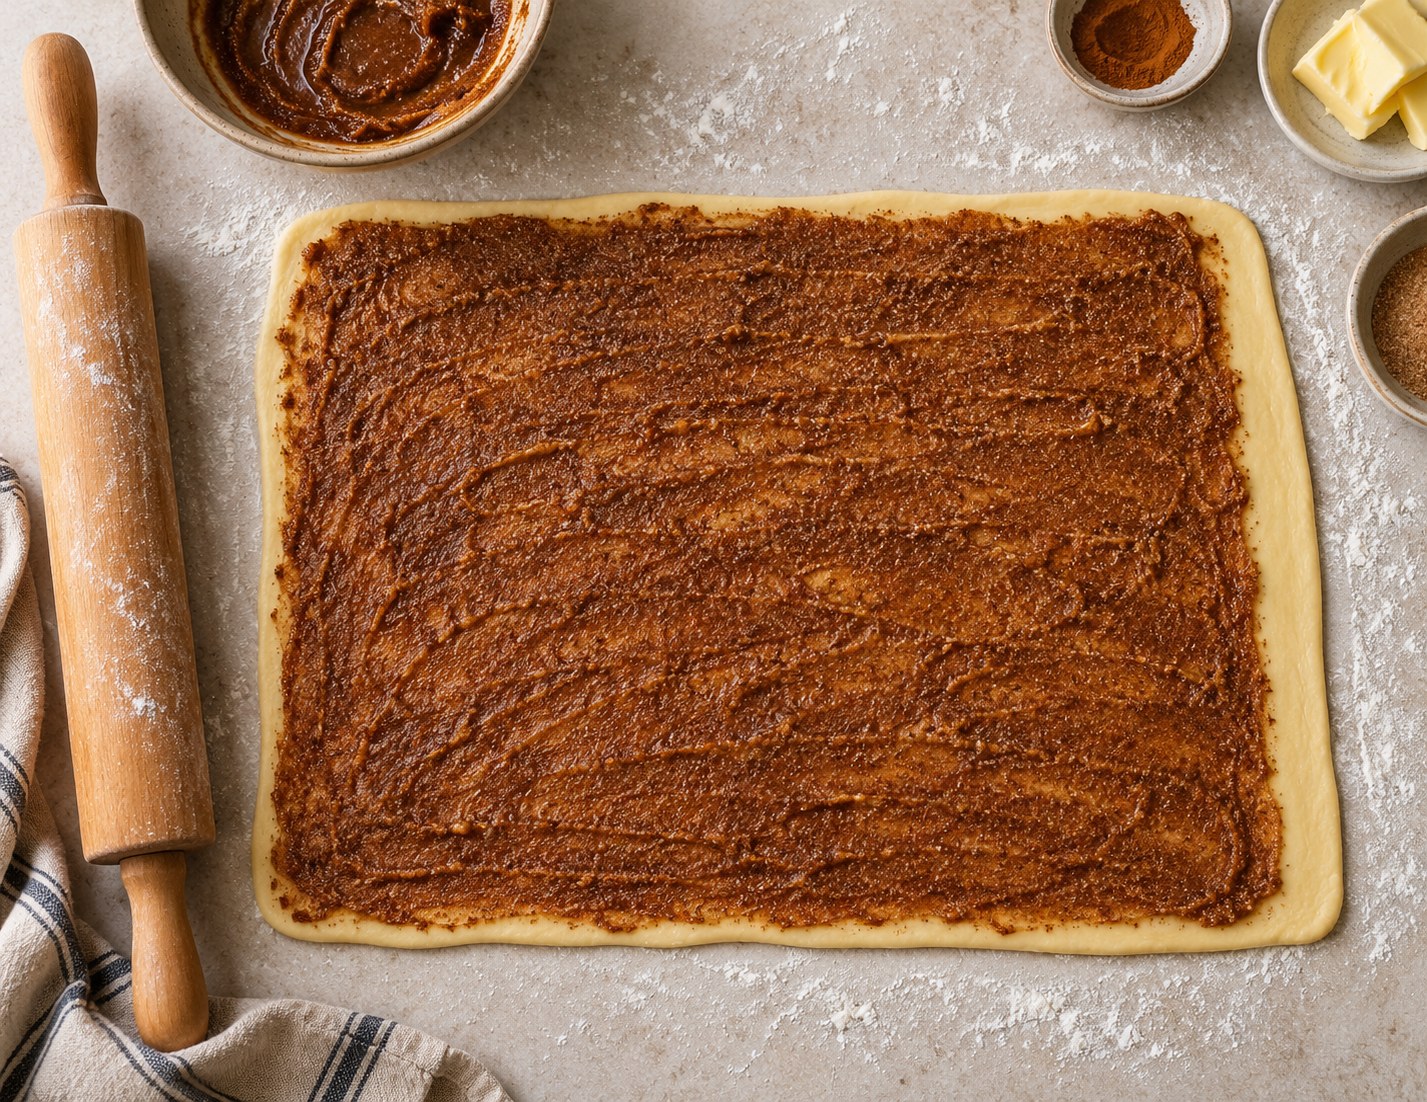
Start by pressing the risen dough into a rough rectangle with your hands. Then roll from the middle outward, rotating your attention to the corners. Stop occasionally to check the size and thickness. Use only enough flour on the work surface to prevent sticking; heavy dusting can make the outer seam refuse to seal.
Spread the cinnamon mixture in a thin, even layer, leaving a one-centimetre clean border along one long edge. Start rolling from the other long edge. The roll should be snug enough to hold its spiral but not so tightly compressed that the centre is pushed upward during baking. Pinch or press the clean edge to secure the log.
Twelve consistent pieces: A small technique with big impact
Before cutting, mark the log into twelve equal portions. With a log approximately 45 cm long, that works out to roughly 3.75 cm per piece, depending on any stretching during rolling. The published recipe describes approximately 3.5 cm pieces; treat the final log length and the goal of twelve pieces as more reliable than an exact cut width. Measure your own log rather than assuming it stayed exactly the same length.
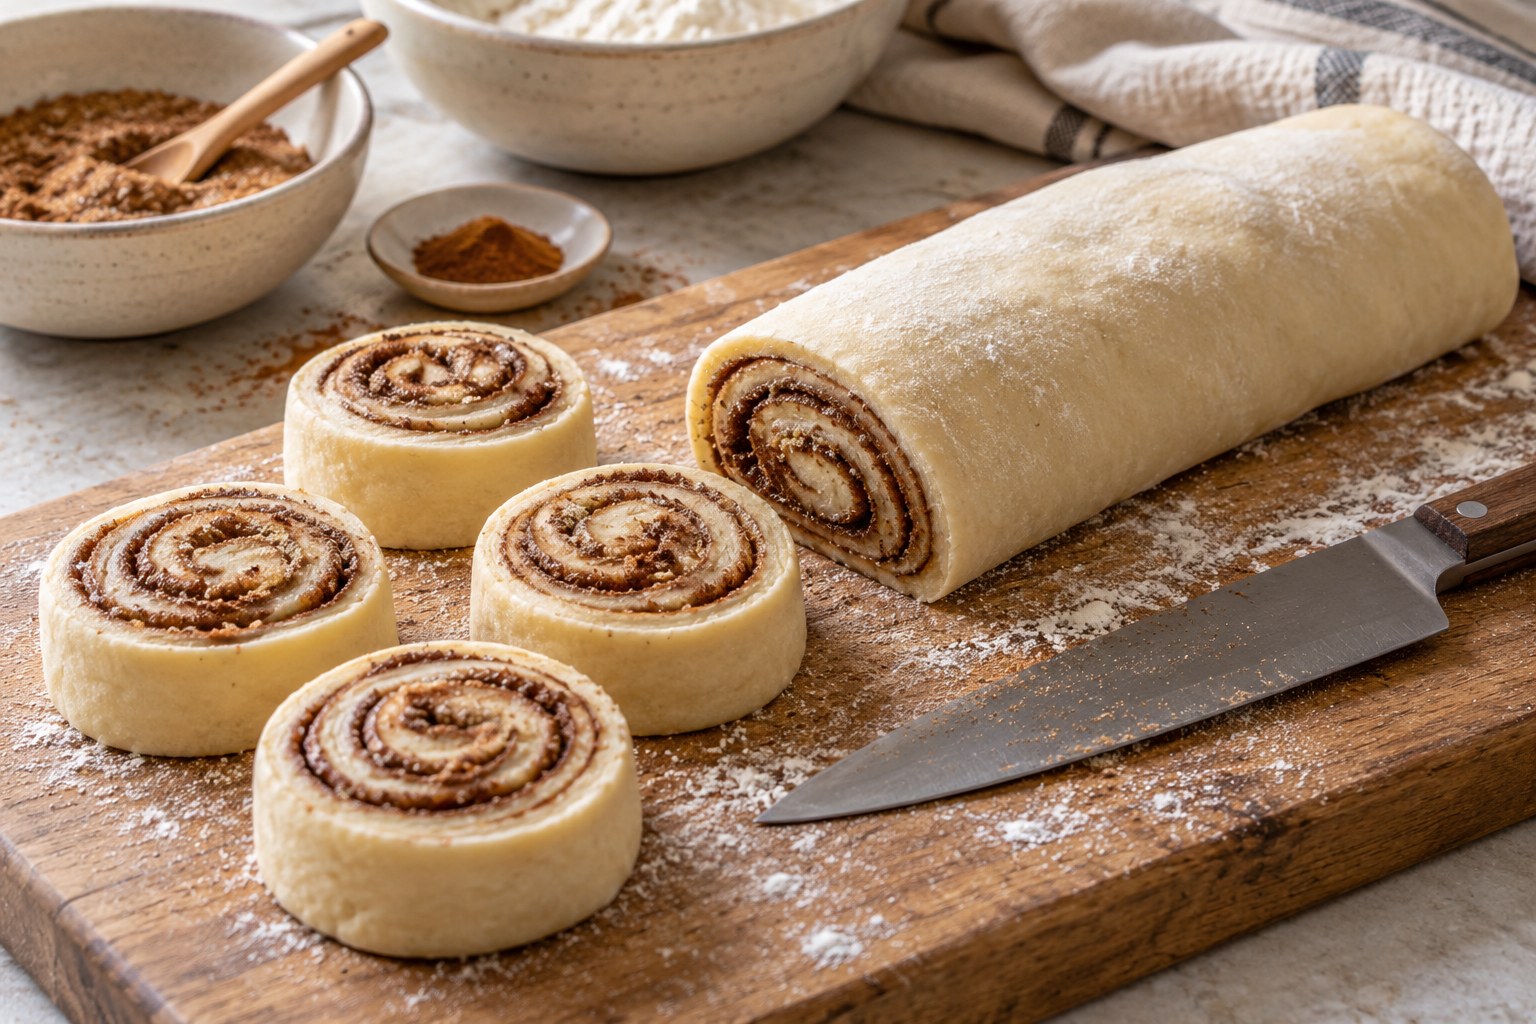
Use a sharp knife and a gentle sawing motion, or unflavoured dental floss if you prefer a neat cross-section. Pressing down with a dull knife can flatten the rounds and glue layers together. Set the rolls upright with their swirls visible on a parchment-lined sheet, leaving about 5 cm between buns as directed.
If a spiral begins to unwind, tuck the loose end underneath before the second rise. If the rolls are oval rather than perfectly round, do not overwork them. Dough expands during proofing and baking, and a slight handmade irregularity is part of the appeal.
The second rise: Do not skip the quiet part
Once the twelve pieces are on the tray, cover them loosely and let them become visibly puffy. The linked recipe estimates 30–45 minutes, but the dough's condition remains the essential signal. A cold kitchen can take longer; a warm one can move faster. Give the rolls enough space to expand without being crushed by the covering.
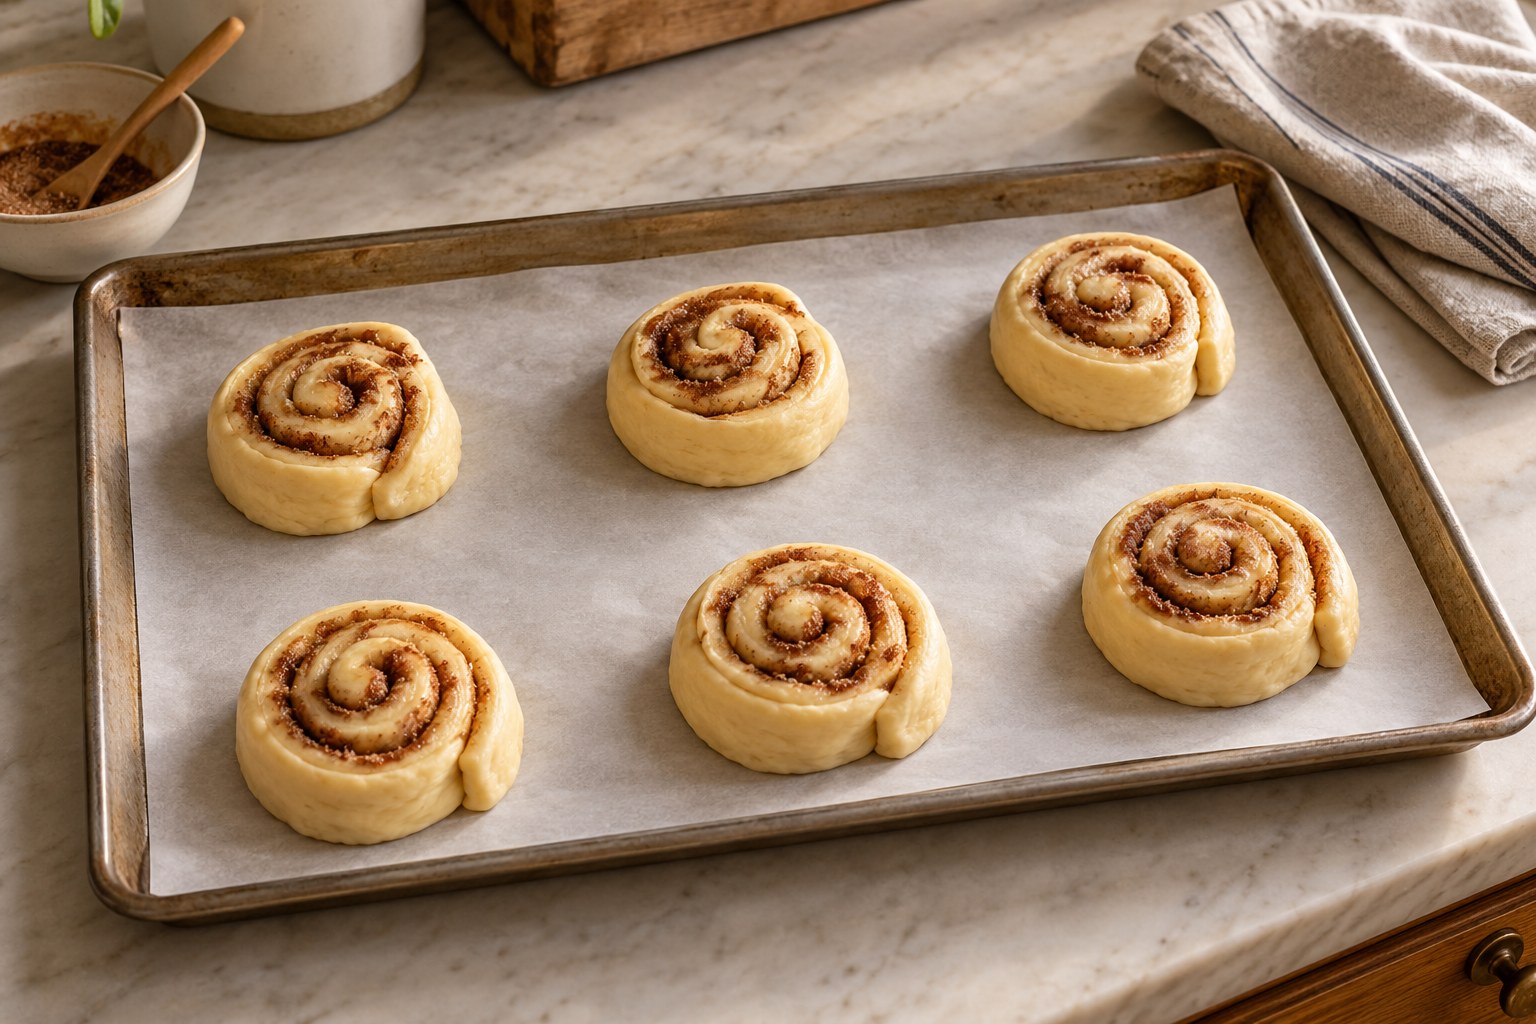
This rise matters because cutting and rolling tighten the dough. A bun baked immediately after shaping may have a denser centre or an uneven spiral. At the other extreme, leaving the shaped buns too long can make them fragile and prone to spreading. Look for a soft, aerated appearance and a dough that no longer feels tightly wound.
Preheat the oven towards the end of the second rise. The recipe specifies 180°C (350°F). An oven that has not fully reached temperature can change the way the rolls expand and brown. Check the oven's calibration if baked goods consistently finish too quickly or too slowly.
Baking: Soft centres, defined swirls and golden edges
The source method bakes the tray for approximately 14–16 minutes, checking for golden colour and doneness. The recipe also gives an internal-doneness reference of about 88–90°C (190–195°F). Use these as recipe-specific indicators, not a universal temperature for every cinnamon roll formula.
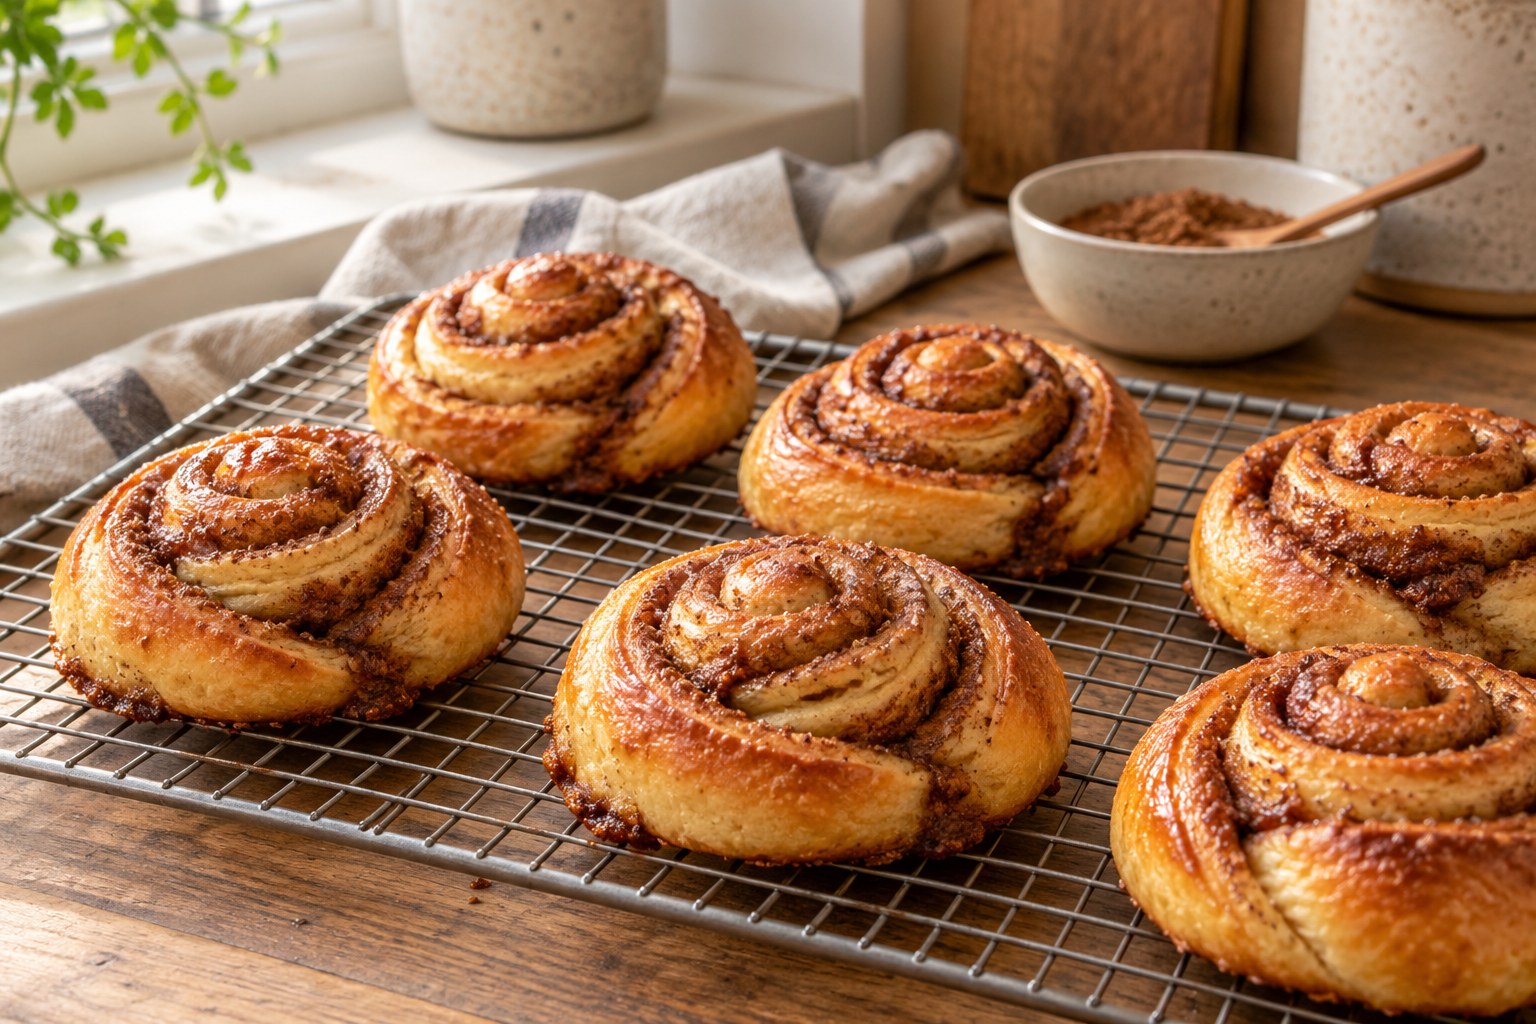
Because the buns are separated on a tray, their edges receive direct heat. Watch the edges and centre together: a browned exterior is useful, but it should not disguise a gummy interior. If you test with a thermometer, avoid probing only the hottest outer edge. A clean probe placed into a doughy part of the centre gives more useful information.
Overbaking is one of the most common reasons a sweet roll loses softness. Once the buns are properly baked, transfer them to a cooling rack as instructed. Do not leave them sitting for a long time on a very hot sheet pan where residual heat can continue to dry the bottoms.
The published recipe lists 30 minutes of preparation and 15 minutes of cooking on its card. That does not include the full hands-off time for the first rise, second rise, glaze and setting. From beginning to serving, allow a generous baking session rather than expecting a 45-minute turnaround.
The chocolate glaze: Smooth, glossy and generously applied
Chocolate gives this variation its characteristic visual finish. Chop the 150 g dark chocolate into relatively even pieces so it melts without large unmelted chunks. Combine it with the 50 g butter, two tablespoons honey and two tablespoons milk in a suitable heatproof bowl over barely simmering water. The bowl should not sit in the water.
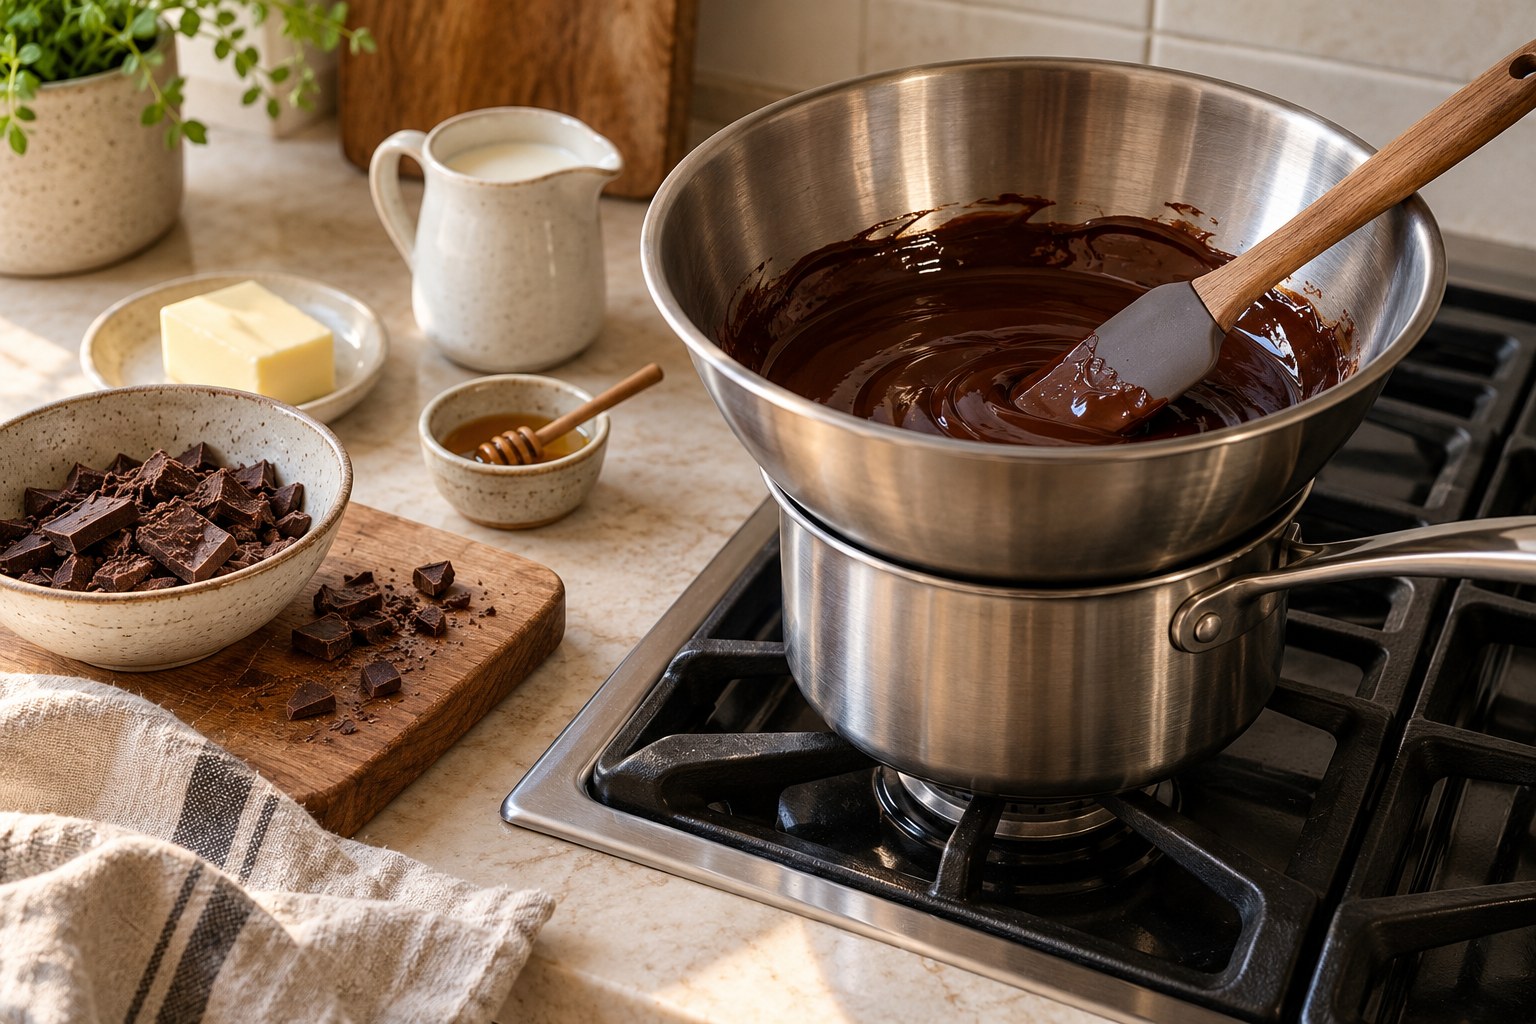
Stir patiently until smooth, then remove it from the heat. The glaze may look thin while very warm and thicken as it cools. If you rush it onto a steaming-hot bun, much of the topping can run off; if you wait until it is too cool, it may form thick streaks instead of covering the surface smoothly.
The recipe calls for coating rolls when they are slightly warm, not hot, then allowing approximately fifteen minutes for the finish to settle. Apply a first spoonful to one bun to check the consistency before coating the whole tray. A small test teaches you more than adjusting the entire bowl of glaze without evidence.
Chocolate glaze versus Icelandic-style cocoa icing
Our recipe is based on melted dark chocolate. Other Icelandic snúður recipes use a mixture of icing sugar, cocoa and liquid. For example, Iceland Food Centre's version describes a cocoa-based icing. These toppings have different setting behaviour and sweetness; substituting one for another requires a separate tested formula.
This distinction also explains why photos from two bakeries can look different while both are recognisably snúður. Some toppings form a matte, opaque surface. Others have a shiny chocolate finish. For the published What's Baking? batch, follow the dark chocolate, butter, honey and milk measurements and enjoy its particular style.
Troubleshooting: Diagnosing the actual problem
Why did my rolls turn out dry?
Possible causes include too much extra flour during kneading, overbaking, or leaving the baked buns exposed to air for too long. Begin by weighing the specified 500 g flour accurately. Watch the buns near the end of baking rather than waiting for them to become dark brown all over. Cool and store them as the recipe recommends.
Why did the dough fail to rise?
The milk could have been too hot, the yeast might be inactive, or the room could be cold. Review the initial bloom and the dough's temperature before assuming the recipe has failed. If the yeast is active and the dough is simply cold, allow additional time for visible expansion.
Why are my swirls uneven or falling apart?
An irregularly rolled rectangle, very loose log, dull knife, or insufficient seam seal can all contribute. Roll to even thickness, spread the filling consistently, mark equal pieces, and tuck loose ends underneath. Avoid pulling the dough so tightly that the spiral centre pops upward.
Why did the filling leak onto the sheet?
Some melted sugar and butter escape during baking. Excessively soft filling, gaps in the roll or uneven spreading can make this worse. Keep the butter softened rather than liquid, spread a thin consistent layer and use parchment. A little caramelised filling at the edge does not mean the batch is ruined.
Why is the chocolate grainy?
Overheating or moisture imbalance can affect chocolate texture. Use gentle indirect heat, a dry bowl and steady stirring. Follow the glaze's measured liquid components. Do not boil the topping or assume that adding a large amount of cold water will repair it.
Why did the glaze slide off completely?
The rolls may have been too hot, or the topping too warm and fluid. Let both cool slightly until the glaze is thick enough to coat a spoon and the buns are warm rather than steaming. Test one roll first.
Why are my rolls dense even though they rose?
Incomplete kneading, underproofing after shaping or overhandling the log may leave a tight interior. Look for smooth, elastic dough before the first rise and visibly puffy buns after the second. Resist compressing the rolls repeatedly to make the shapes look perfect.
How to schedule the bake around a normal day
This is a worthwhile weekend project because much of the time is passive. A practical workflow begins with the yeast, moves through kneading, then uses the first rise to mix the filling and prepare your tools. Shaping follows when the dough is ready, then the second rise allows time to heat the oven and clear a cooling area.
Bake the buns, transfer them to a rack, and make the chocolate glaze while they cool slightly. Finish with a generous coating and the recommended setting time. There is no need to work frantically through the rising periods; the goal is to use them intelligently while still responding to how the dough actually behaves.
If preparing for guests, read the complete recipe the previous day and purchase the ingredients in advance. Check that the yeast is usable, butter is available for both dough and glaze, and there is enough chocolate to cover all twelve. Plan serving time with extra room for slower rises, because an exact schedule is harder to guarantee with yeast than with a simple cookie dough.
Serving ideas and thoughtful presentation
A lightly warm bun with chocolate icing pairs comfortably with coffee, tea or a cold glass of milk. For a clean presentation, arrange the twelve rolls in shallow rows on a board or tray that leaves their spirals visible. The chocolate is already a dramatic feature, so extra decoration is optional rather than necessary.
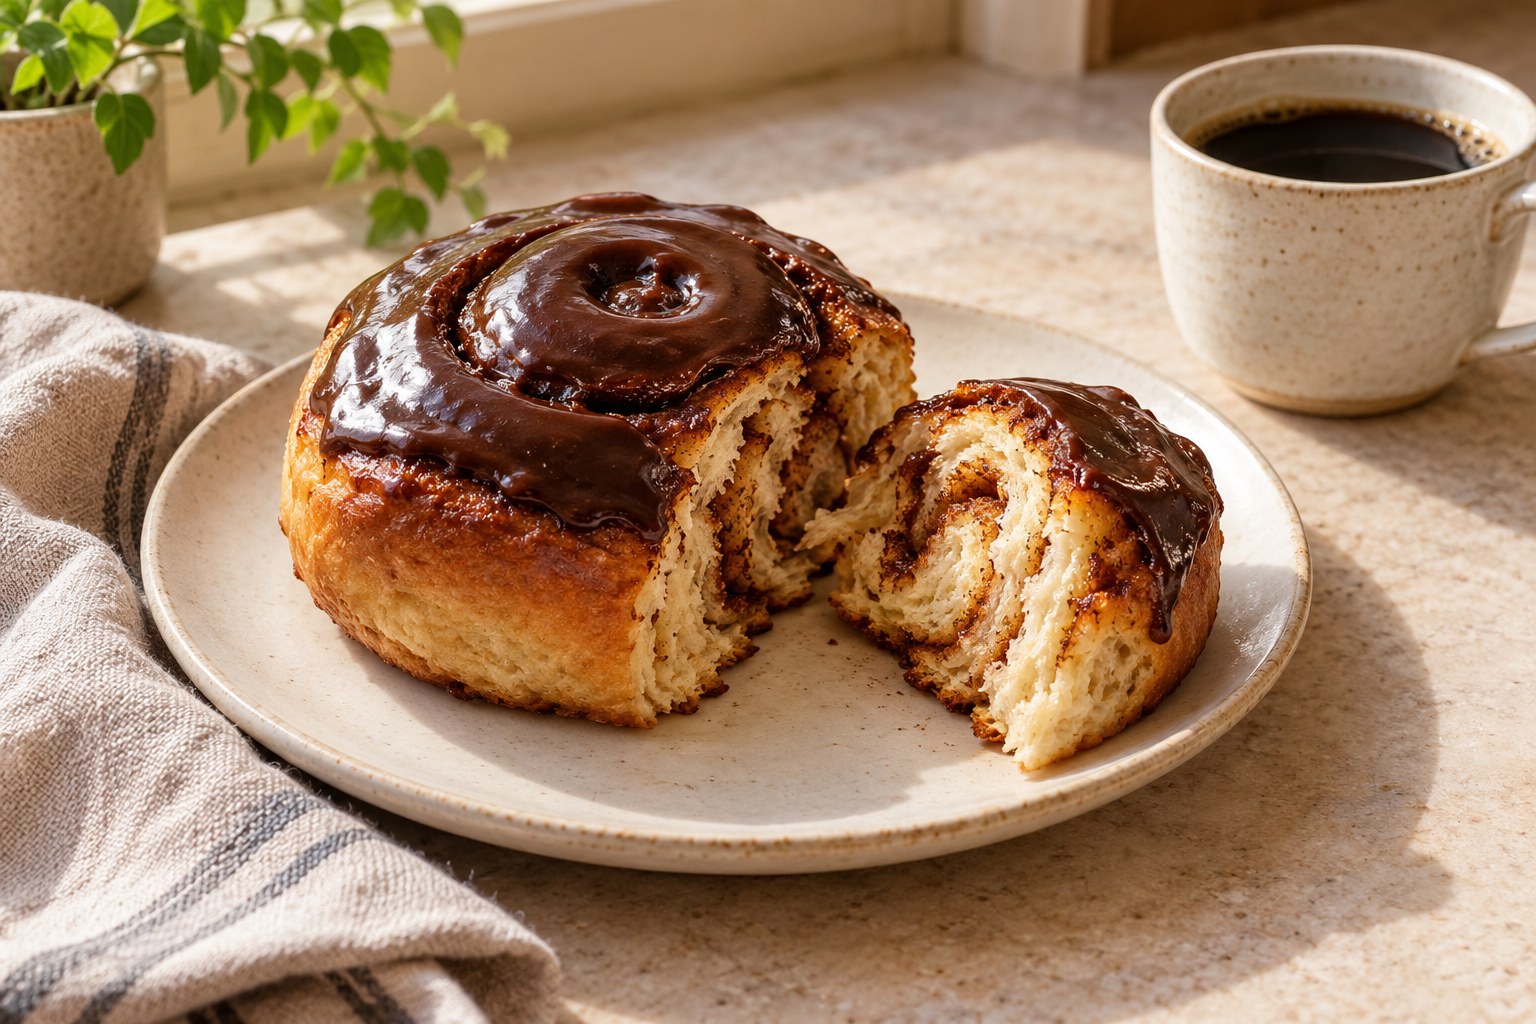
For a family breakfast or afternoon gathering, serve fruit or another lighter accompaniment alongside the buns rather than trying to make the pastry itself a complete meal. Use napkins: a generous chocolate topping is part of the experience, and a perfectly tidy slice is not always realistic.
A short description on a serving card can help guests understand the pastry: Icelandic-style cardamom cinnamon rolls with dark chocolate glaze. This is more informative than describing the recipe as identical to every bun baked in Iceland. If offering a variant with coloured sugar icing, label it separately.
For a bakery-inspired photograph, show one whole iced snúður beside a cut or gently separated roll so the cinnamon spiral is visible. Soft window light reveals the chocolate's texture without harsh reflections. Use photographs that match the actual ingredients and finished bake; do not borrow images of cream-cheese-frosted American rolls and present them as this recipe.
Allergens, substitutions and storage
The published dough contains wheat, milk, egg and butter, and the chocolate topping contains milk and may have additional allergens depending on the chosen chocolate. Honey is part of the glaze. Read chocolate packaging carefully, particularly for people managing nut, dairy or soy allergies. Cross-contact matters when baking for someone with a severe allergy.
A plant-based version is not a matter of casually removing the egg and replacing all butter with oil: those changes can alter the dough's structure and the glaze's setting texture. For special dietary requirements, choose a tested adaptation and label it accurately. Likewise, ordinary all-purpose wheat flour is not gluten-free.
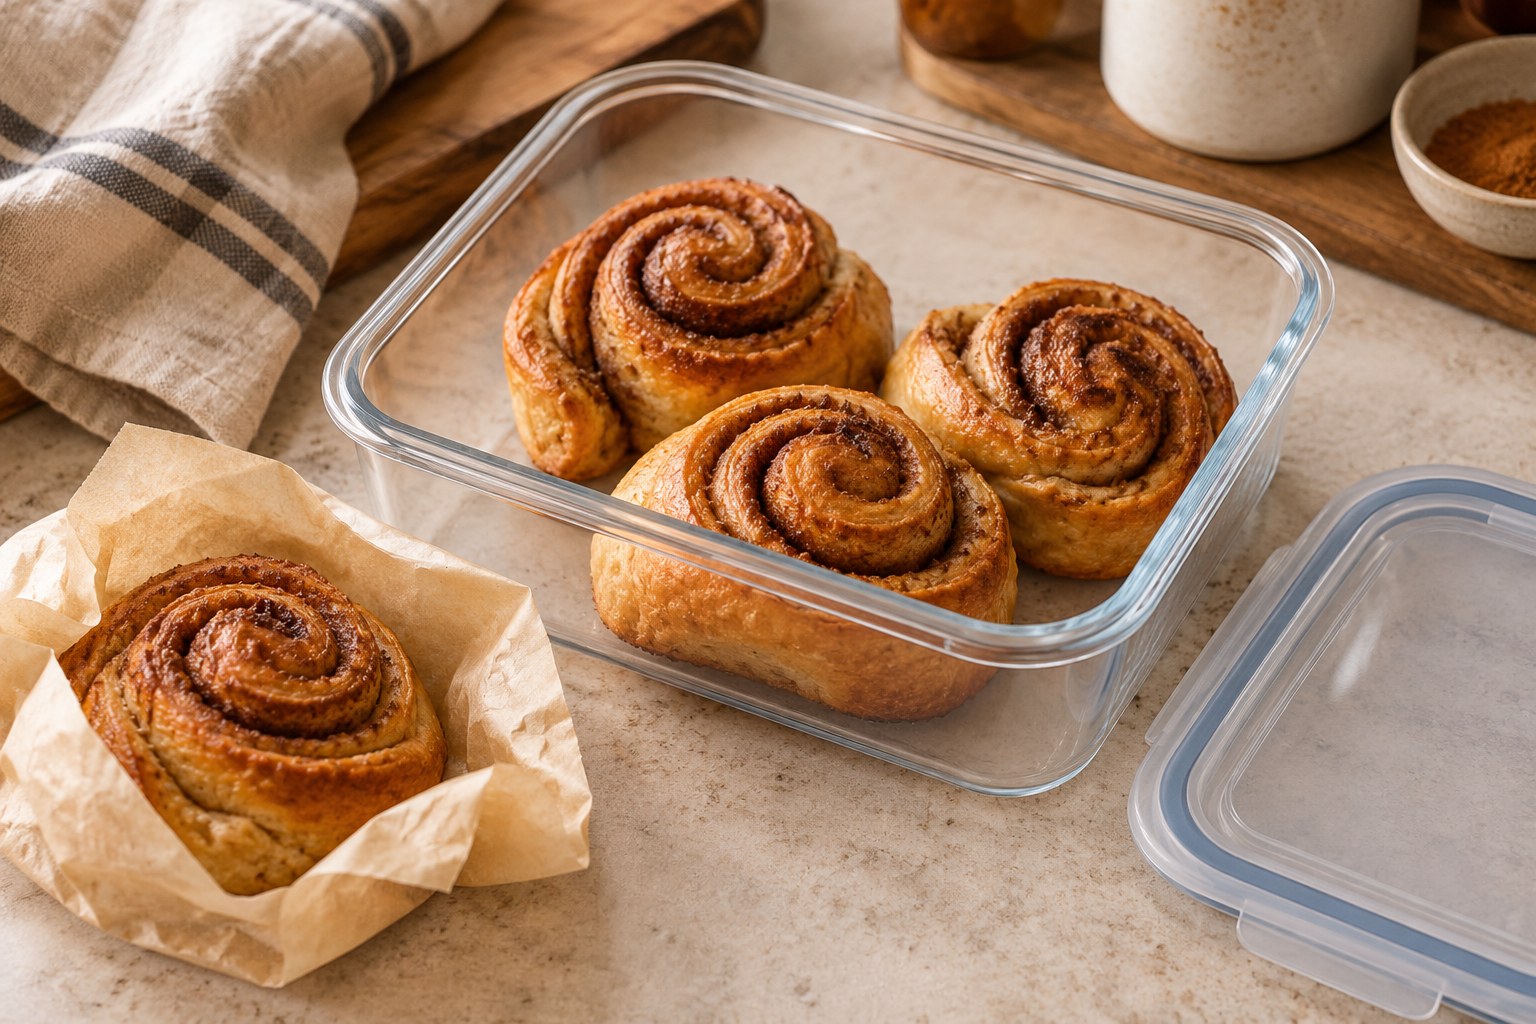
The linked recipe recommends enjoying the snúður fresh and storing leftovers in an airtight container for up to two days at room temperature, or freezing for longer storage. Those are its published recommendations for the stated formula, not an instruction to store every cream-filled or dairy-frosted bun at room temperature. Use common food-safety practices and consider the actual topping or filling if you change the recipe.
To freeze, allow rolls to cool, protect them from freezer odours and moisture, and label the date. Freezing unglazed rolls can make reheating and fresh glazing easier. Warm baked buns gently rather than repeatedly heating the same batch; overly aggressive reheating can dry them out. The exact storage and reheating method should suit the finished recipe and your food-safety needs.
Frequently asked questions
Is chocolate icing essential for authentic snúður?
No. Chocolate is a familiar and beloved option, but bakeries also sell pink or other glazed variations. The original Icelandic pastry tradition accommodates more than one icing style. The What's Baking? version specifically uses dark chocolate glaze.
Must the dough contain cardamom?
The linked What's Baking? formula includes one teaspoon of ground cardamom, so use it if you want to reproduce this recipe. Other Icelandic recipes may vary in their spice mixture. Cardamom adds fragrance, but it should not be presented as proof that every snúður in Iceland follows the exact same formula.
Can I skip one of the two rises?
Not if you want to follow the published method. The first rise builds volume in the bulk dough, while the second allows the shaped spirals to become puffy before baking. Skipping the second is especially likely to affect texture.
How many rolls does this recipe make?
Twelve. The ingredient amounts and shaping method are designed around that yield. If you make significantly larger pieces, the cooking time and internal heating may change. Keep the official recipe card open when scaling.
How long does the recipe actually take?
Its CMS card lists thirty minutes of preparation and fifteen minutes of cooking, but it also requires a first rise of roughly one hour, a second rise of about thirty to forty-five minutes, plus cooling and glaze setting. Allow a few hours rather than promising an under-one-hour pastry.
Do I need a stand mixer?
A mixer helps handle enriched dough consistently, but kneading by hand is possible with sufficient time and care. Use the dough's smoothness and elasticity as the endpoint rather than assuming an identical time for all methods.
Are these rolls supposed to be dense or fluffy?
Aim for a tender, pleasantly substantial yeasted crumb, not a dry, heavy one. The dough formula, kneading, proofing and baking all affect how airy the bun becomes. Icelandic bakery versions vary, so there is no reason to deliberately underproof just to make a denser roll.
Can I substitute cocoa powder for the melted chocolate?
Not one-for-one. Cocoa powder behaves differently from chopped chocolate and changes fat, sweetness and liquid balance. Follow the stated dark-chocolate glaze, or use a separate tested cocoa-icing formula.
Can I prepare these for a party the day before?
You can plan and measure ingredients in advance and bake ahead according to the recipe's storage guidance. For the best fresh texture, reheating unglazed baked rolls gently and glazing closer to serving may work better than leaving finished pastries uncovered overnight. Do not improvise lengthy room-temperature holds for perishable modified fillings.
Where can I find the complete method and photographs?
Use the original Snúður recipe card for measurements and the twelve-step method. The companion Icelandic Snúður editorial feature has the previously approved food photography and a different, visual storytelling approach.
For the longer technique walkthrough and approved photos, read our companion Icelandic Snúður feature.
Final thoughts: Bake the bun, not a myth
What makes Icelandic snúður memorable is the experience of the spiral and its topping, not an inflexible set of claims about the only correct icing or the exact hour that the pastry was invented. Our version draws on the recognisable Icelandic bakery idea: a cardamom-scented, cinnamon-filled roll with a generous chocolate finish. Bakeries in Iceland show that other icing styles belong to that same story.
For your first batch, respect the verified formula, keep the dough soft, judge both rises by appearance and proof, shape twelve even spirals, and use gentle heat for the chocolate. If something turns out differently than expected, change one variable on your next attempt rather than rewriting the whole recipe at once. A good snúður should be both satisfying to eat and enjoyable to make—and the second batch often teaches the most.
IN PICTURES
From the baking notebook
FROM THE RECIPE BOX